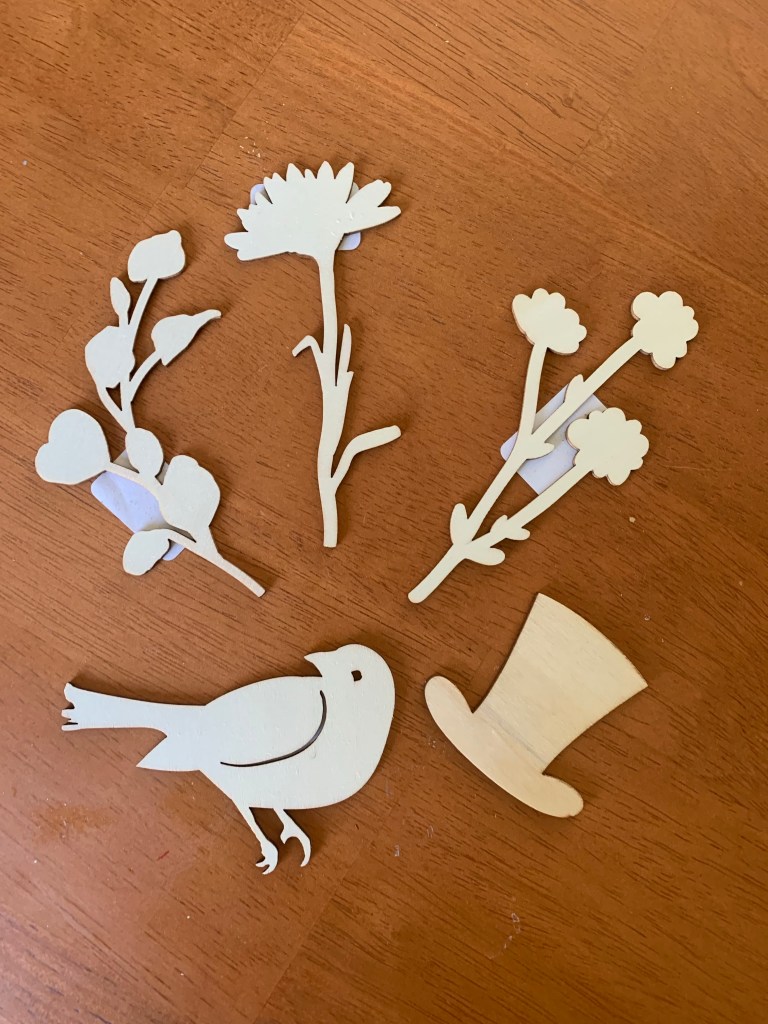
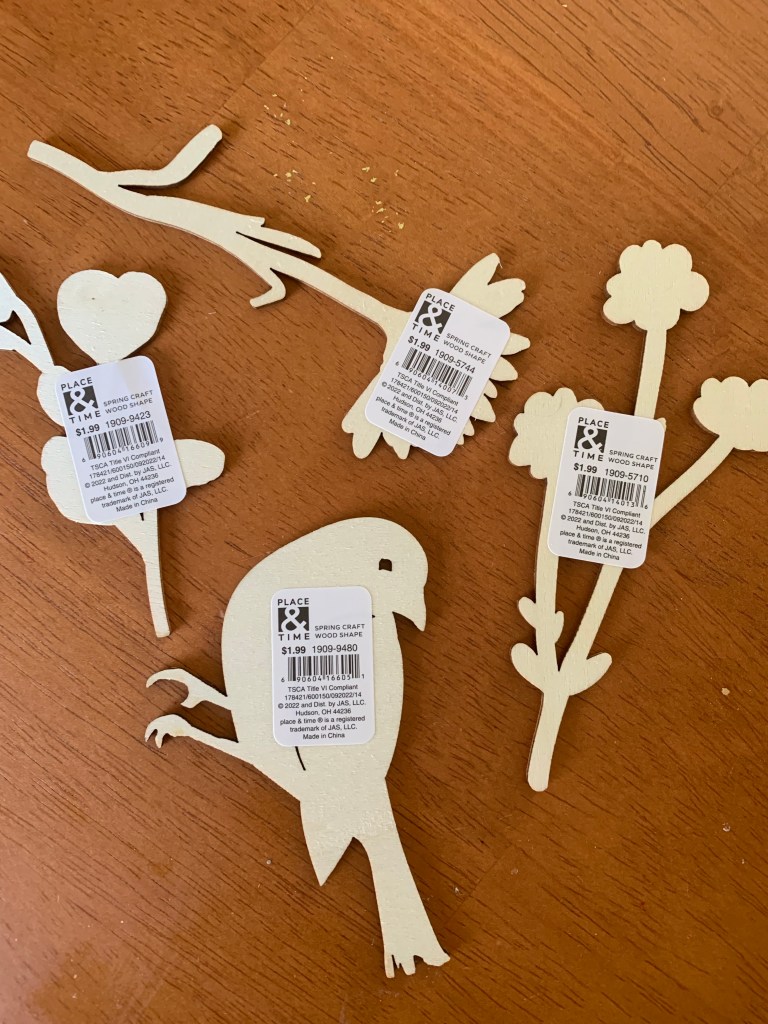
I recently purchased some laser-cut wooden flowers while shopping at Joann Fabrics. They came in a variety of different flowers-they even had a bird. At only a $1.99, they were small and inexpensive. I grabbed a few and then headed over to the paint and Diamond Dotz section. While I shopped, I came up with a fun and easy idea on how to incorporate these tiny cut-outs into my work wardrobe.
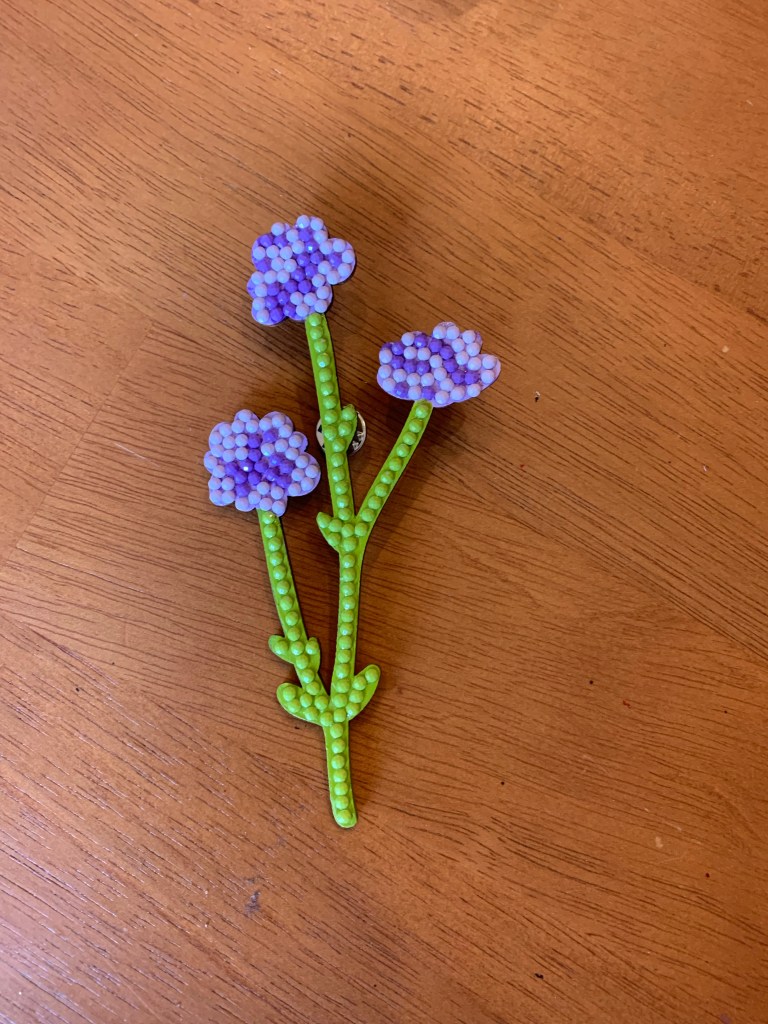
I thought it would be fun to take these small wooden cut-outs and create some eye-catching brooches. I wear a plain black jacket at work. Usually, I wear a festive badge holder to give it some color, but I decided to create a few unique brooches to wear on the lapel of the jacket for the different seasons and holidays of the year. Plus, I love adding sparkle to anything. The flower cut-outs were perfect for Spring.
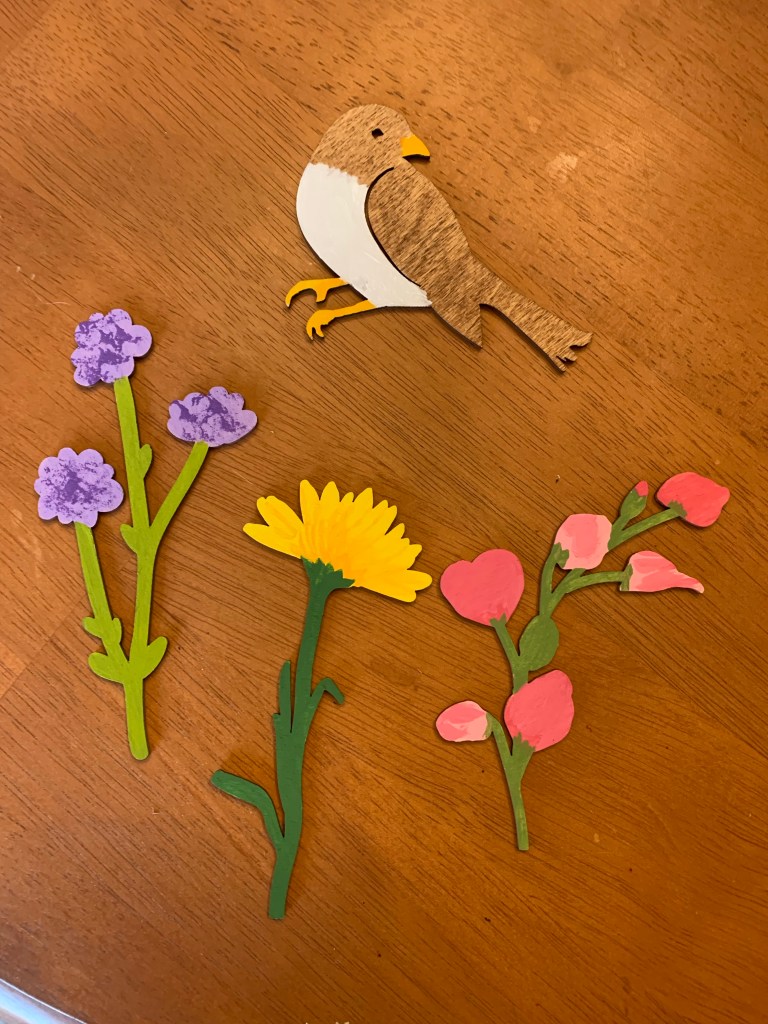
First, I painted the flowers and the bird. For the bird, I used wood stain for his feathers.
To give the flowers some depth, I used a sponge to apply a darker shade of color to the petals.
Diamond Dotz
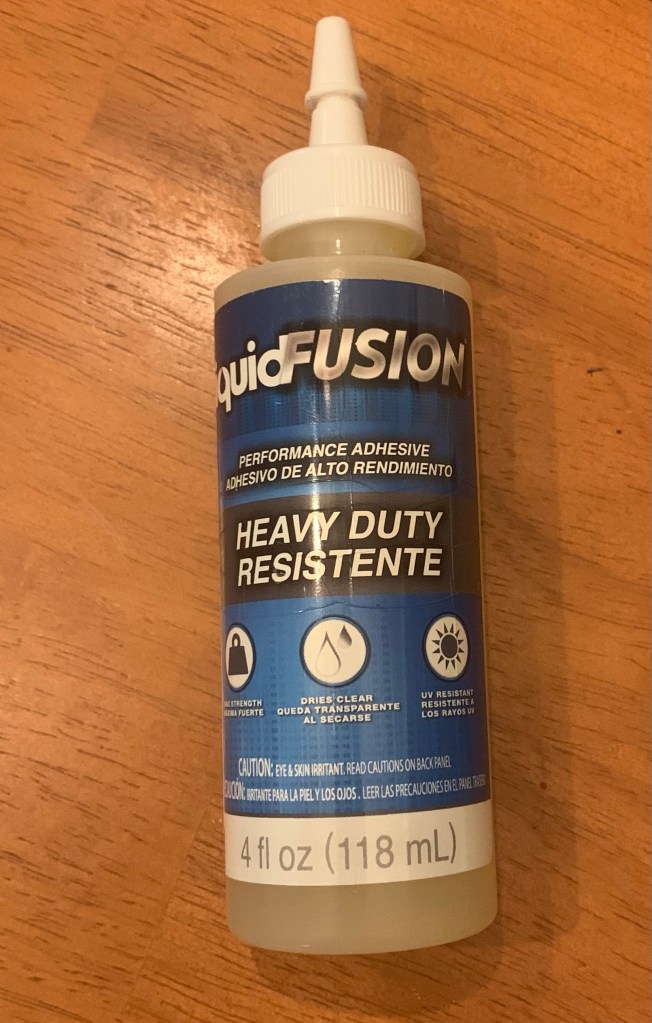
Once the paint was dry, it was time to apply the Diamond Dotz. Since I was making brooches, I wanted to use an adhesive that was sturdy and keep the Diamond Dotz in place. I find Liquid Fusion is the best for this type of job. Since the tiny wooden cut-outs were small, they only needed a few Diamond Dotz.
The pin really stands out on my jacket.
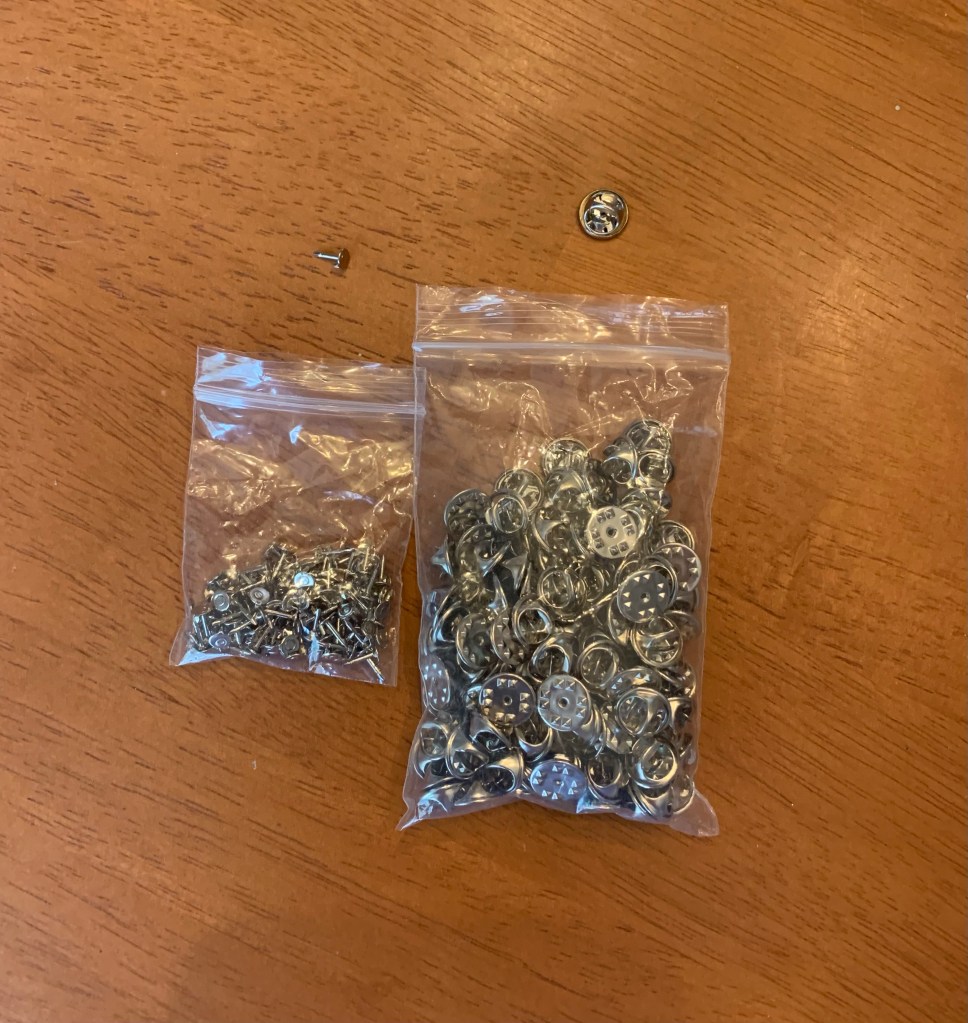
To turn the flowers and bird into brooches, I bought some tack-backs on Amazon. Using the Liquid Fusion, I attached them to the back.
Tack backs.
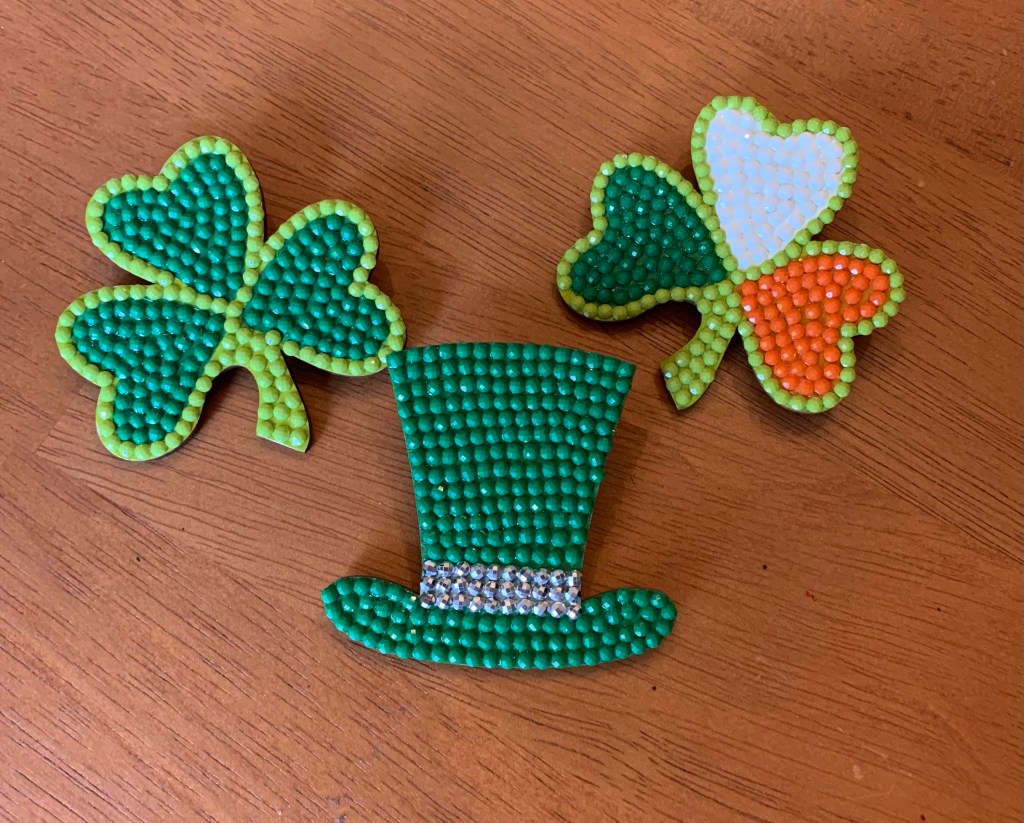
I bought some more wooden cut-outs for St. Patrick’s Day on Amazon. I even transformed one of the leprechaun hats into an Uncle Sam hat for the Fourth of July. I love how they sparkle.
St. Patrick’s Day pins.Uncle Sam pin.
I was so happy with the way my flower brooches turned out that I bought some more cut-outs for the coming months and holidays. They only took an afternoon to make and were inexpensive and fun. I can’t wait to find some cut-outs for the Fall and winter holidays. Happy crafting!
I wanted to share a project I’ve been working on. Recently, a small goose planter caught my eye at my local thrift store. I glanced at it, but I decided to leave it. Several days later it was still on my mind. Luckily, when I went back, it was still there. I’m going to be honest, I wasn’t sure if it was a goose or a swan. But, after looking at several photos of both, I’m confident it looks more like a goose.
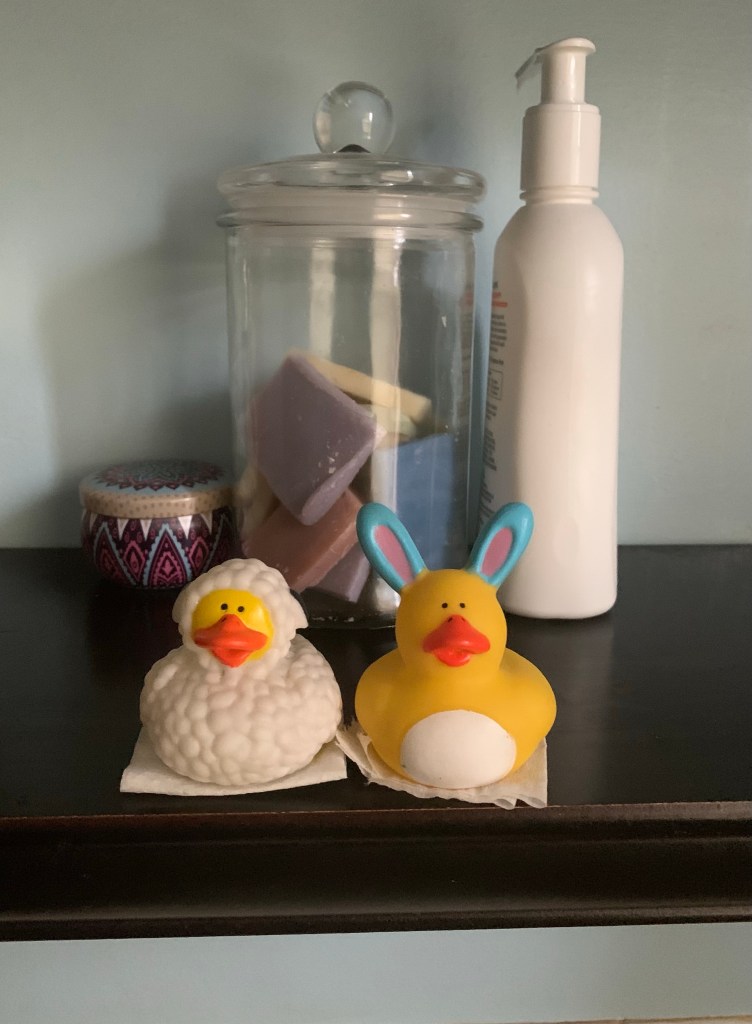
I’m not sure why, but I have a thing for ducks and geese. My dress-up goose, Betty Duck Duck, sits on my fireplace. Every month I decorate her for a different holiday or season. She even has a golden egg that I decorate for the different seasons. I also have a collection of small rubber duckies I use to decorate my bathroom. Maybe that’s why this goose planter stuck with me.
Betty Duck Duck in her St. Patrick’s Day costume.Betty Duck Duck in her Easter outfit.My bathroom Easter duckies
I thought I was the only one who had a dress-up goose on her fireplace. But after watching a few videos on social media, I discovered that a whole new generation of people are embracing the dress-up goose. But when I looked online, I was surprised and horrified at how much people were charging for one. Not to mention the insane markups on the outfits. With that in mind, I wanted to find a way for anyone to bring a little avian fun to their house. So, if you can’t afford a dress-up goose, this craft is for you.
The first task was to thoroughly clean my little goose planter. This is essential for anything I pick at a thrift store. I discovered the goose had a few chips and even a small crack, but nothing too bad. Luckily, I wasn’t planning on putting a real plant in the planter.
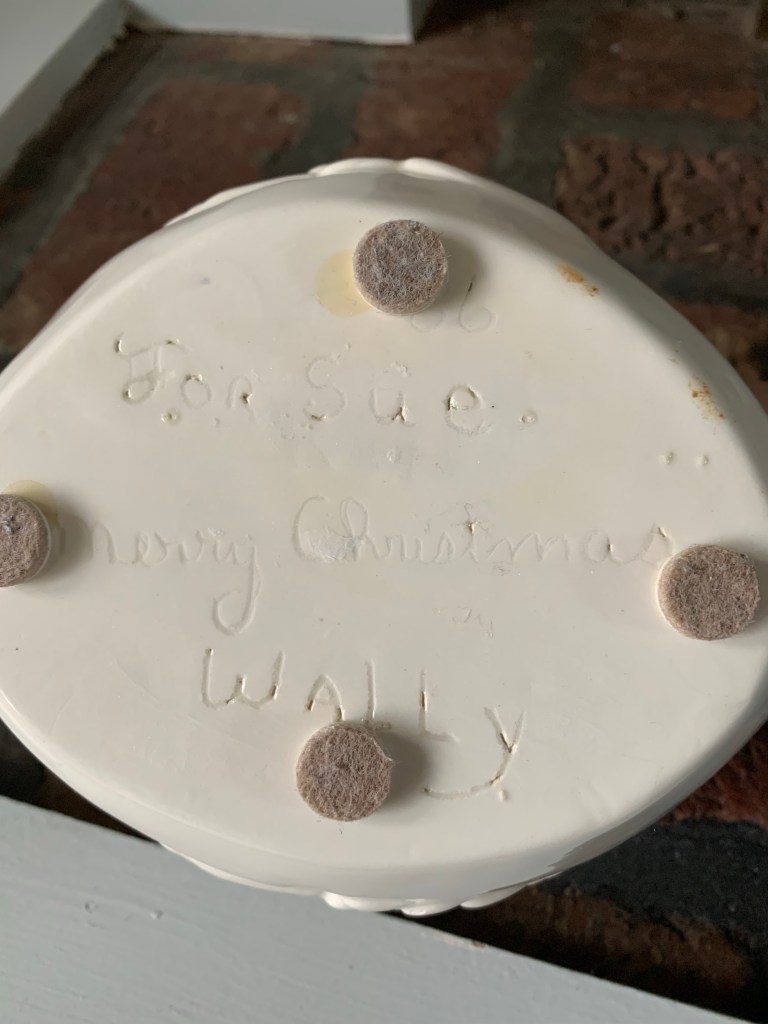
A pleasant surprise was waiting for me when I peeled off the price sticker on the bottom. Turns out, my goose planter was made by someone named Wally for a person named Sue for Christmas!
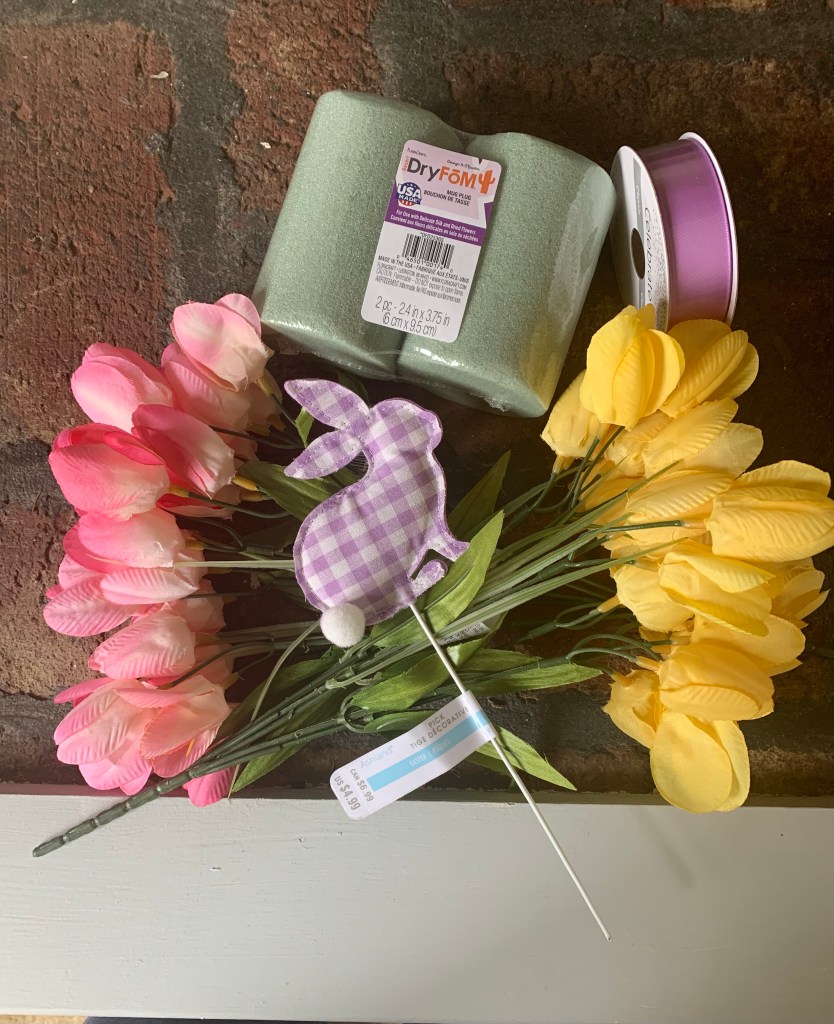
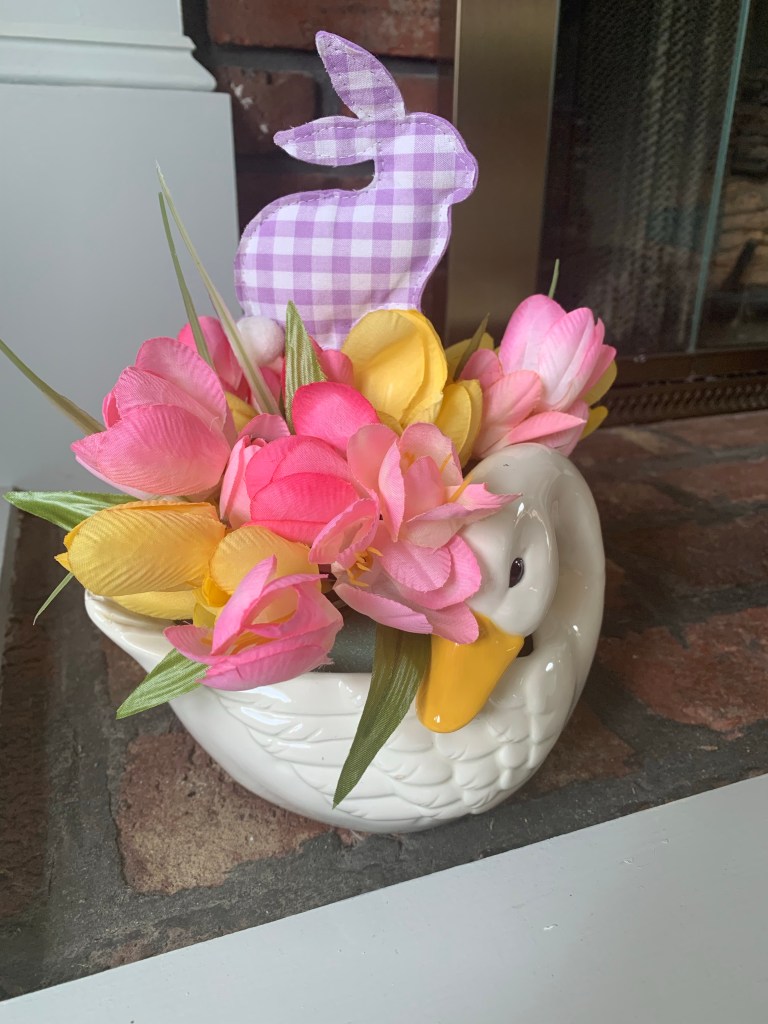
Next, I headed to the craft store to grab ribbon and flowers to decorate the goose. I also grabbed planter foam and an Easter pick. My plan is to create a few seasonal flower arrangements that can easily be interchanged for the different seasons and holidays during the year. Since it’s springtime, I’m starting with Easter. I plan to create some festive scarves and hats for the goose for other holidays during the year.
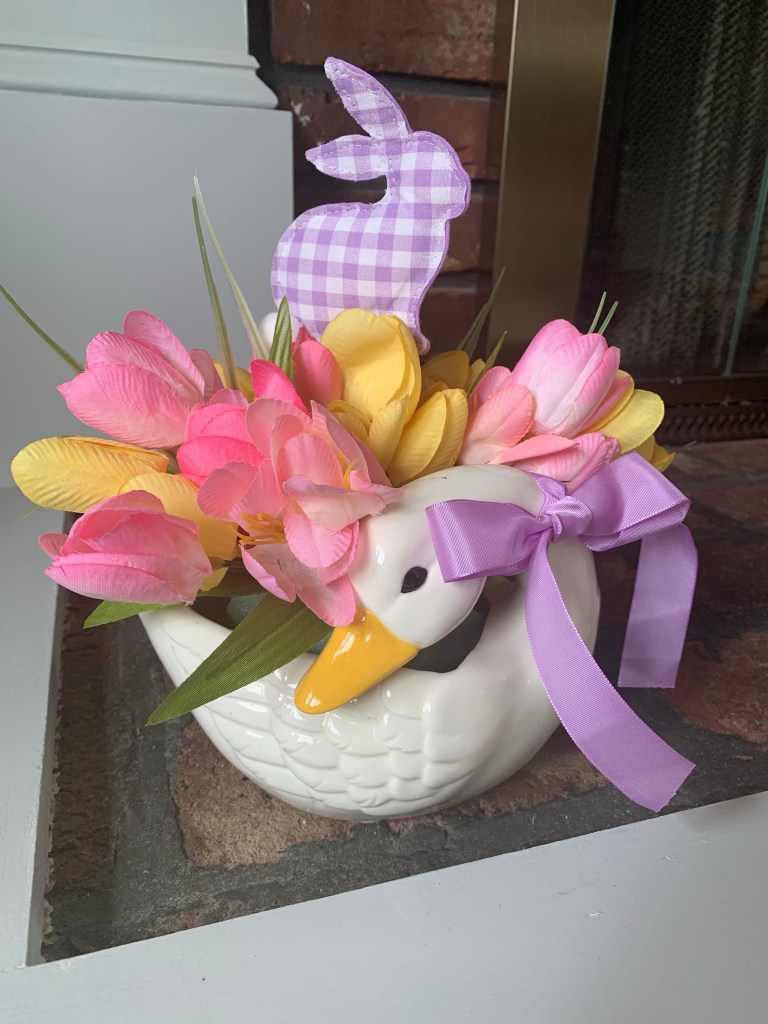
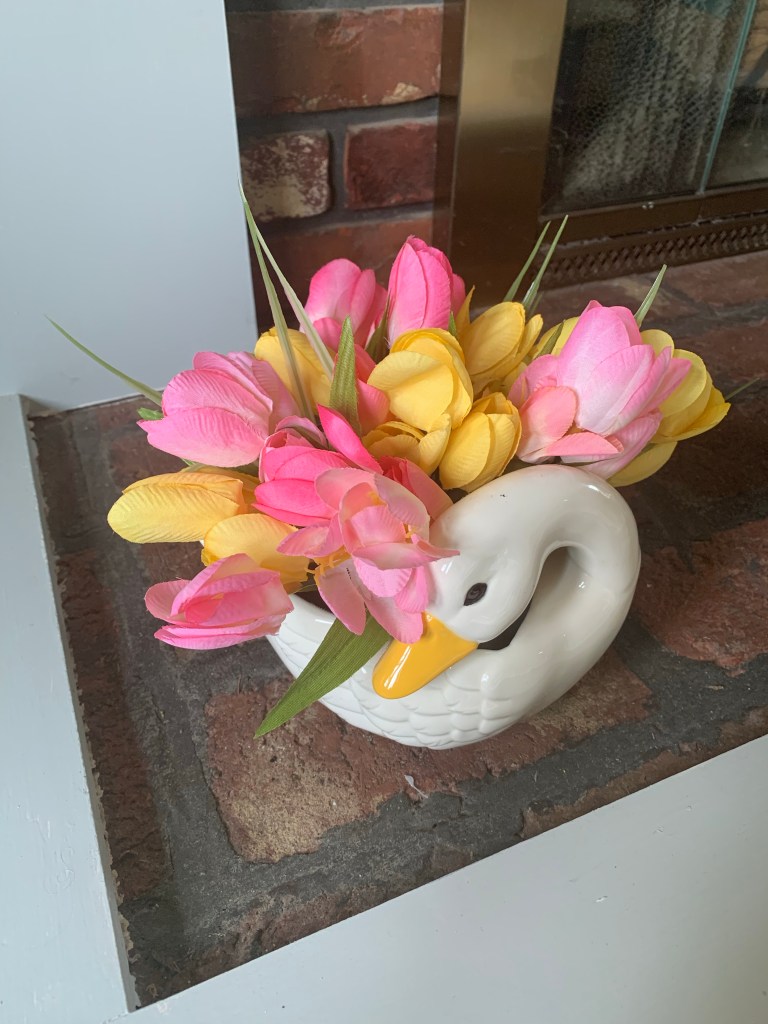
I found the perfect-sized floral foam to fit inside the goose planter. I didn’t even have to cut it. Then I just cut the stems of the flowers and started to arrange them. All it took was about a half hour of work before I was done.
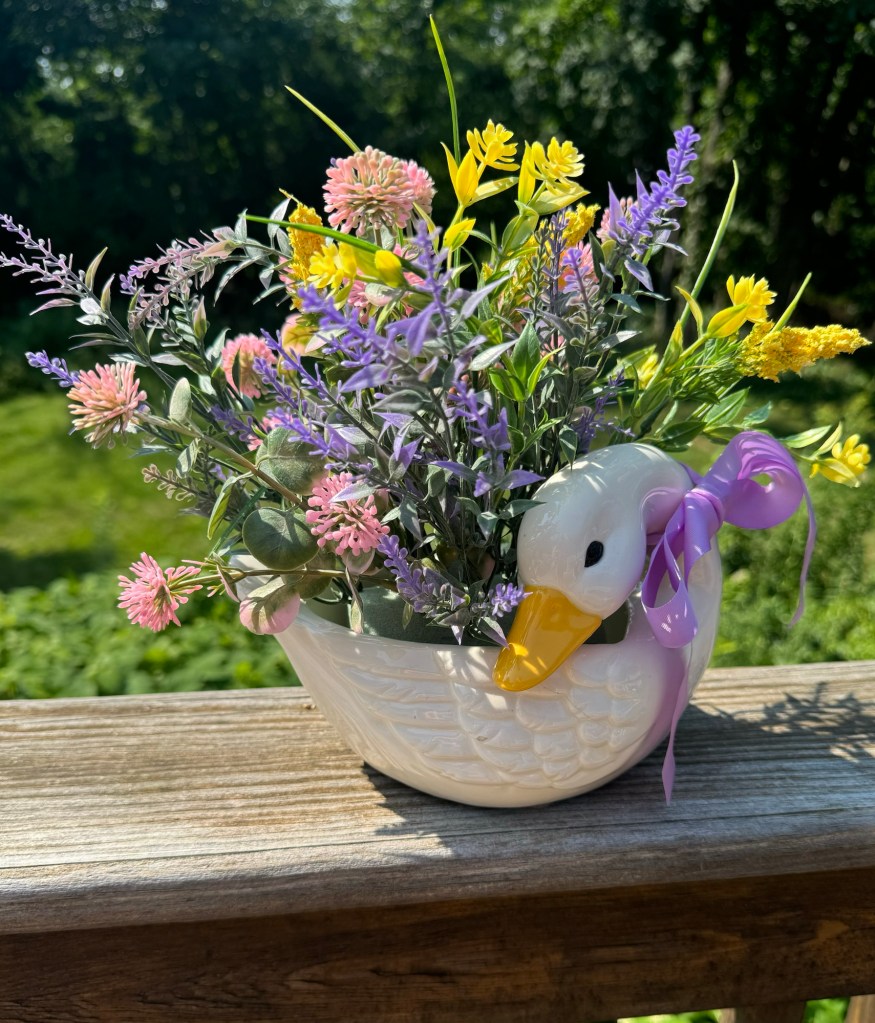
To finish, I tied a pretty purple ribbon around her neck and added the Easter bunny pick.
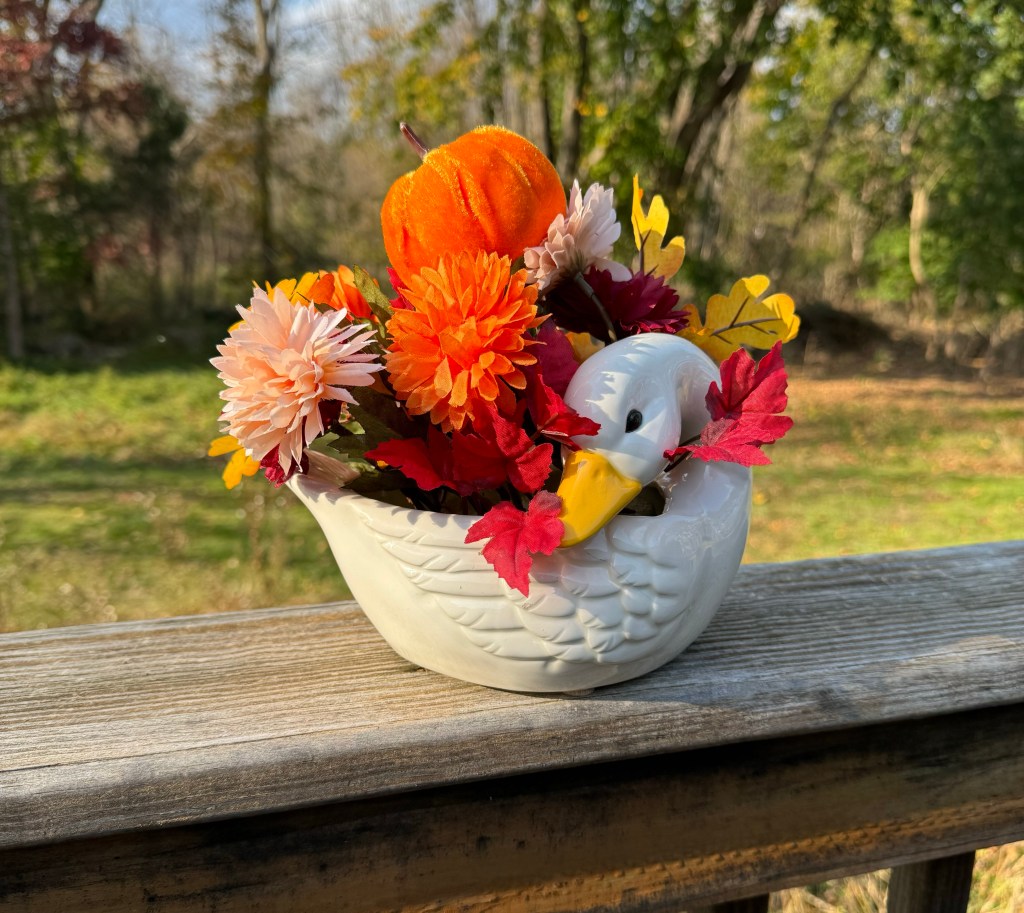
I can’t wait to decorate my new goose planter for summer. I’m already thinking of ideas for all the different seasons and holidays. I hope this craft shows you how easy it can be to turn someone else’s trash to your treasure. So many items can be salvaged and given a new life with a little material and creativity. I’ll keep you posted on how I decorate this planter throughout the year. And if you’re out there Wally, you did a great job on this planter. Have a happy Easter and keep crafting!
With Valentine’s Day approaching, I wanted to create a new pin art piece for the frame I have in my sitting room. I have a ton of extra foam sheets from a package I received a while ago. Instead of throwing it all away, why not create art with it?
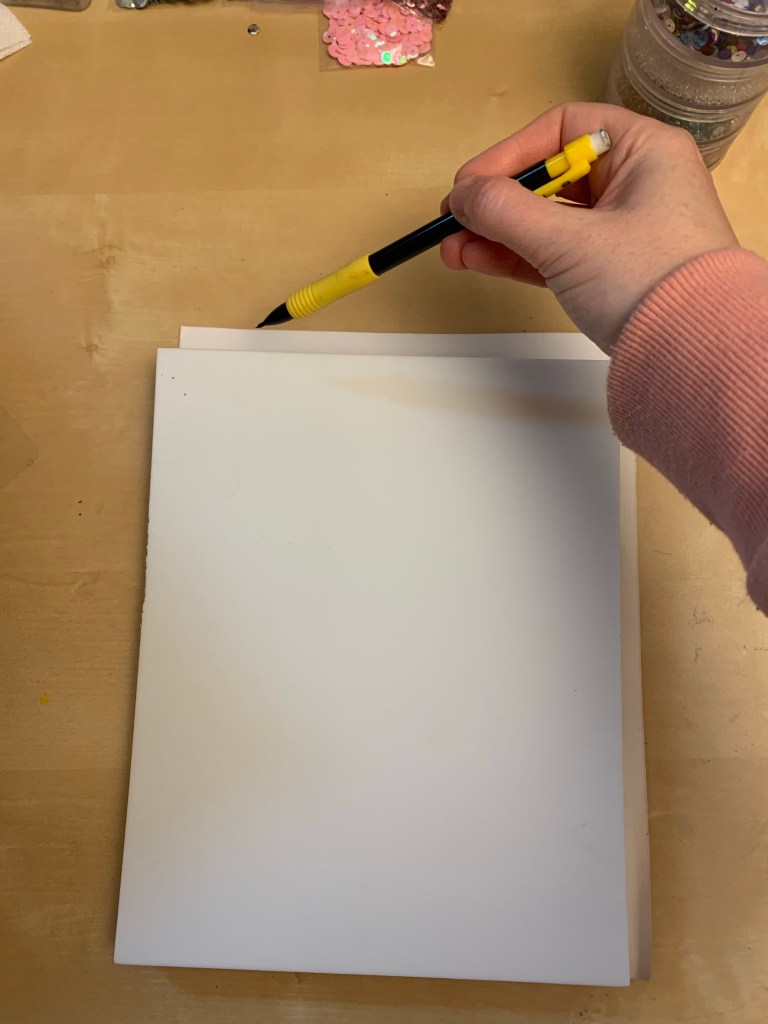
Trace the outline of the foam on the paper side of the velour contact paper. Then cut and adhere to foam.
I used velour contact paper for the background of the piece. The soft, fuzzy texture feels great and it comes in a variety of different colors. It’s like a big fuzzy sticker. For this pin art, I chose red. Using a knife or blade, cut the foam to the size you want. The piece of contact paper I was using was too big, so I flipped it around to the paper side and traced the foam piece, then cut it to size. Then I was ready to adhere the velour paper to the foam board.
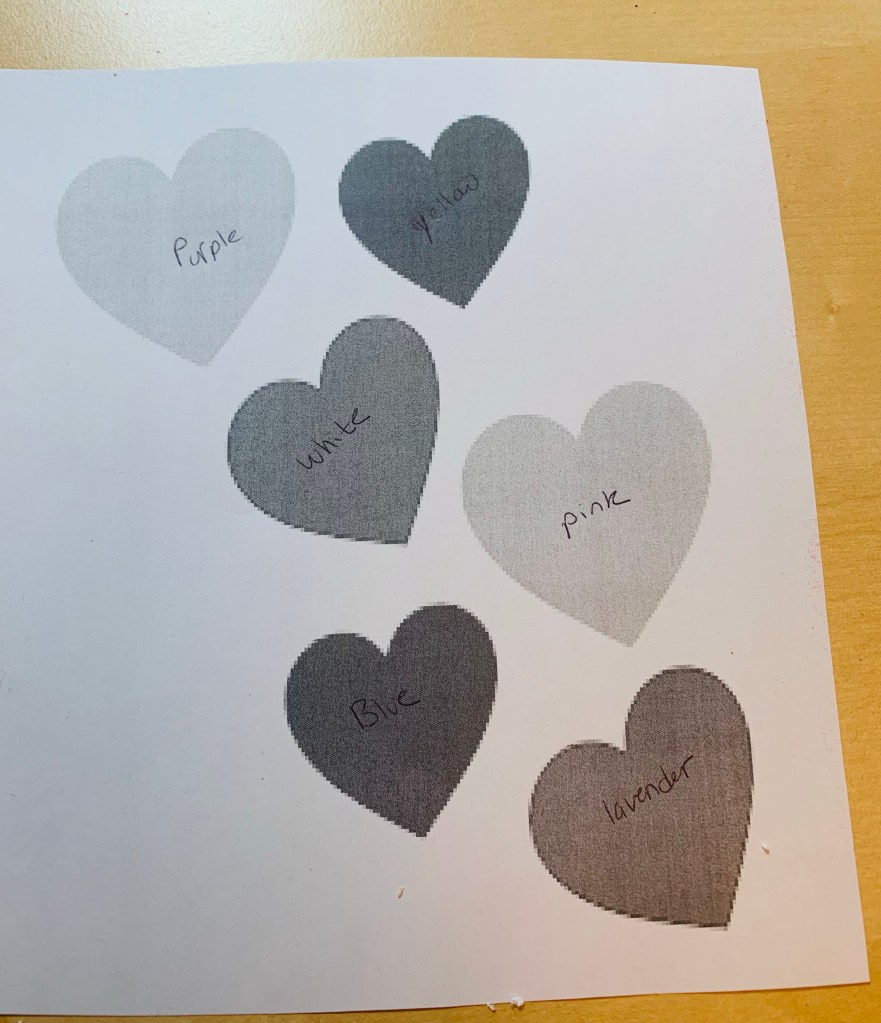
I mapped out colors beforehand.
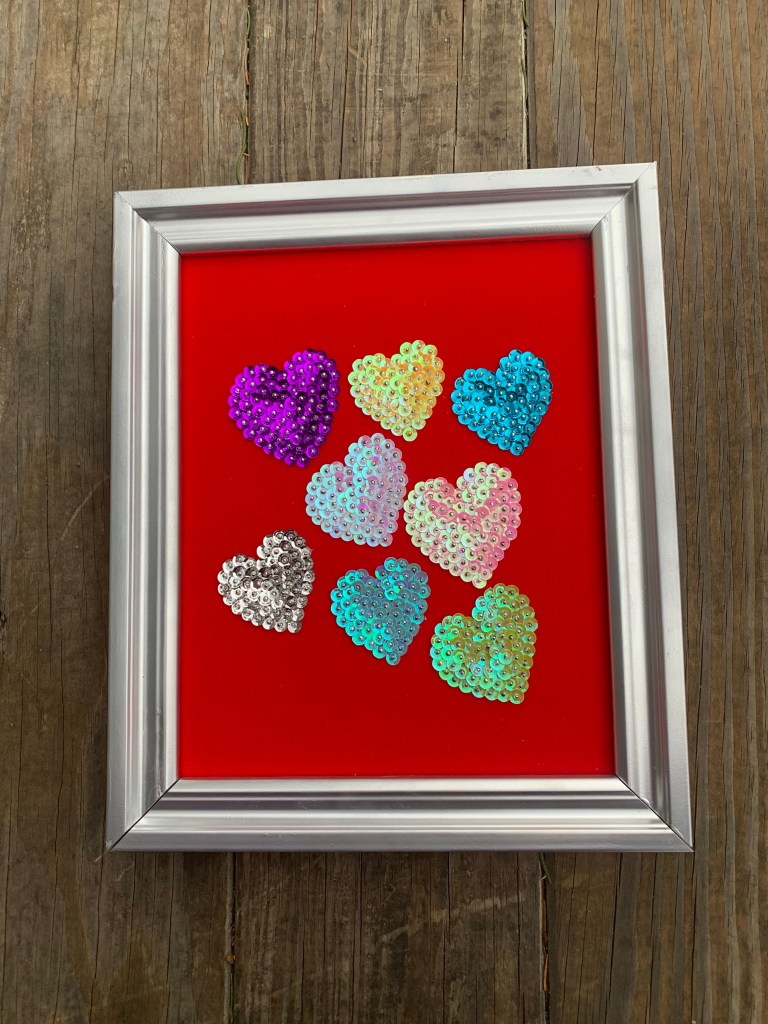
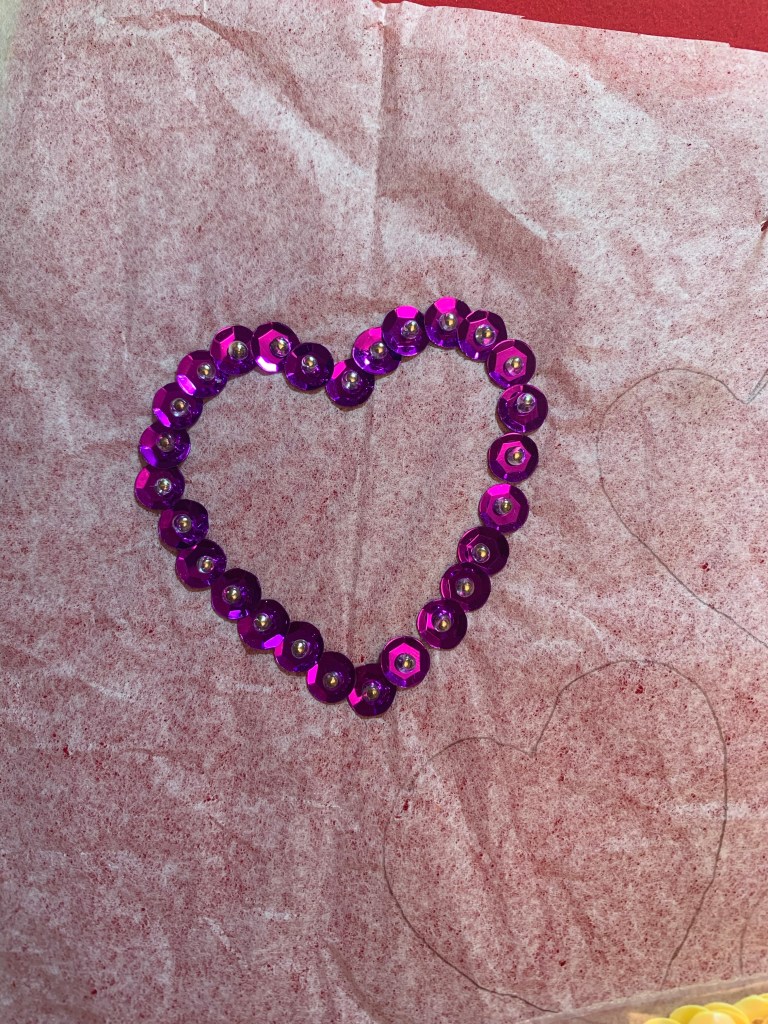
Next, I went online to find some free clipart for inspiration. I settled on an image of several hearts floating in the air. I wanted hearts in all different colors, so after I printed it, I wrote on each heart what color sequin I wanted to use to help me later. Using a piece of tissue paper, I traced the image, careful not to tear the tissue paper. After I traced it, I decided to add some additional hearts to help fill the canvas.
Seed beads.These tiny sequin pins can be purchased online or in a craft store that sells sewing supplies.
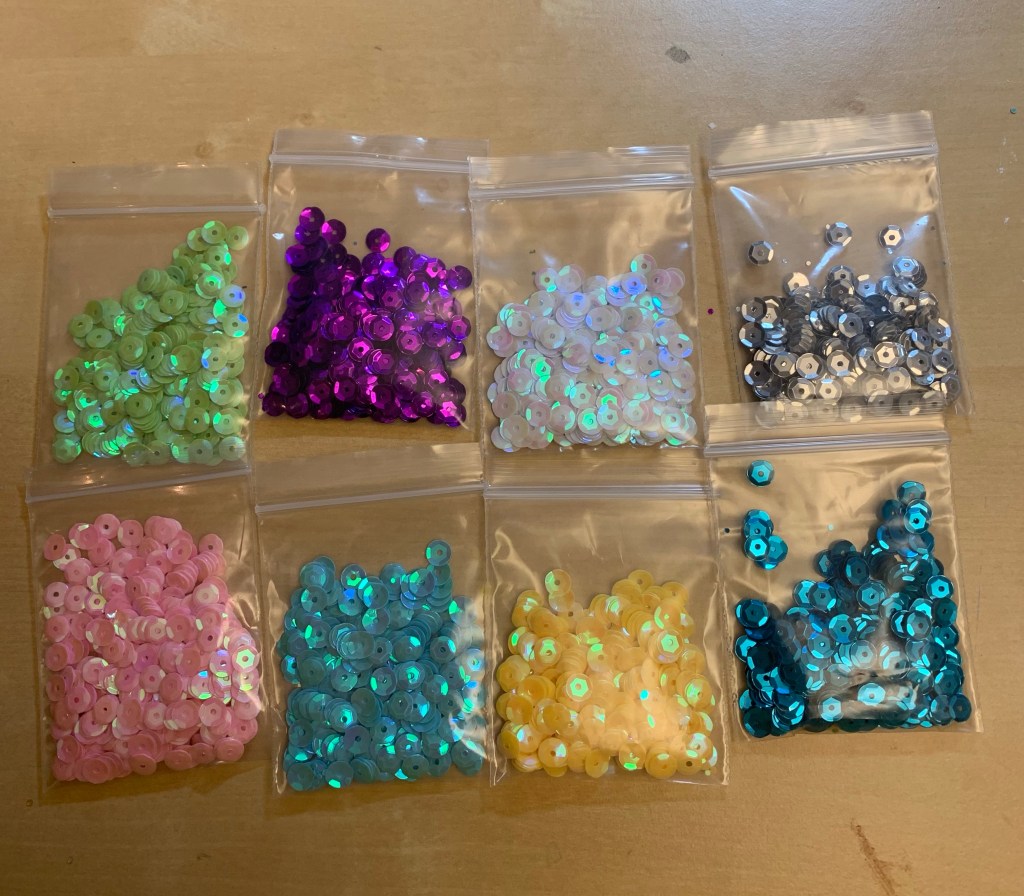
Once the image was traced, I used some pins to hold the tissue in place. Now for the fun part: sequins! I was having trouble finding sequins in the craft stores, so I ended up ordering a bunch at a really good price online. I also picked up some 1/2″ sequin pins and seed beads. Seed beads, like sequins, come in all sorts of colors, but for this project I used clear ones. The seed beads add a bit more texture, and they also help to keep the sequins firmly in place.
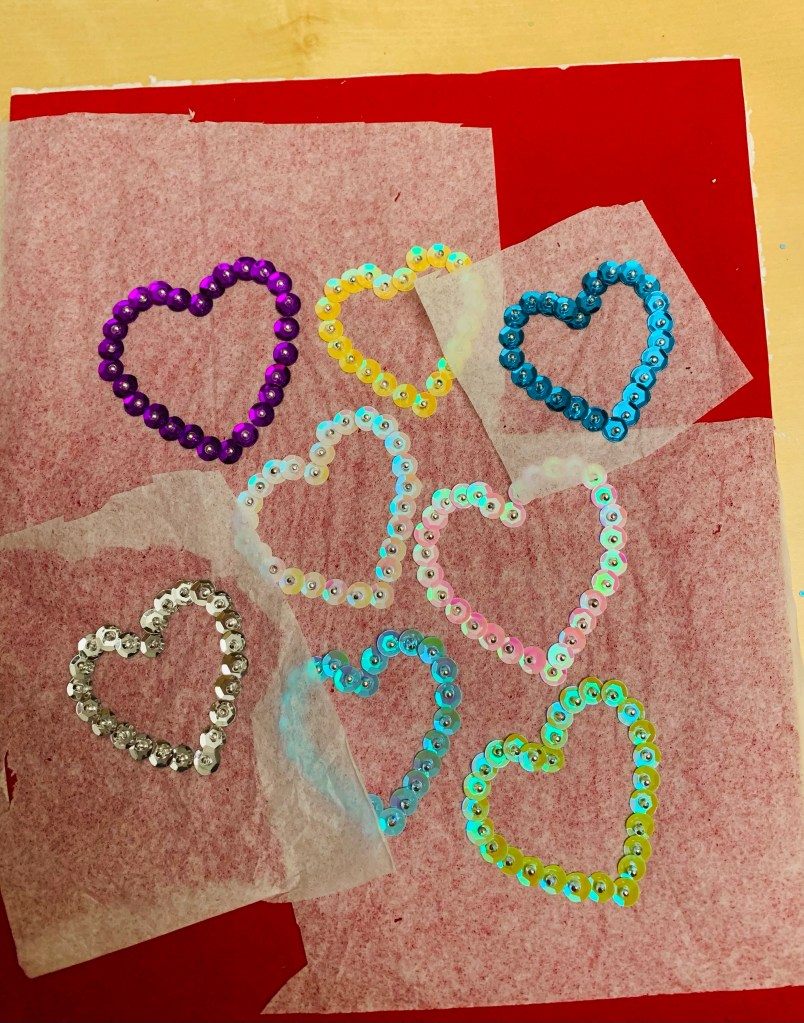
As with all my sequin pin art projects, I like to start out by outlining each shape with sequins. Once the outline is done you can tear all the tissue away. Then continue the rows of sequins until you reach the center. Using a 1/2″ sequin pin, I first place a seed bead on the pin, then the sequin. You don’t need to use a seed bead, but I find they help keep the sequins secure.
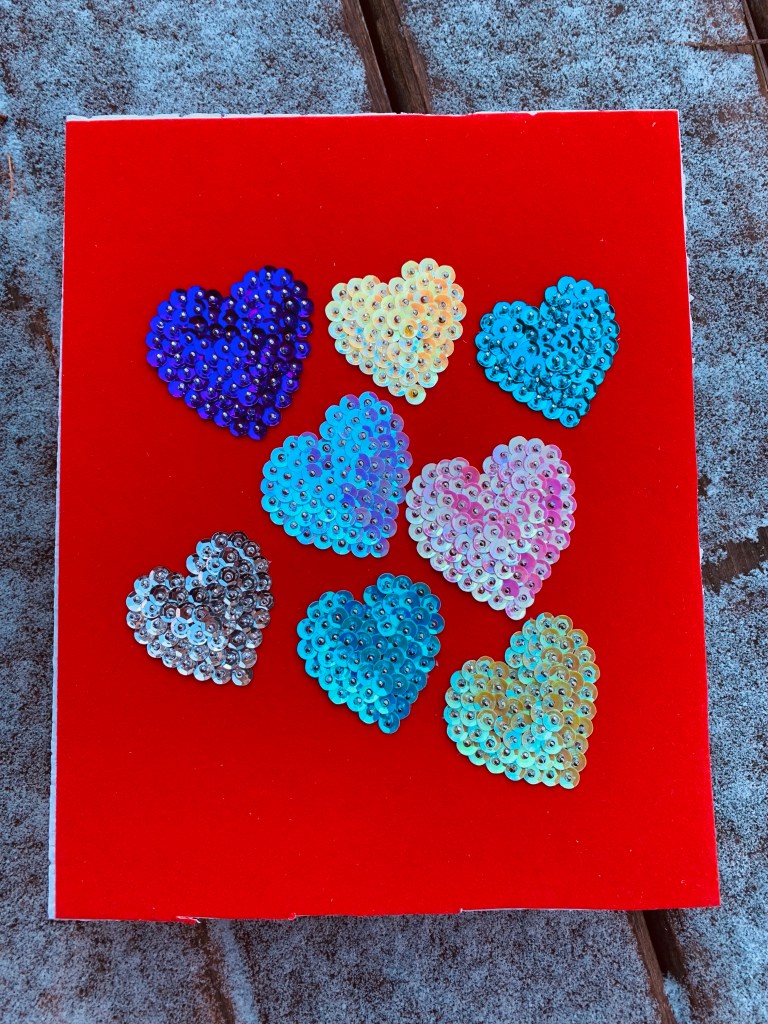
This project was a quick one, and I love the way it turned out. It’s the perfect project to do while watching TV or listening to a podcast. I want to continue creating a new pin art piece for every month of the year to brighten up my sitting room. When the sun beams into the room, the sequins give off a beautiful sparkle. Happy Valentine’s Day!
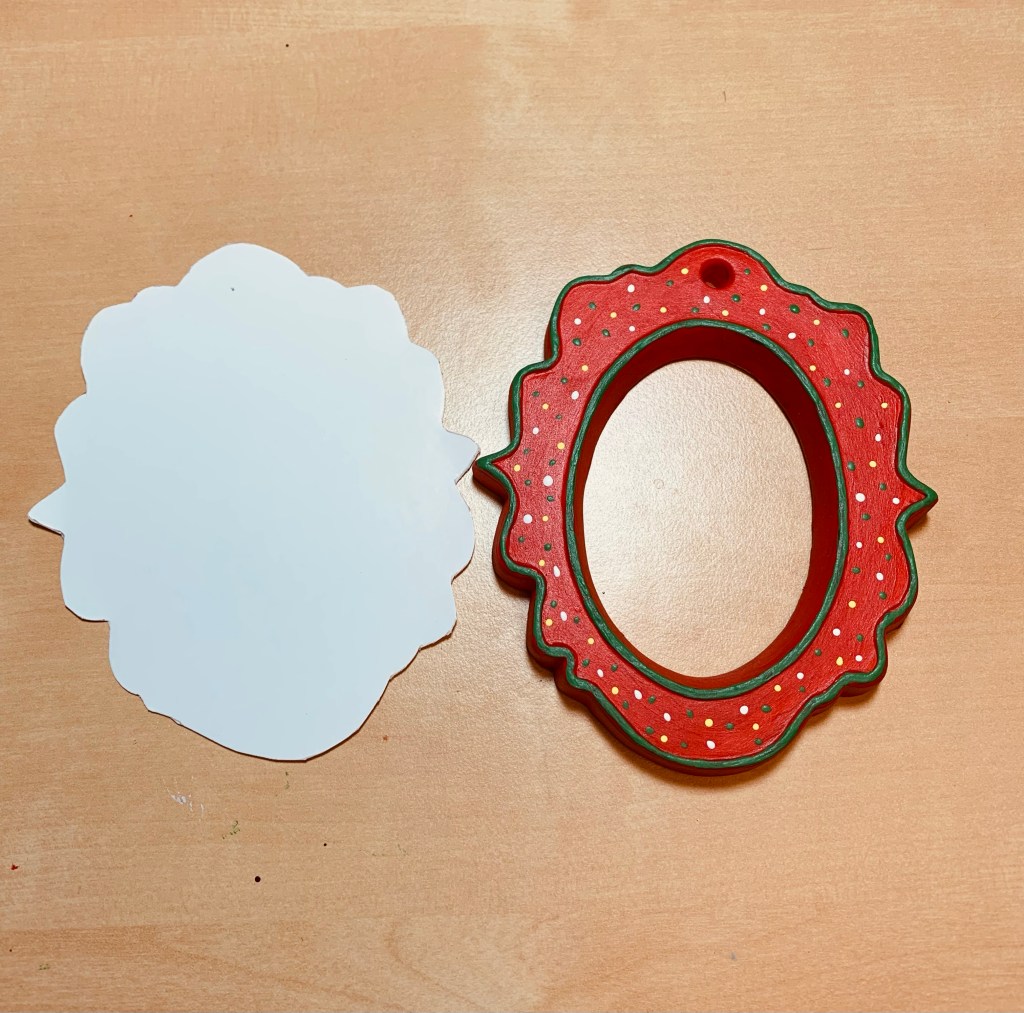
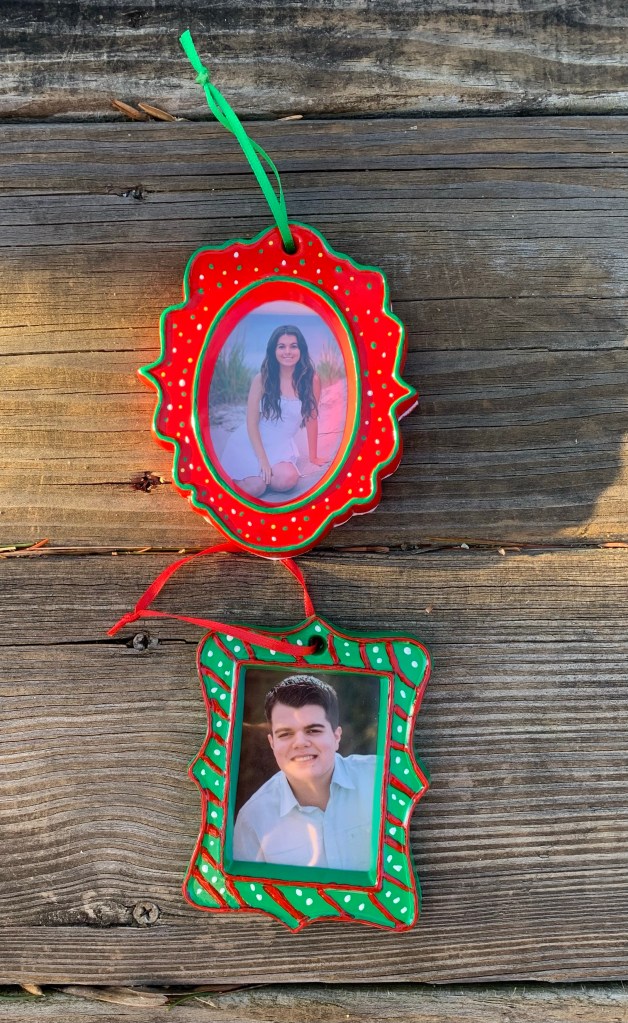
I bought these cute plaster ornaments a few years ago at Michael’s Craft Store. I’ve been painting plaster ornaments and village pieces for years. I love how a little bit of paint can take a bland piece of white plaster and turn it into a beautiful, cherished item.
I wanted to paint the frames and put my children’s senior photos in them to hang on our tree. But the plaster ornaments did not come with a back. I was worried about protecting the photo inside the frame. After all, Christmas ornaments spend a lot of time in storage. I wanted these ornaments to last a long time and not break or get damaged. Luckily, I had some time before my kids were graduating, so I put the frames on a shelf and forgot about them for a few years.
A glossy acrylic sealer gives painted plaster a nice shiny look.A piece of flat, clear plastic from packaging.
This Christmas I received my daughter’s senior photos and was finally ready to use the ornaments. But I wanted to create a craft plan before I started. After much thought, I decided I needed poster board, a small bit of clear plastic from a discarded package and lots of paint.
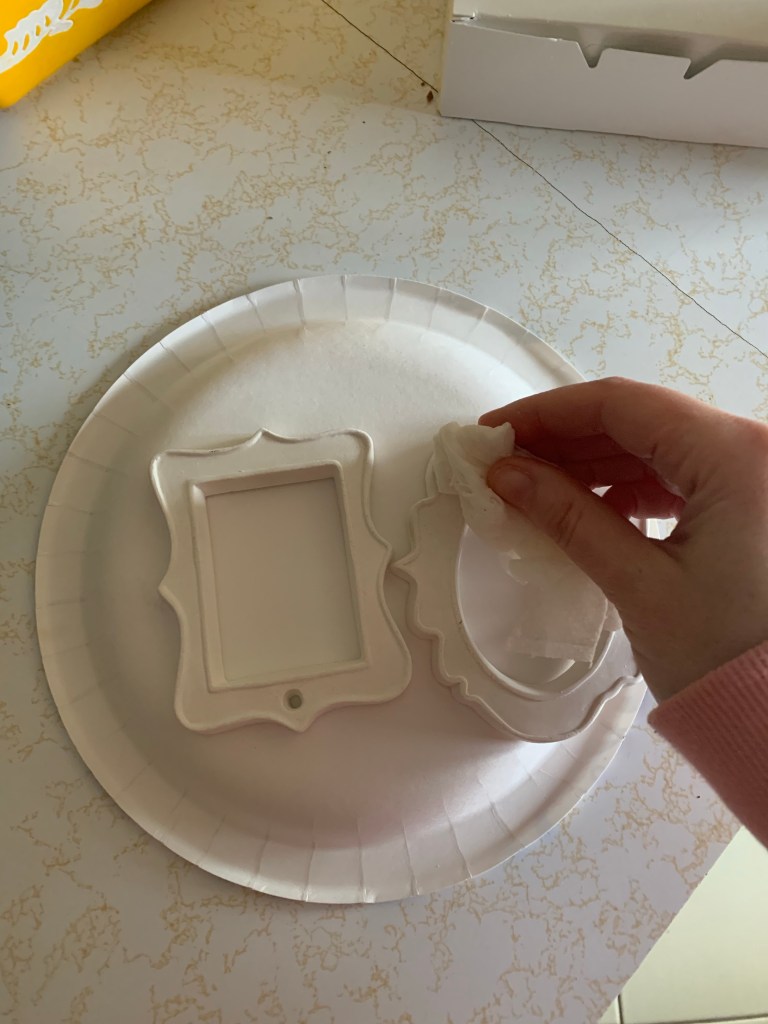
First, I had to clean and prep the plaster frames. After years of sitting, they were pretty dusty. They also needed a light sanding to remove the small bits of plaster lingering around the openings of the frames. Since the frames were both fairly small, I used a small emery board to sand them down. After I was done sanding, I wiped the frames with a damp cloth to remove the dust and debris.
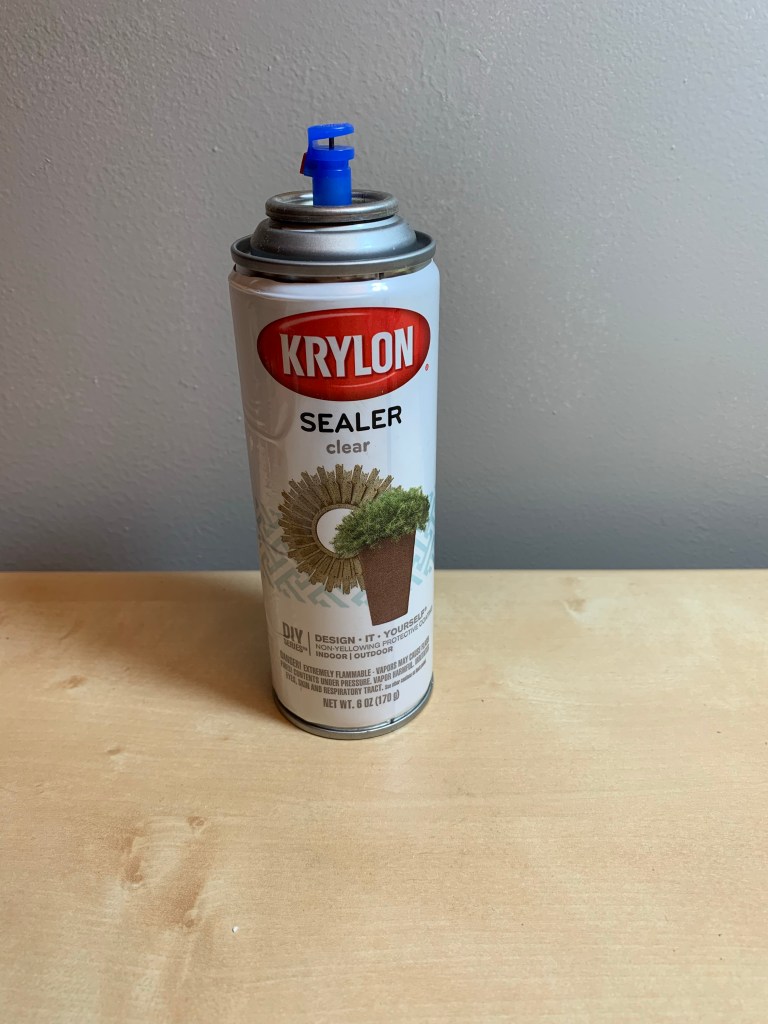
Seal the plaster before painting.
Once the frames were completely dry, I sprayed them with sealer. Since plaster is porous, sealing the plaster makes it easier to paint. Once that was done, it was time for the fun part! Time to get painting.
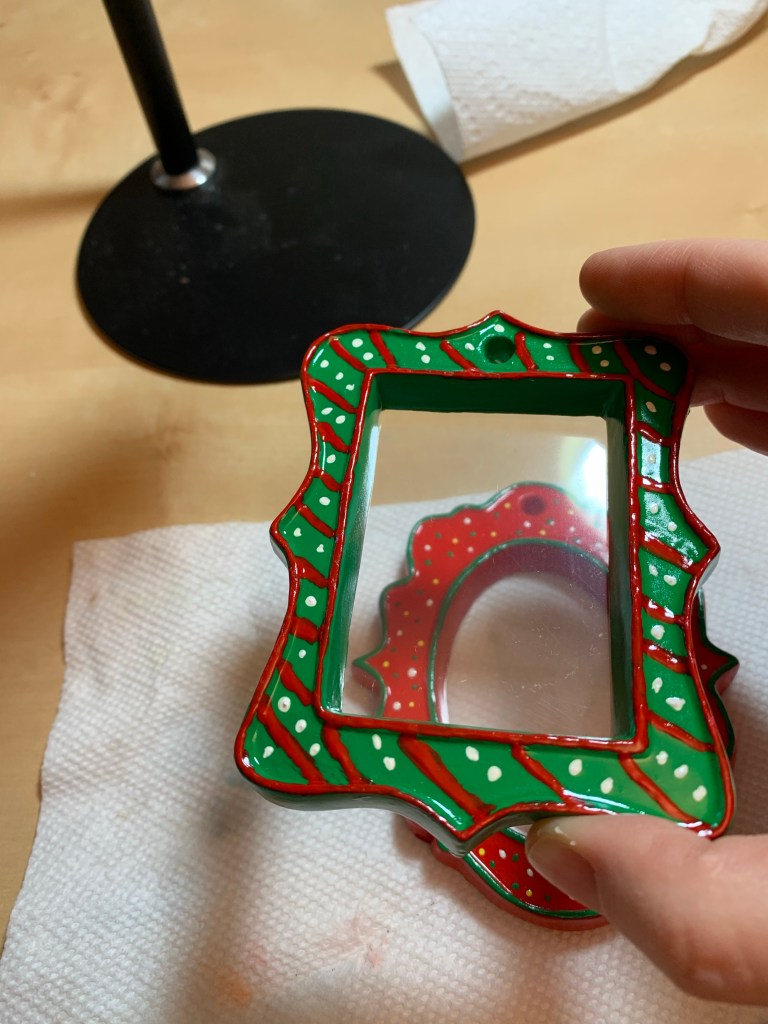
After one coat.After two coats.All shined up.
Then I added some simple stripes and dots to the to make them each special. I’m not much of a free-hand painter, so you can be more adventurous with the painting if you like. Once I was finished with the painting, I sealed the frames with a glossy sealer.
Using a pencil, trace the ornament shape on poster board to create a back for the ornament.
To protect the picture from the back, I used a piece of poster board. I traced the shape with a pencil then cut it out. To help the poster board blend in, I painted it with the same color paint.
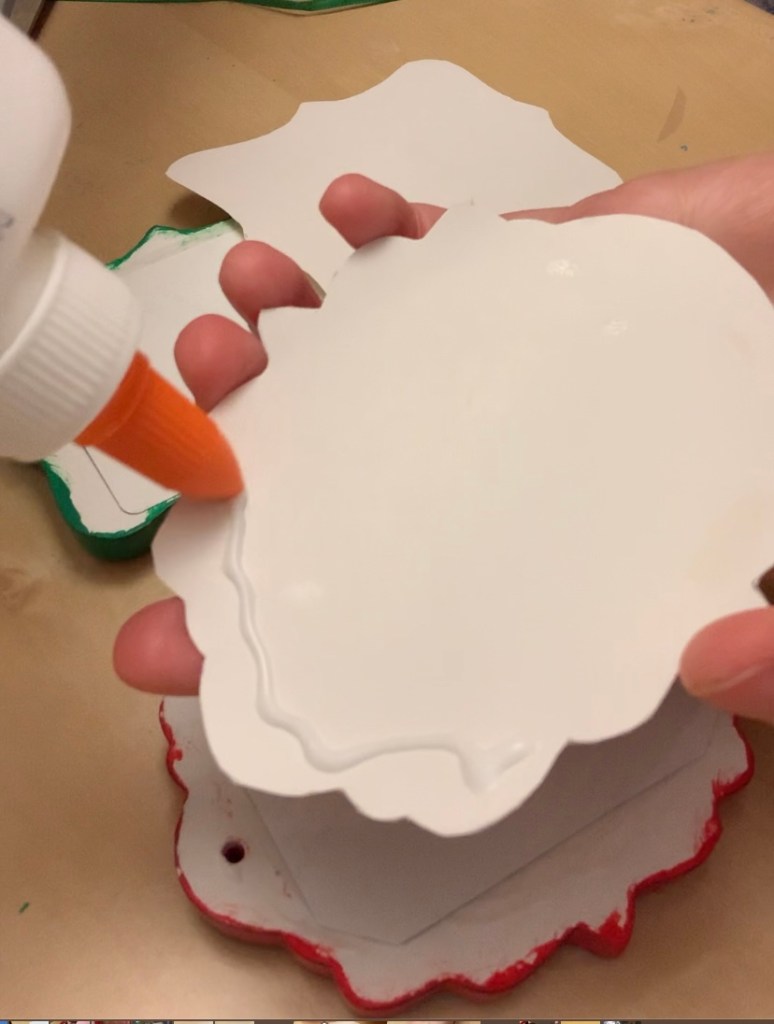
To protect the picture from the front, I used a clear plastic shell from a discarded package. The clear packaging acts as the glass in a regular picture frame. I used a little glue to keep the plastic in place.
I had to trim the pictures slightly to fit into the frame. Then I added a little glue to the corners and placed the photos behind the clear plastic.
To close it all in, I glued the poster board to the back. I needed a little help keeping the poster board from curling up, so I used paint bottles to keep it down. Then I used a nail to poke a hole through the poster board and added some ribbon for hanging.
The paint bottles helped to keep the poster board flat.
When they were finished, I hung the frames at the top of my tree for everyone to see on Christmas Day. By adding the protection of the plastic and poster board, I created an ornament that should last for many years to come. So, the next time you see a plaster ornament or figurine in a craft store, grab it. They are so easy and fun to paint. With a bit of imagination, you create something that will be treasured for years to come.
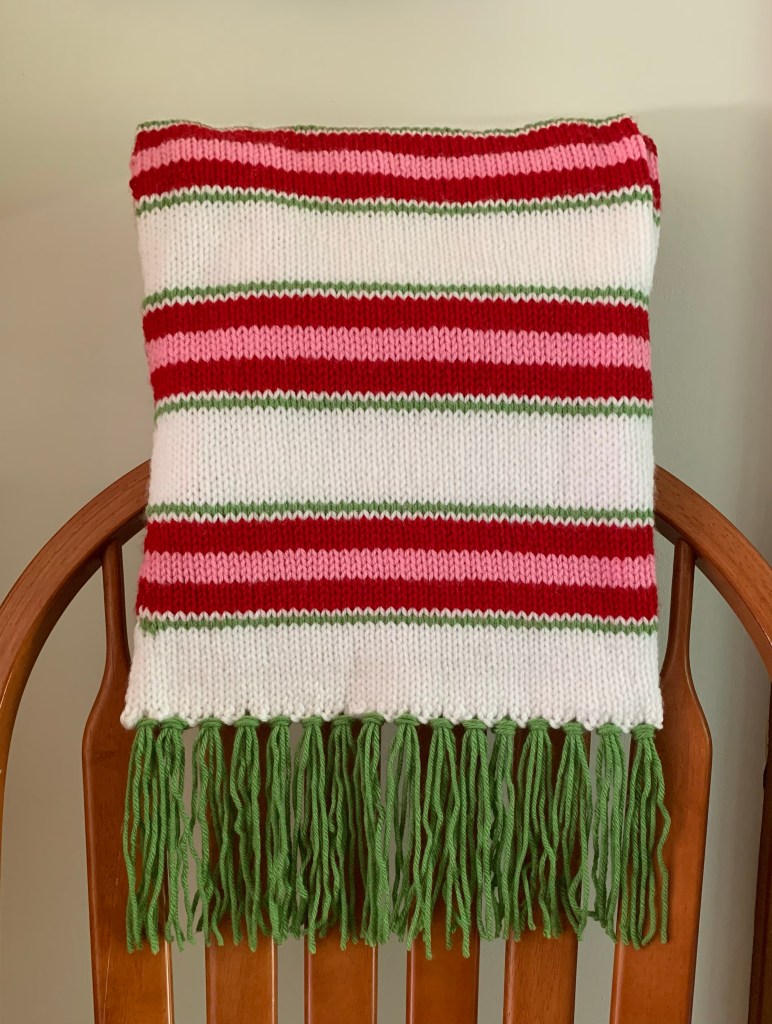
If you’ve read my first blog post, you know I love a thick scarf. Especially a thick, Christmas-themed scarf. For this post, I want to share with you a fun pattern I came up with using the inspiration of a Christmas mug I bought years ago.
My inspiration
I love going to craft fairs during the holidays. It was at a Garden Club holiday plant and craft fair that I found a beautiful mug. I love collecting Christmas mugs and this one’s pretty stripes caught my eye. I couldn’t take my eyes off it. So, in my cabinet it went. It joined the rotation of Holiday mugs I bring out after Halloween. Then, last year it hit me. How wonderful would these stripes look on a scarf?
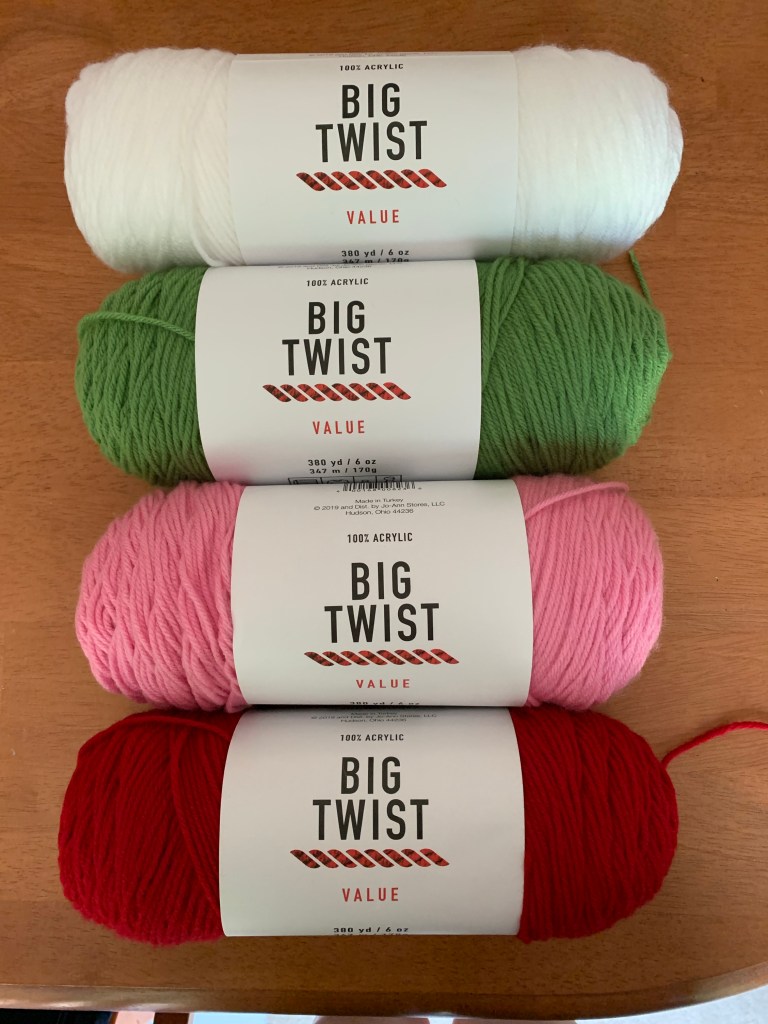
Off to the craft store I went. I was lucky enough to find inexpensive yarn in colors very similar to the scarf. But my luck ran out when I tried to figure out the pattern. Some rows were too thin, or others too thick. After much hair-pulling and yarn yanking, I finally figured out a pattern I liked.
Supplies:
24” size ten circular needles
2 skeins Big Twist in White
1 skein Big Twist yarn in Deep Red
1 skein Big Twist yarn in Medium Rose
1 skein Big Twist yarn in Light Green
Begin by casting on 105 stitches with white yarn. Join in the round, careful not to twist. Mark beg of row. Then create pattern as follows:
12 rows with White yarn.
1 row Light Green
1 row White
4 rows Deep Red
4 rows Medium Rose
4 rows Deep Red
1 row White
1 row Light Green
Repeat above sequence until scarf measures 68″. Bind off.
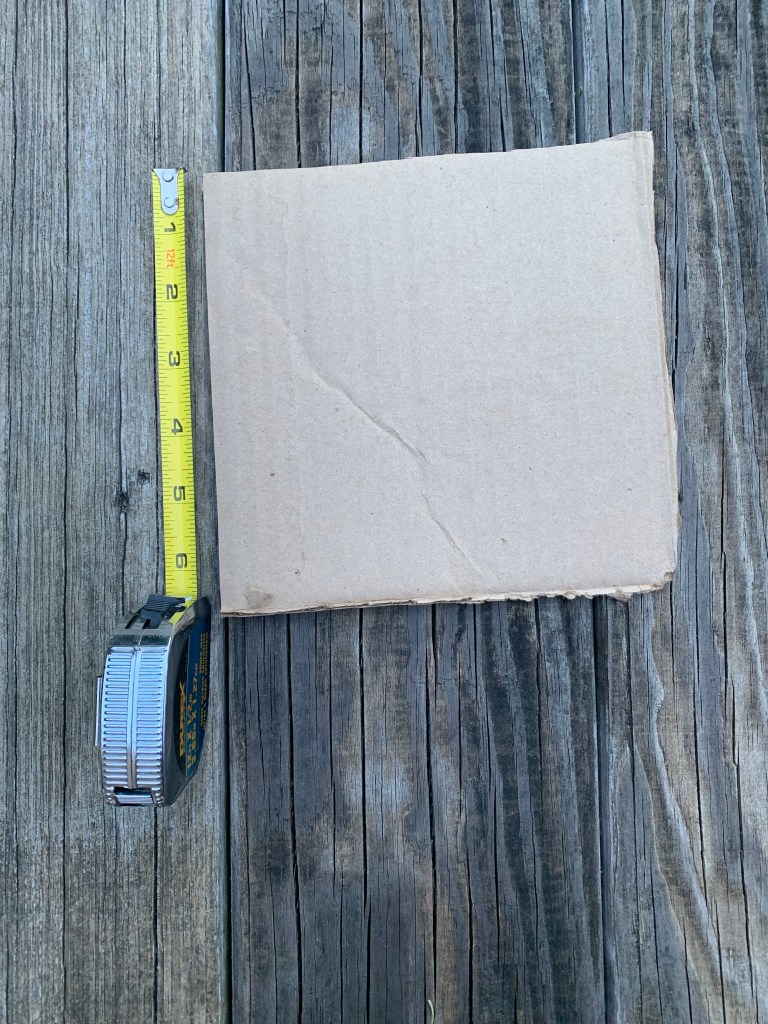
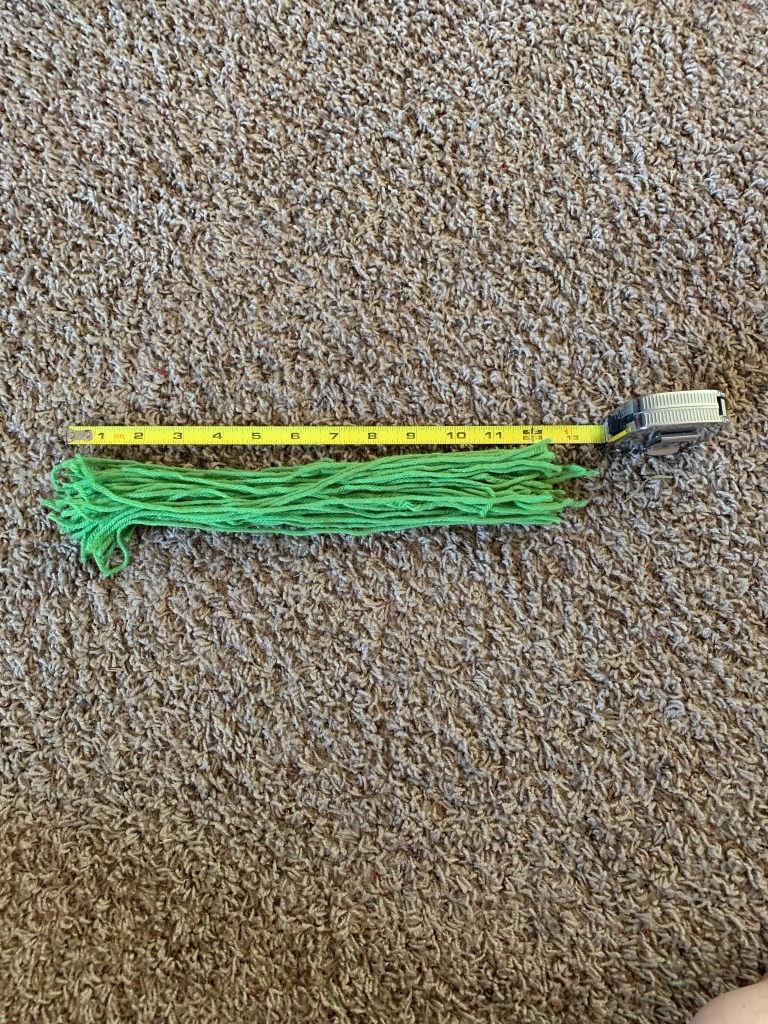
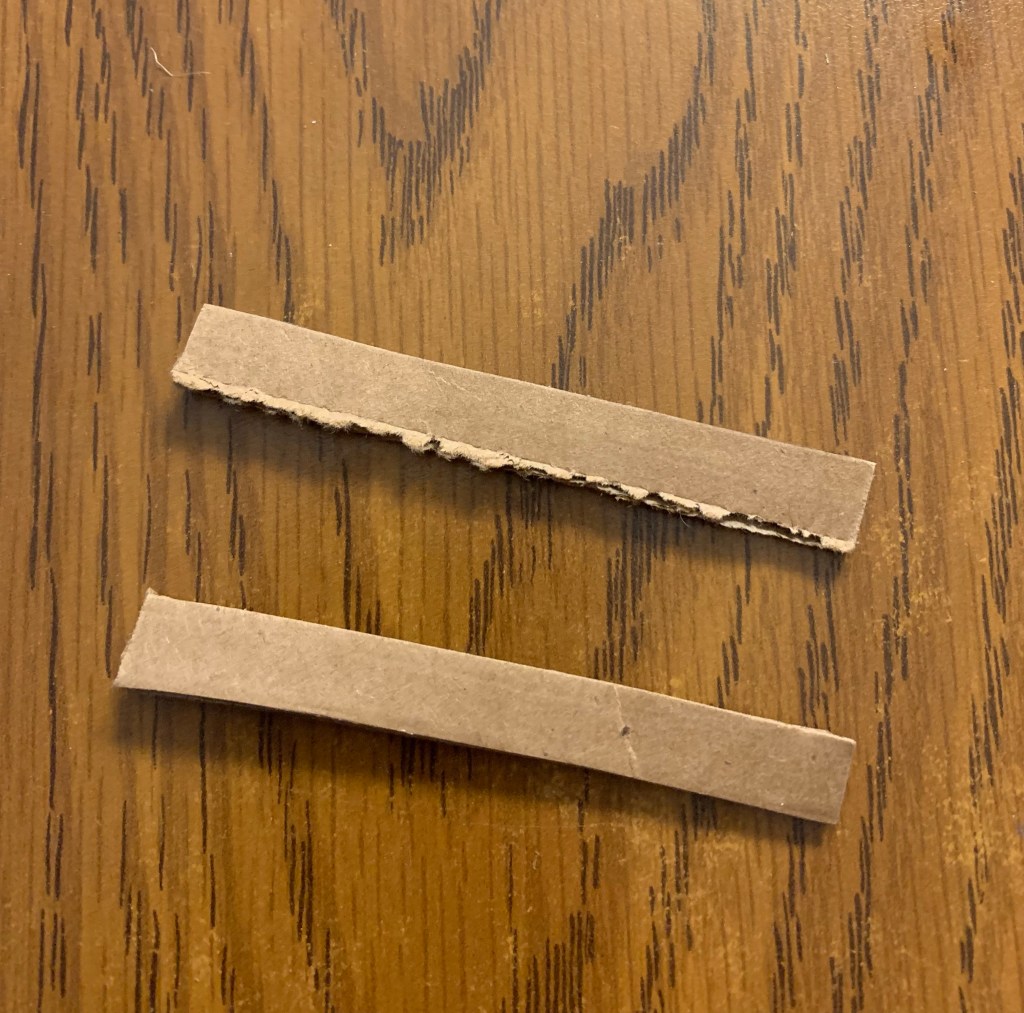
I used a scrap piece of cardboard to make tassels.
To create fringe, wind Light Green yarn around a 6 1/2″ piece of cardboard. Luckily, I have a lot of Amazon boxes laying around, and the lid of one was the perfect size. Cut yarn at one end so you end up with pieces of yarn approximately 13″ long (don’t worry if some are bigger or smaller, you will be trimming the fringe after attaching).
Gather yarn pieces in groups of 3. Before I attached yarn, I first marked the places for the tassels with one piece of yarn to ensure proper spacing. Then, using a crochet hook, I pulled each group of three through the end of the scarf and tied. The technical term for the knot used is a lark’s head knot, but I call it a tassel knot.
Mark tassel placement before tying on tassels with a single strand of yarn every three stitches to ensure even spacing.My daughter chilling in a peppermint stick scarf.
This scarf was a lot of fun to knit. Not only is it stylish, but it’s so thick it will keep you warm in the winter weather. The colors are fun, and the pattern is simple. I can’t wait to show it off at my town’s annual Christmas parade. Happy crafting!
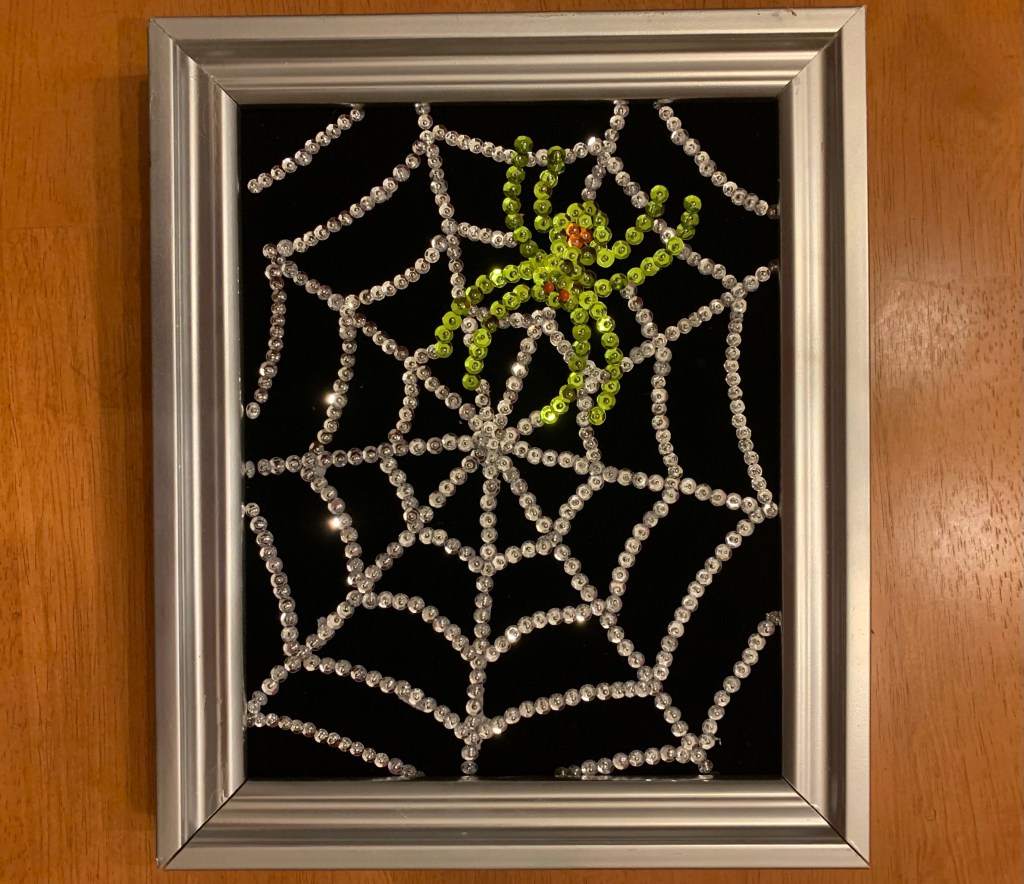
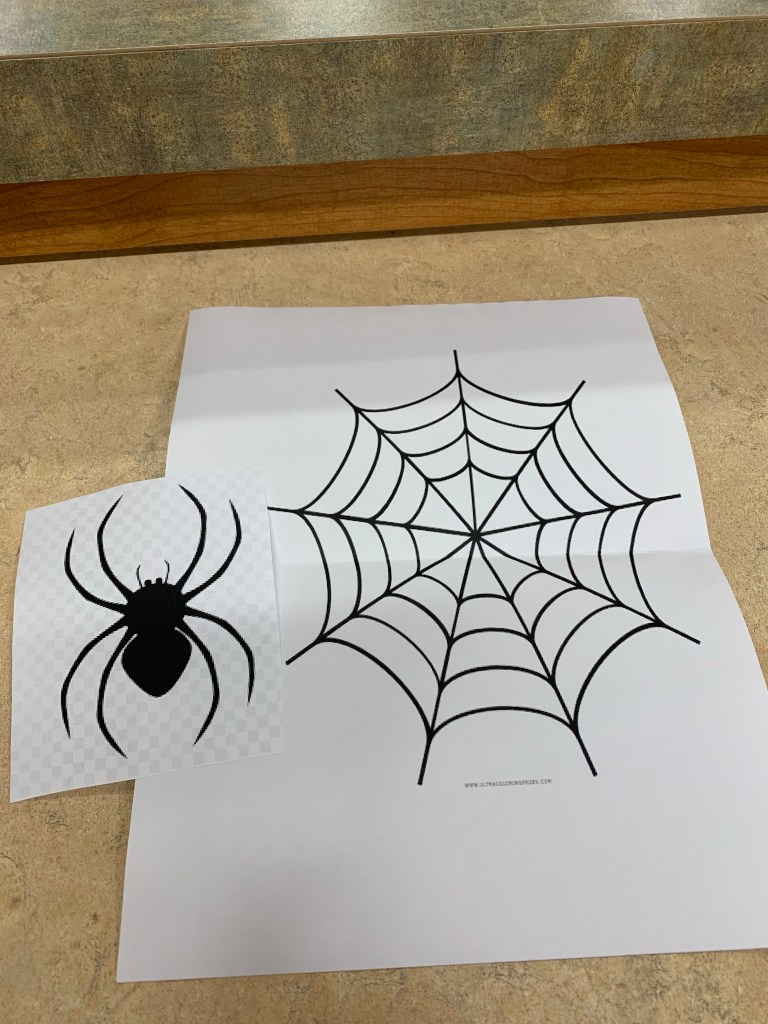
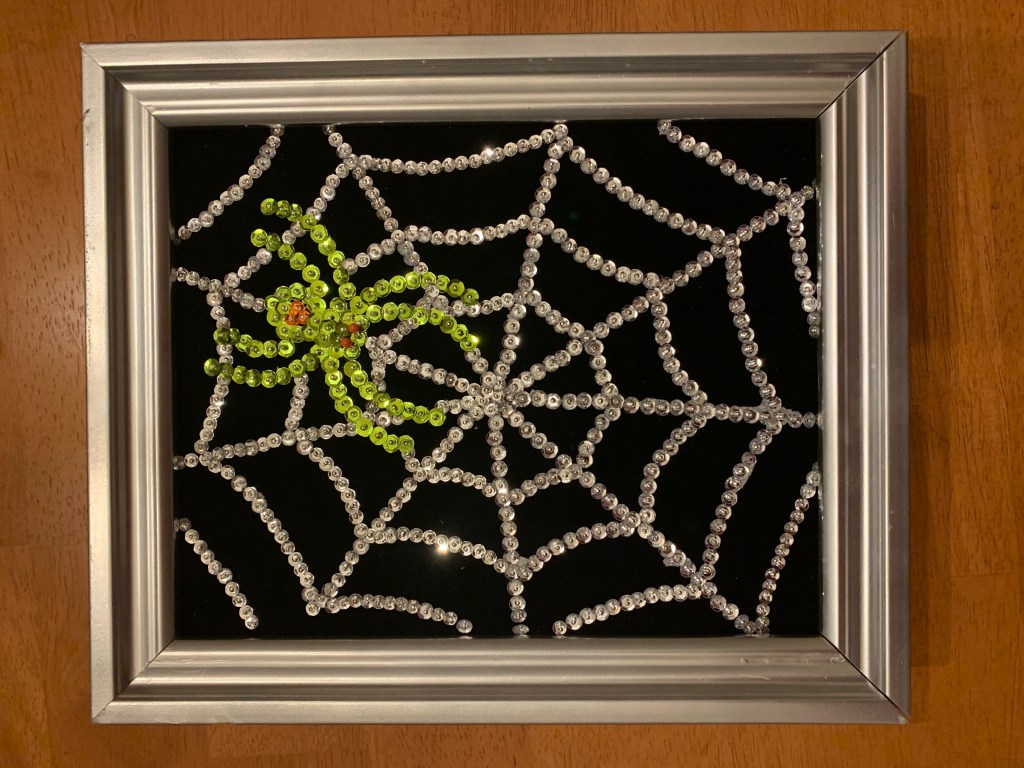
With Halloween just a week away, I wanted to update my pin art frame with a spooky print. Since it can be difficult to depict objects with sequins, I wanted something that was unmistakable for the season. I finally thought of the perfect idea: a spiderweb. Once I got the hang of creating the tracing for the web, I realized what a simple, yet effective way it was to add a bit of Halloween to my wall. Of course, I had to add a creepy spider to the web. Here’s how I did it:
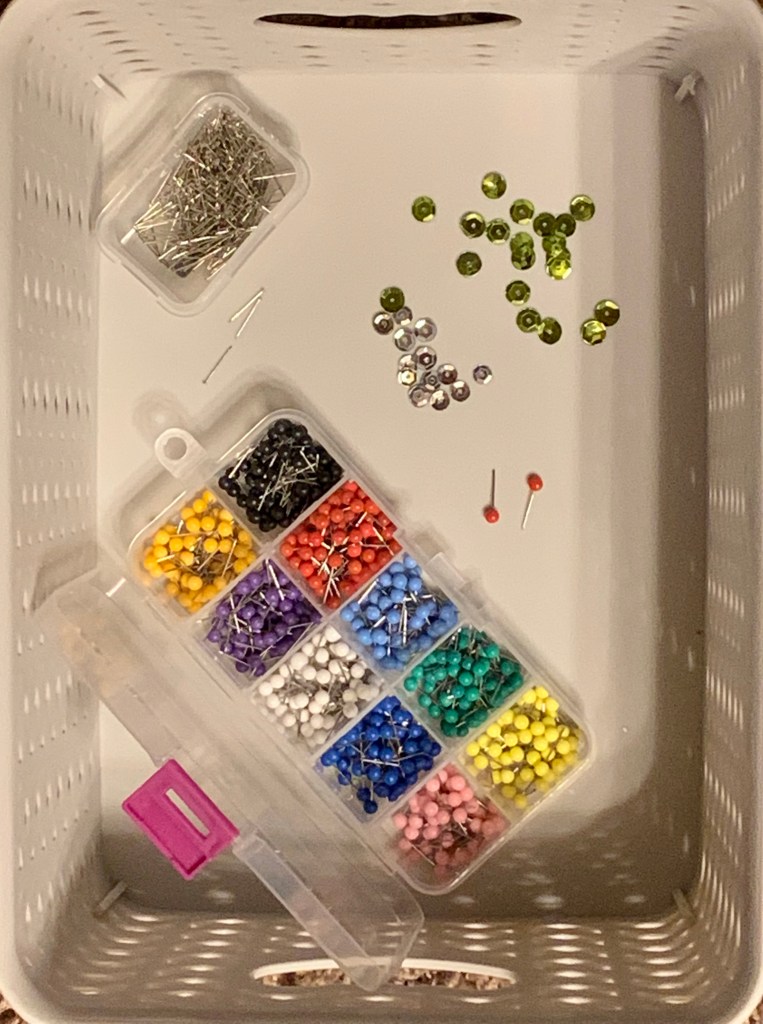
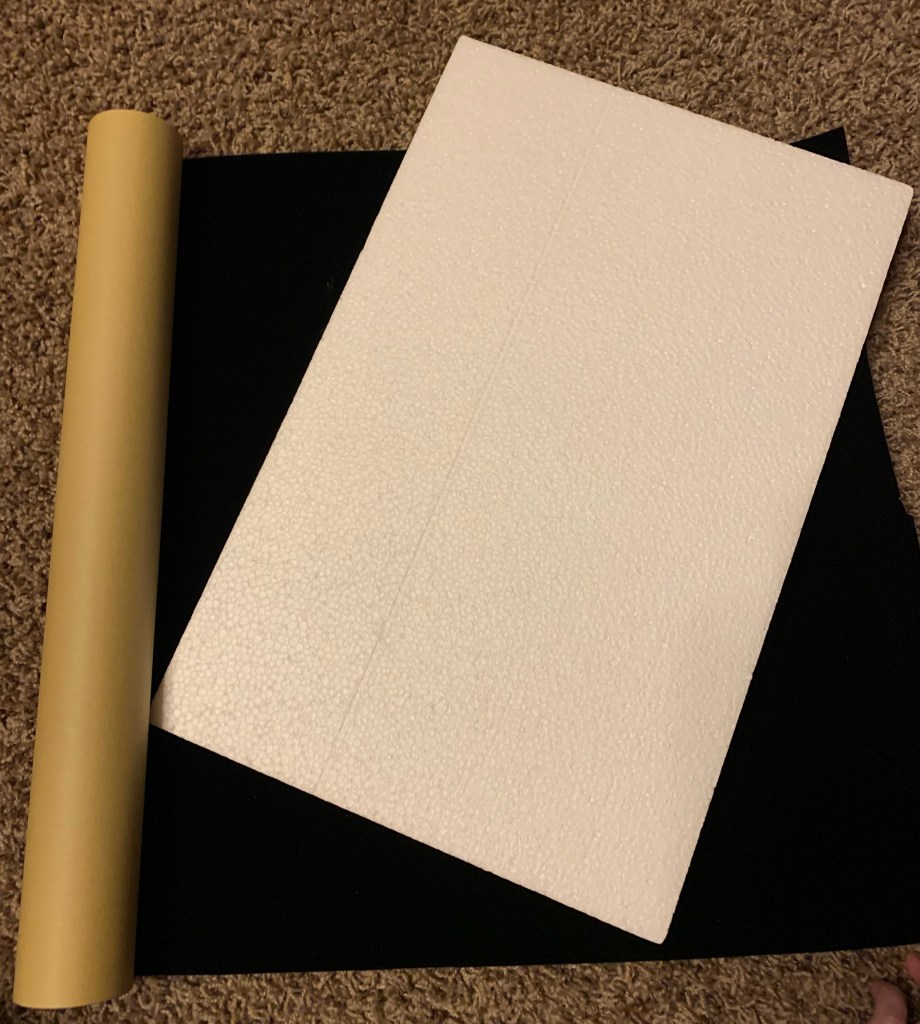
Map pins, sequin pins and sequins.A roll of black velvet contact paper and a piece of 1/2” foam.
Supplies: an 8 X 10″ piece of foam, Exacto knife to cut the foam to size, a pencil, paper and tissue for tracing, black velvet contact paper, silver and green sequins, clear beads and pins.
To start with, I searched free clipart on the web for a spiderweb and spider. Copying them into a word document, I sized them to fit my piece of foam. You can buy foam craft pieces at a craft store, or you can save the foam that comes in some packing boxes. I like to use 1/2″ thick pieces.
I used a roll of black velvet contact paper I bought online. Placing the foam over the paper I traced the outline and then cut the contact paper to size.
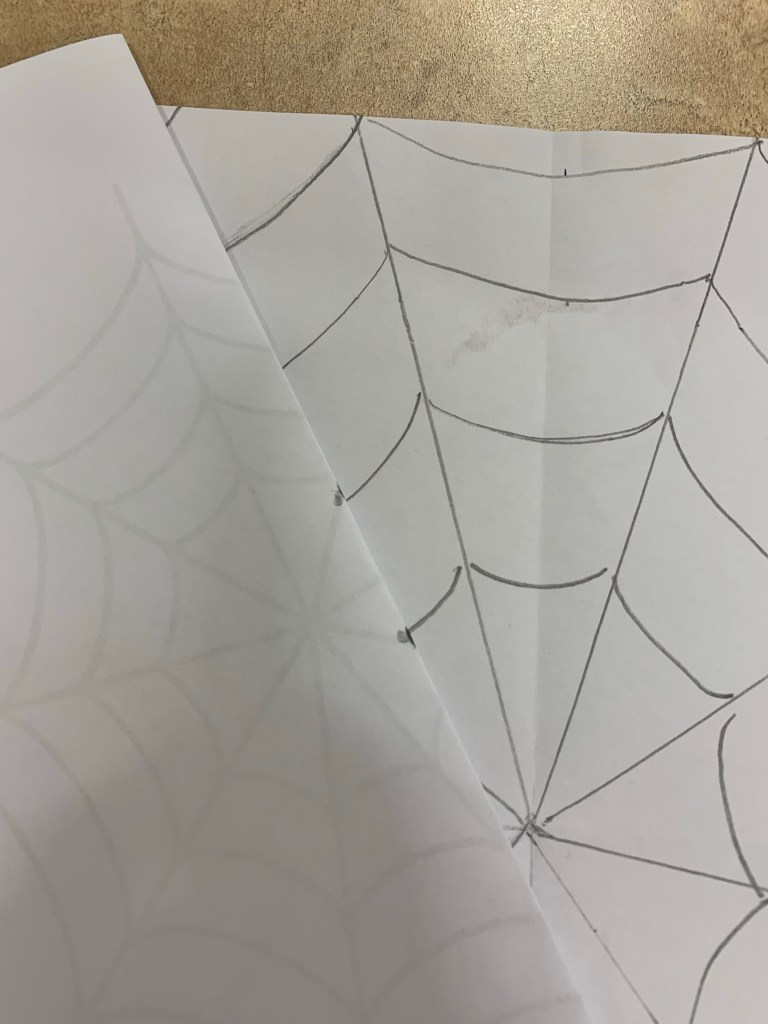
Next I traced the image onto a spare piece of tissue paper. Then I peeled the back off of the velvet contact paper and adhered it onto the foam piece. Once that was done, I simply pinned the image on top of the contact paper.
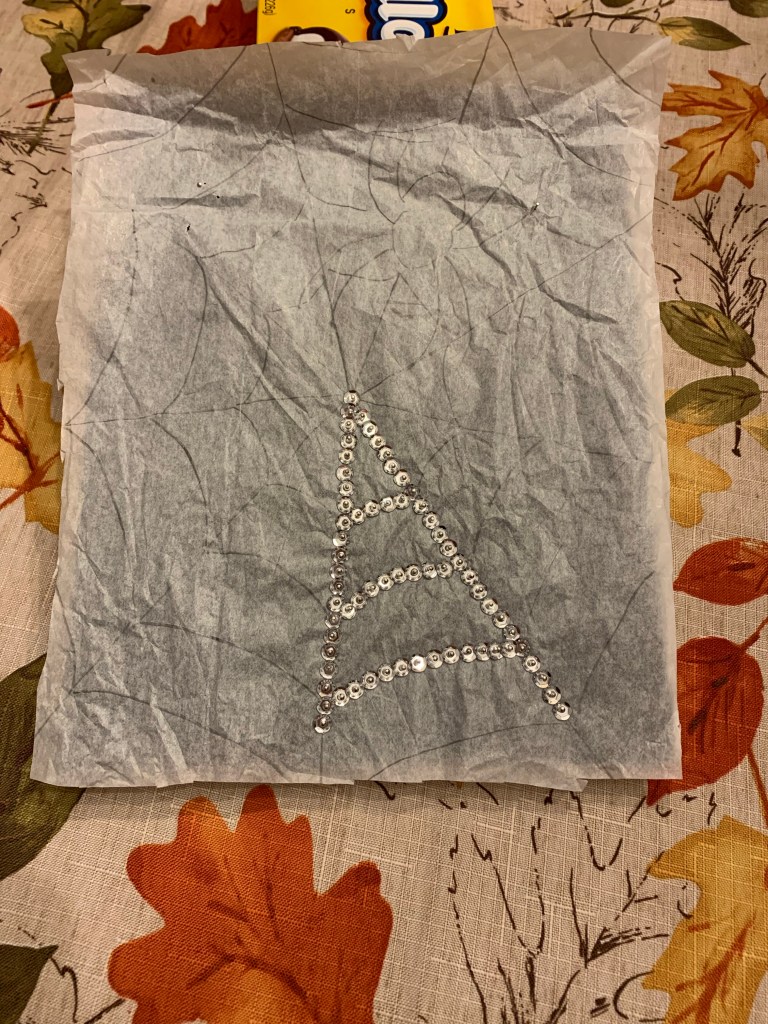
Time to get out my sequins and pins! I like to use between 1cm cup sequins, but you can use larger if you like. the larger ones do make the pinning go by faster. I also like to add a clear bead on top of my sequins, but you can skip this part if you like. I used silver to create the web and decided on a lime green for the spider. To make the spider look menacing, I pinned two red map pins for his eyes.
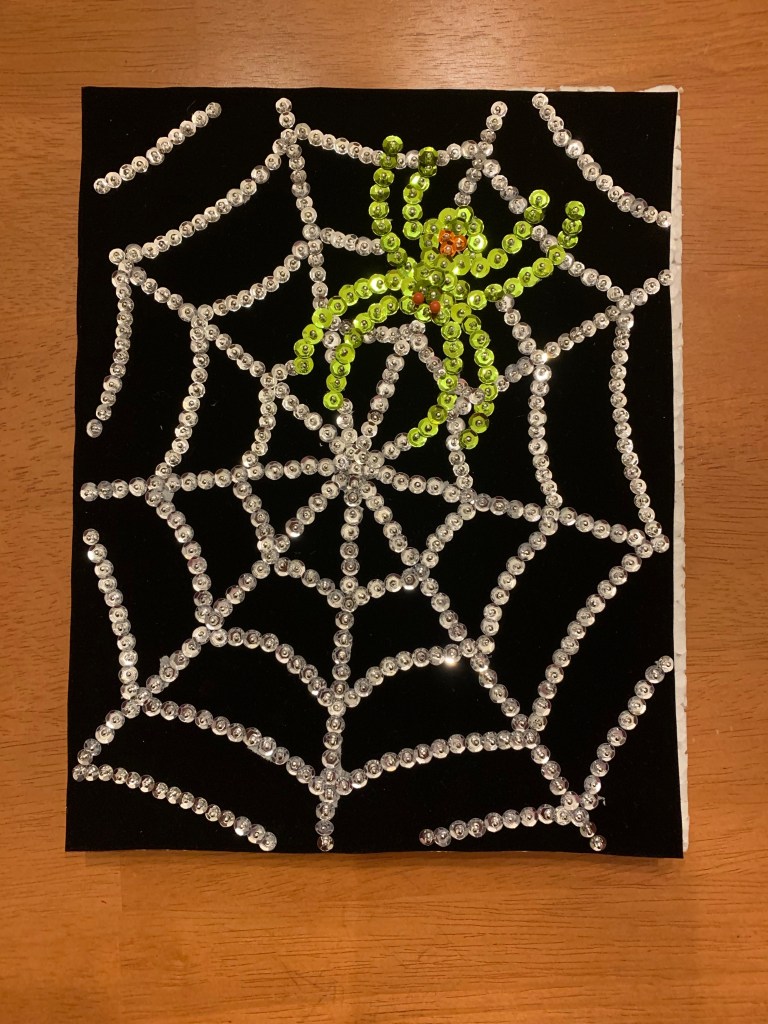
I completed this craft while watching TV. As the image started to appear on the contact paper, I started to get excited for the upcoming holiday. With each finished section I tore the tissue paper away to reveal the image. You can display the image vertically or horizontally.
For me, Halloween marks the start of the holiday season. This small sequin piece adds the perfect amount of sparkle and ghoulish fun to my walls. Happy Halloween!
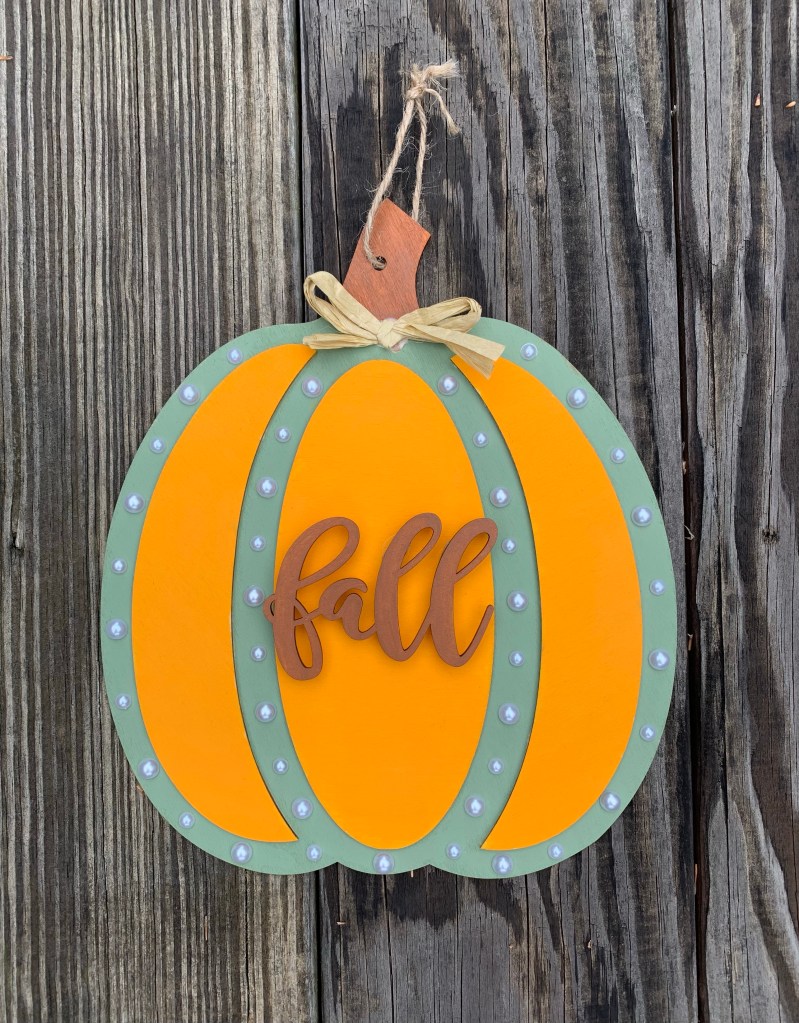
With my favorite season fast approaching, I wanted to share a simple fall Dollar Tree craft. This quaint craft was both easy and inexpensive, two of my favorite things.
I love experimenting with different craft supplies to create something memorable. Wooden cut-outs and signs are plentiful at every craft and department store, and there are so many ways you can make them truly unique and beautiful. Paint, Diamond Dotz, fabric, or gem accents, it’s never wrong if you like it. Plus, they’re perfect for all ages, young or old. For this sign, I combined a couple different laser cut-outs, paint and some pearl accents.
Supplies: Dollar Tree pumpkin sign, “fall” laser-cut sign, acrylic paint, half-flat pearl beads in various sizes, small bit of cardboard and some glue.
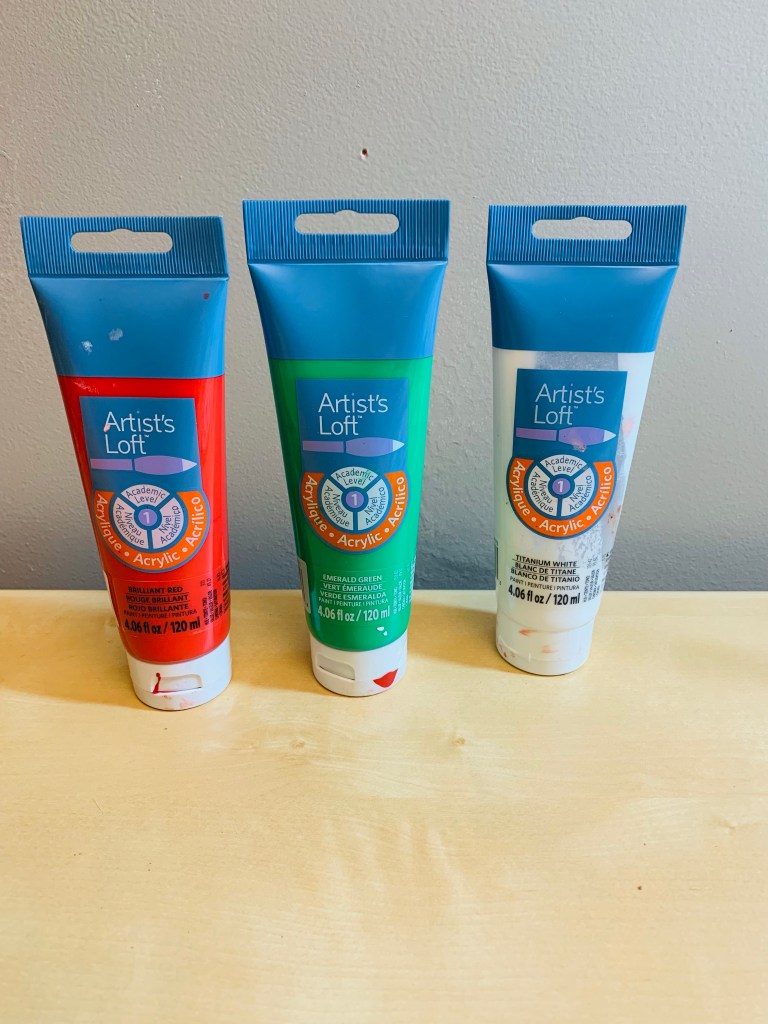
First, I painted the pumpkin cut-out. I used acrylic paint I had on hand in orange, green and brown. The wood is porous, so it may take several coats to get the color vibrant.
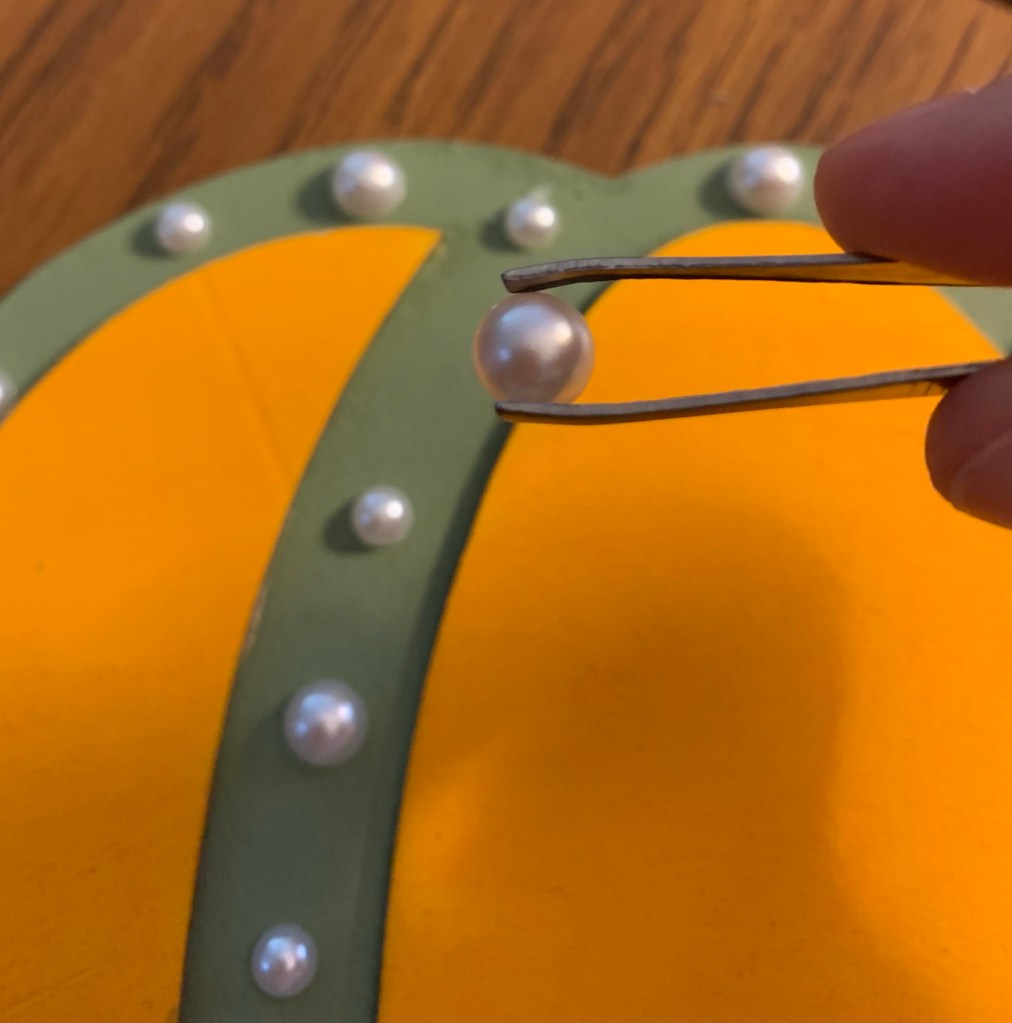
To give the size some shine, I used some pearl accents. I found this collection of half-flat pearl beads in eight different sizes on Amazon. The pearls not only give the sign an elegant look, but also add some texture and shine.
To apply the pearl accents, you can use Elmer’s Glue or a glue gun. I used a tweezer since they’re very slippery. Before I glued them, I laid out the pearls so the spacing looked good. Then I marked the spots where I wanted the pearls with a pencil. Allow plenty of time for the glue to dry before moving on to the next part.
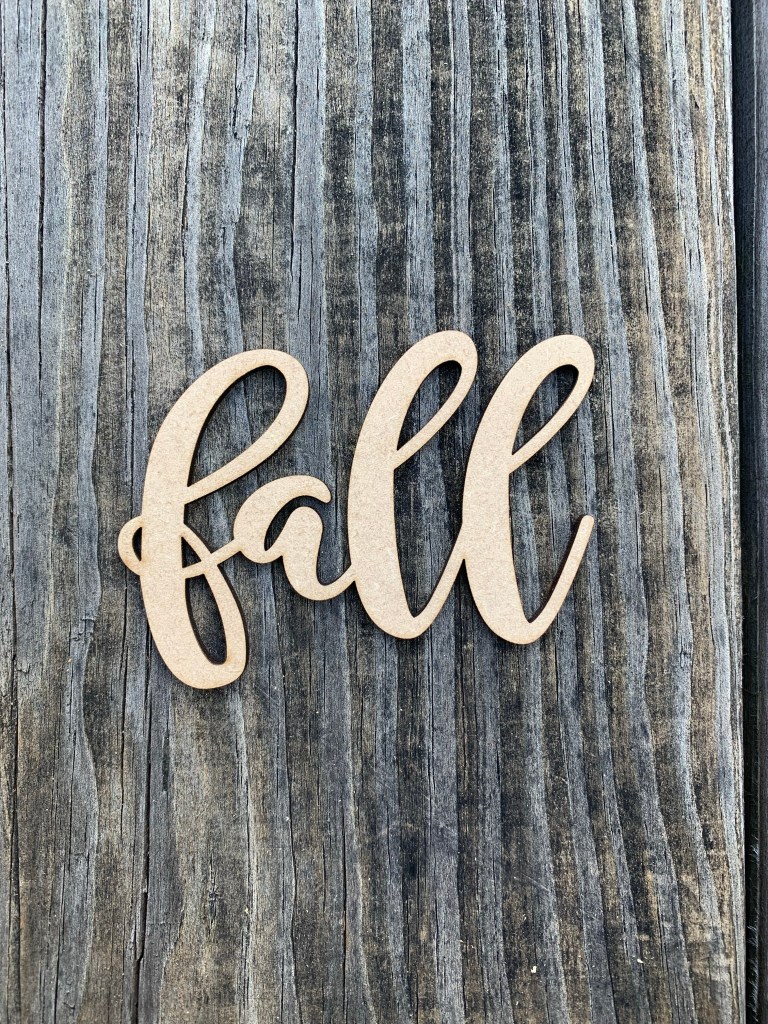
Then, I worked on the “fall” cut-out. I picked up this piece on Amazon, but just about every craft store has similar laser-cut products in a wide variety of sayings. I decided on an earthy brown color that would pop against the pale colors I chose for the pumpkin.
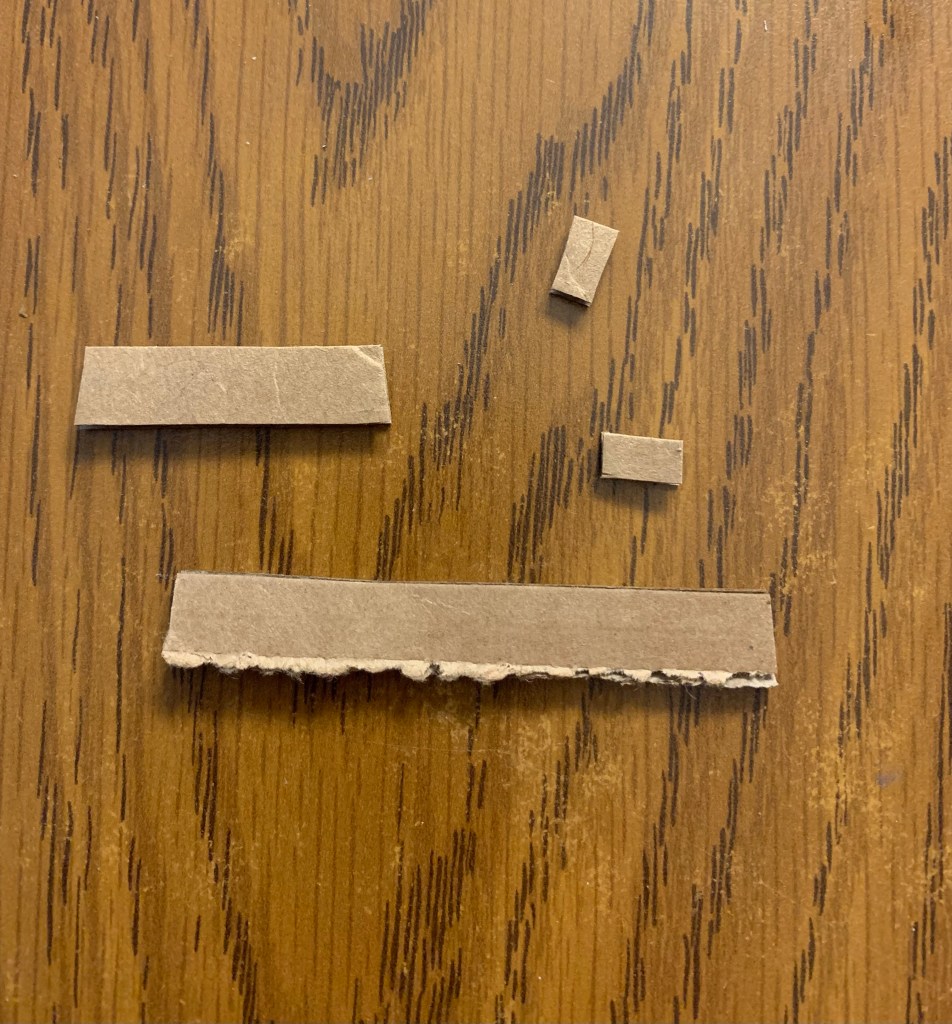
To give the cut-out a more dimensional look, I cut small pieces from a discarded piece of cardboard and glued them to the back before adding the words to the pumpkin. Then I glued it to the center of the pumpkin.
This sign is now proudly hanging by my front door. I had a lot of fun using different craft items to make the sign my own unique design. Signs like this are the perfect craft to use up some of the lingering craft supplies in your house. Happy crafting!
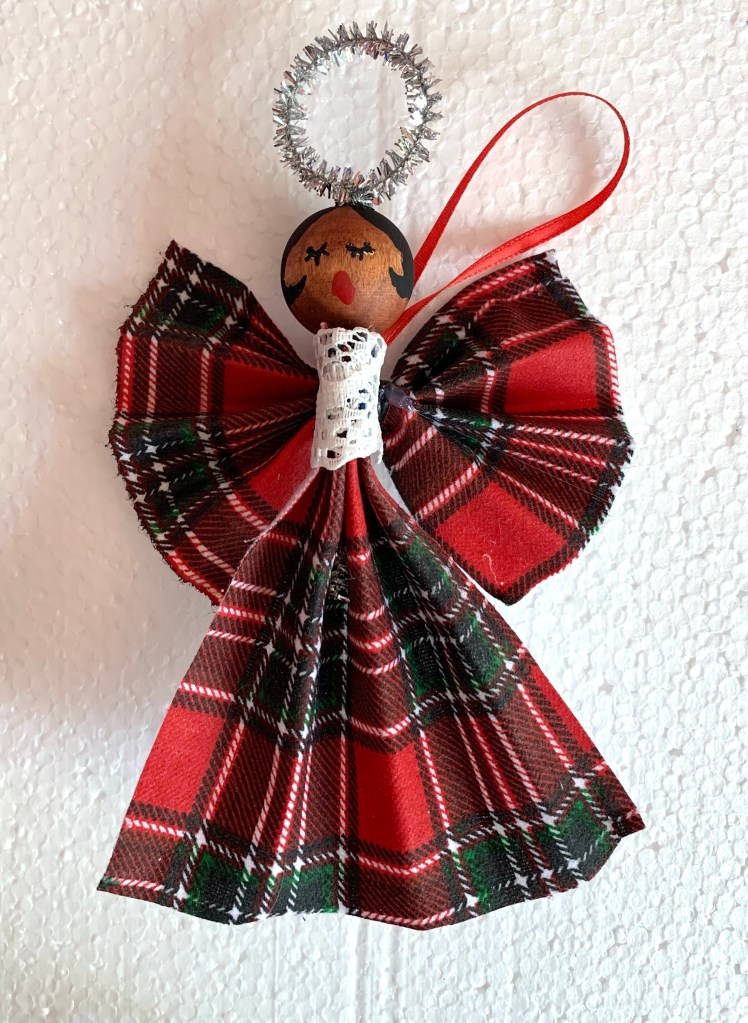
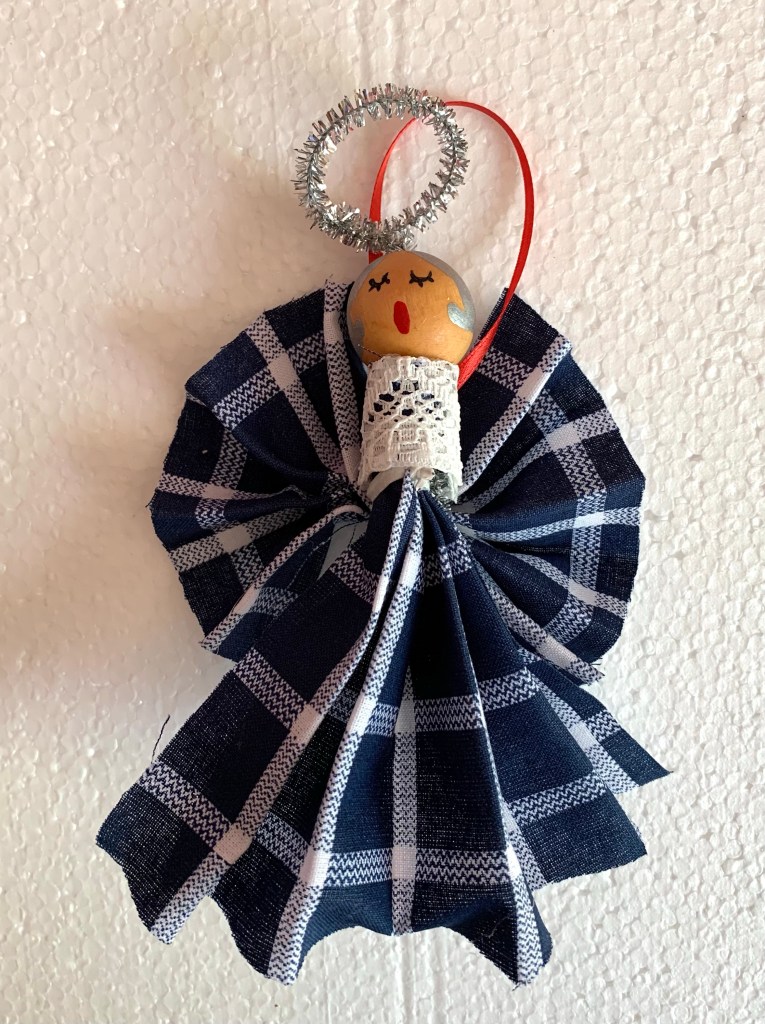
Are you holding onto a cherished shirt or other piece of fabric from a loved one who’s passed? You know you’ll never wear it, yet you just can’t part with it. Instead of keeping it hidden in your closet or in a box in the basement, why not make something with it? This craft is designed to be made from the scraps of a loved one’s favorite garment. Using small pieces of fabric, you can create an angel ornament to adorn your holiday tree. Since it uses so little fabric, you can make several angels from one piece of fabric to share with other family and friends.
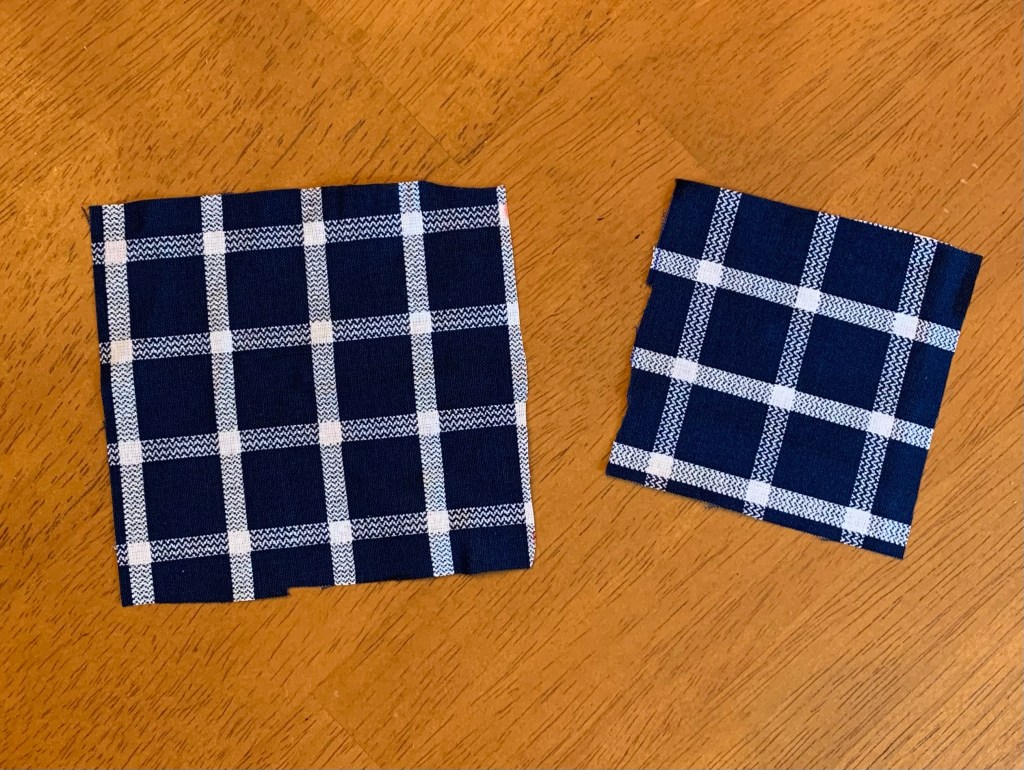
Cut a 4-inch square piece of fabric for the body and a 3-inch square piece for the wings.
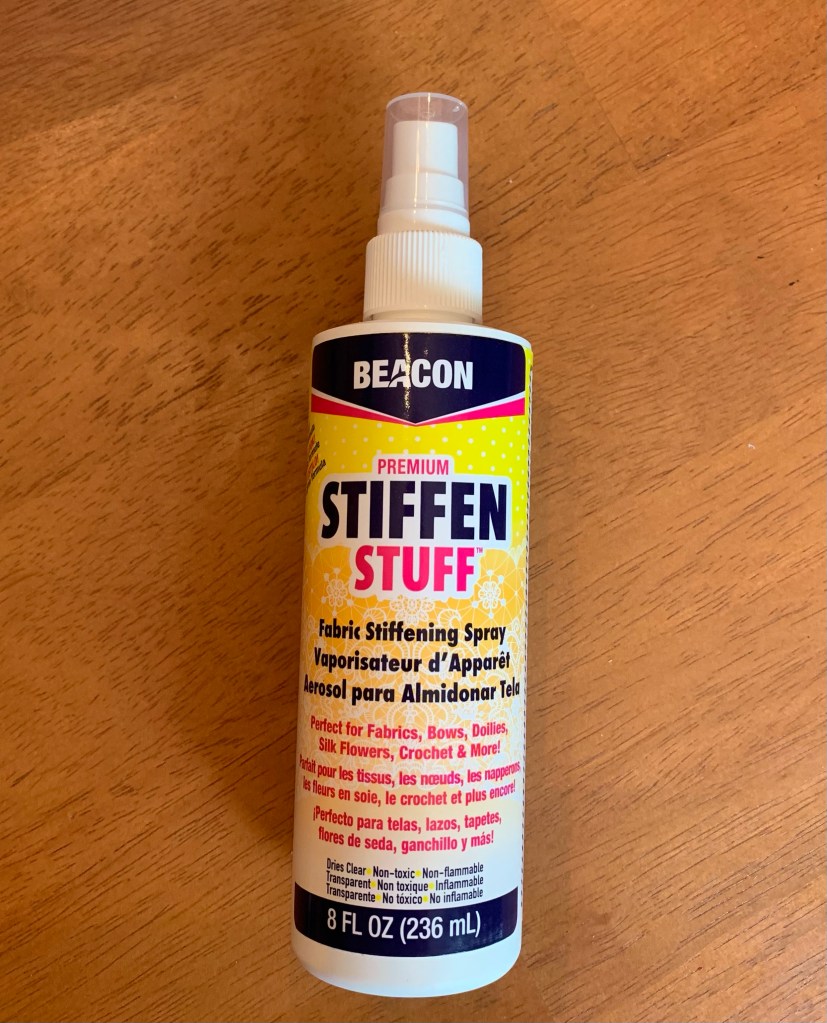
Supplies for body of angel: an old shirt or any piece of fabric, scissors or pinking shears, fabric stiffener, a bread bag tie, a needle and thread, lace trim, hot glue gun, a 3-inch piece of silver or gold pipe cleaner for halo and 1/8″ wide ribbon for hanging.
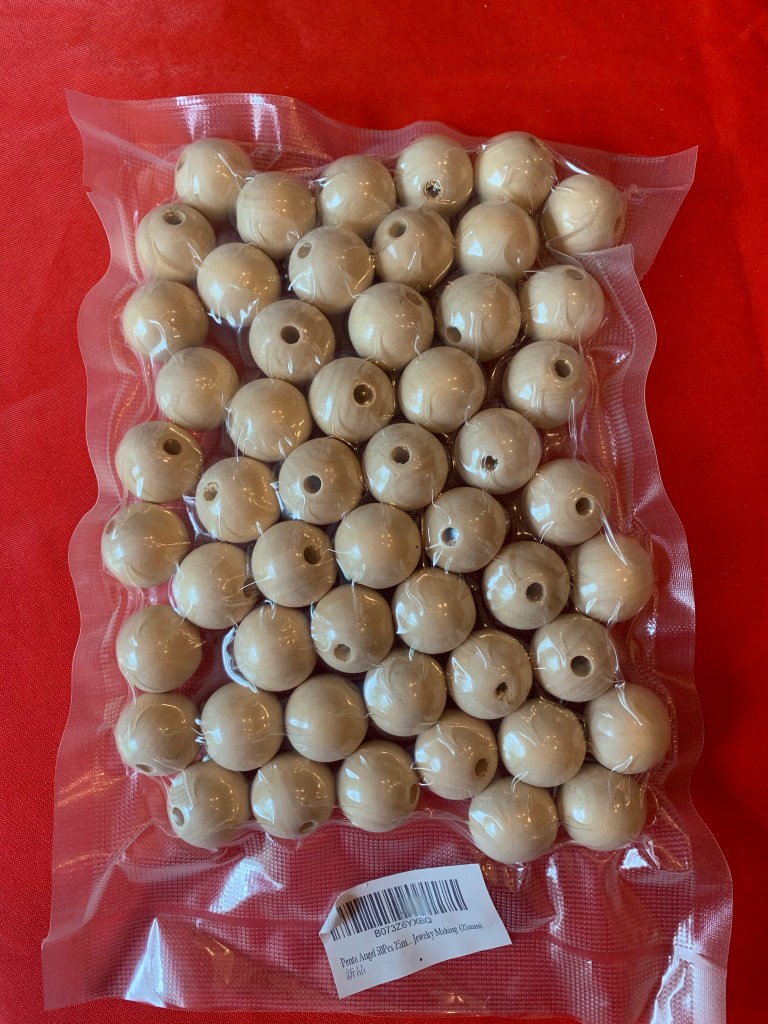
Supplies for angel head: one 18mm wooden bead with a 4 mm hole in the center, wood stain and markers or paint.
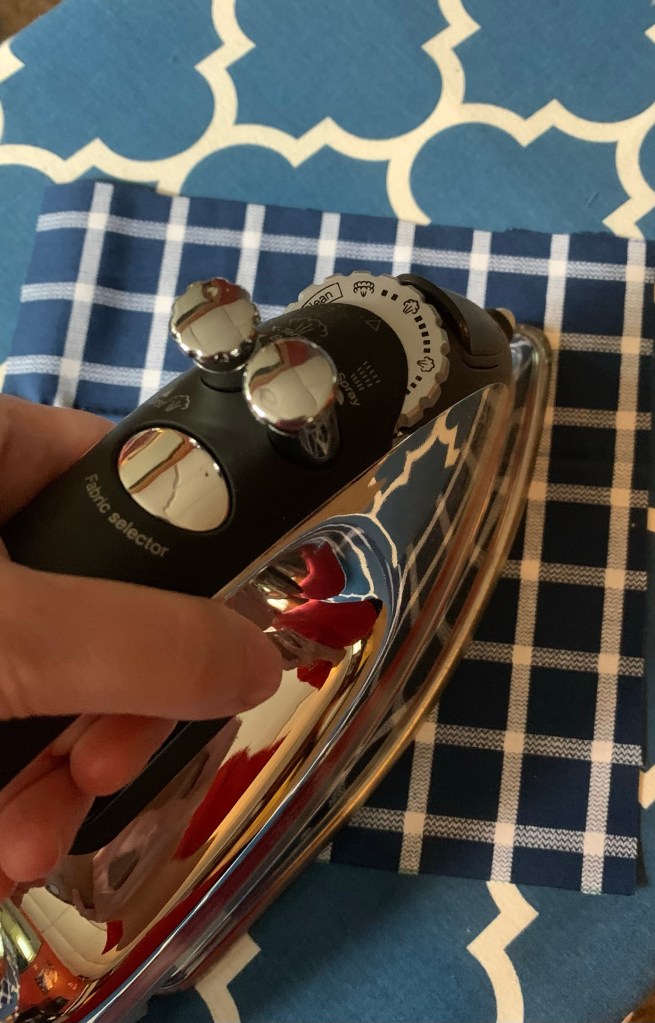
Before beginning, I recommend ironing the pieces of fabric. Then, using either a sharp pair of scissors or a pair of pinking shears, cut a 3-inch square and a four-inch square from the fabric.
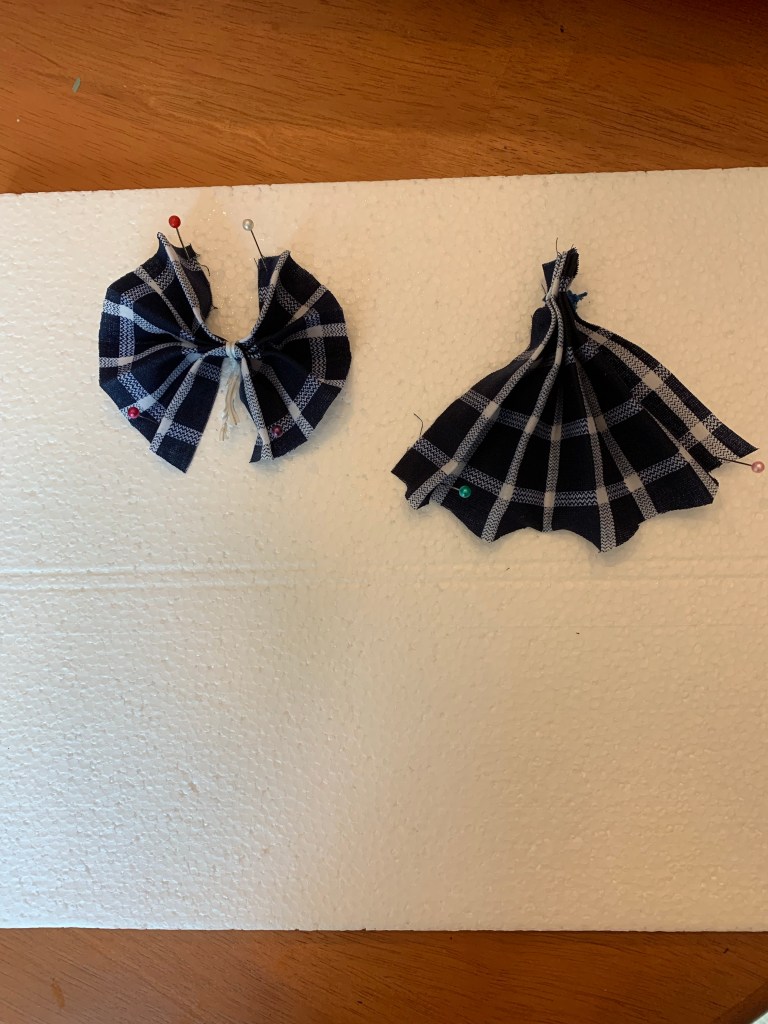
Next, spray the fabric with fabric stiffener. The fabric stiffener also helps keep the fabric from fraying. While the fabric is still wet, fold the fabric up like an accordion.
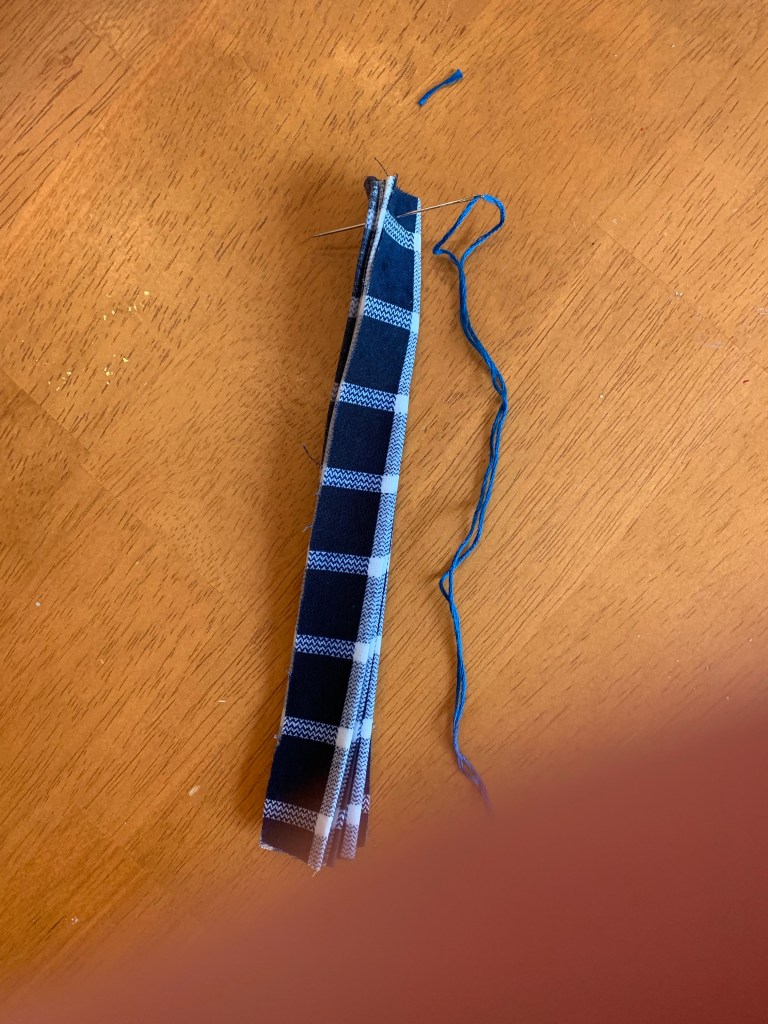
Use a sandwich tie to make the angel’s wings.Use the needle and thread to secure the top of the angel’s skirt.
To help the fabric keep the pleated look, I secured the top of the larger piece being used for the angel’s skirt with two stitches at the top. For the piece being used for the wings, I tied the fabric in the middle with an old bread bag tie.
Pin the wings and body of the angel down so they keep their shape.
To help shape the fabric, I next pinned both pieces onto a piece of foam. If you don’t have any foam laying around, you could use an old cutting board or a bulletin board. Let the fabric dry completely before moving to the next step.
While the fabric is drying, I stained the wooden bead being used as the head of the angel. I found this bag of 18 mm wooden beads on Amazon, but most craft stores carry these beads in the wood or jewelry department.
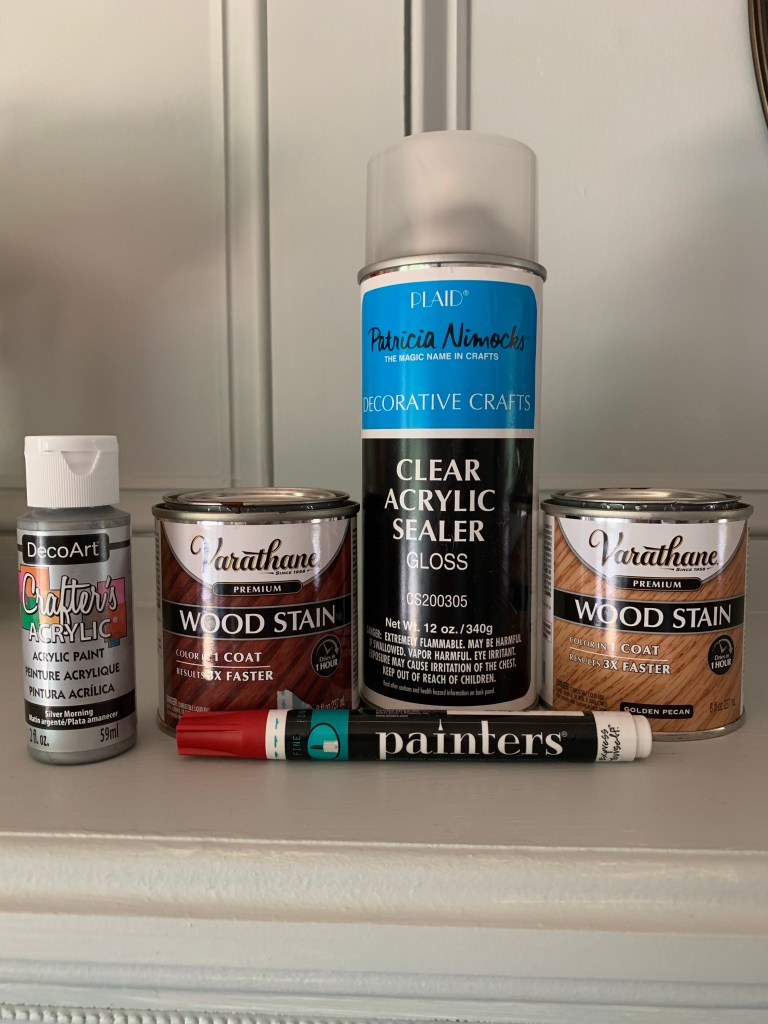
Paint, stain and sealer to create the angel head.
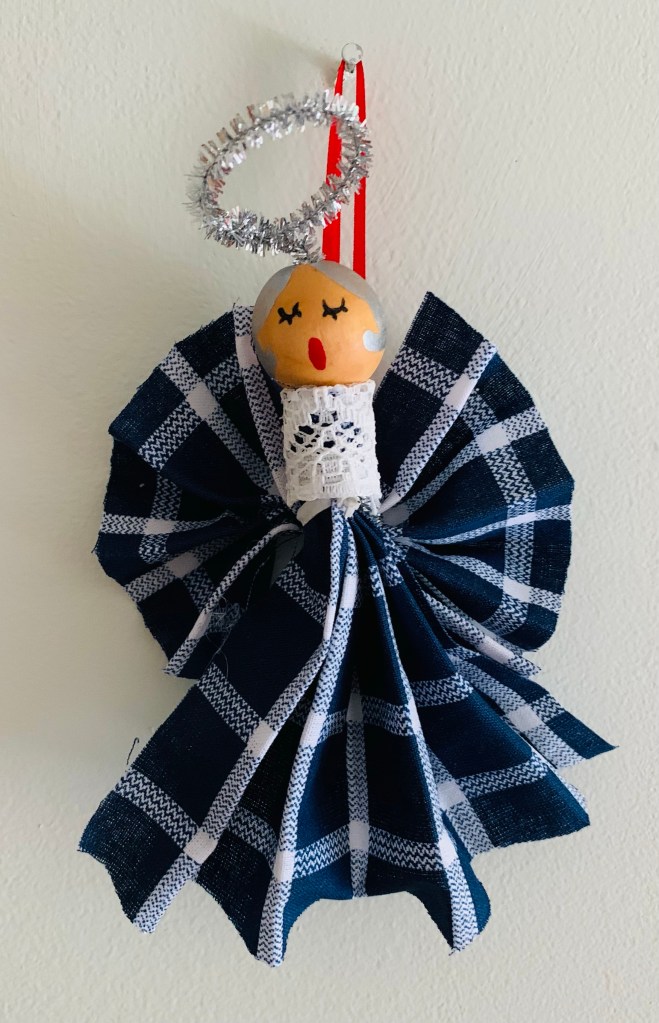
I recommend staining the wooden bead before painting on the face. The stain helps stop the paint or marker from bleeding. Paint your angel head with any color hair you’d like. You can use black, silver or white marker to make the eyes. To seal the paint, I sprayed a paint sealer over the beads.
Stick the beads on a spare piece of pipe cleaner to make painting a breeze.
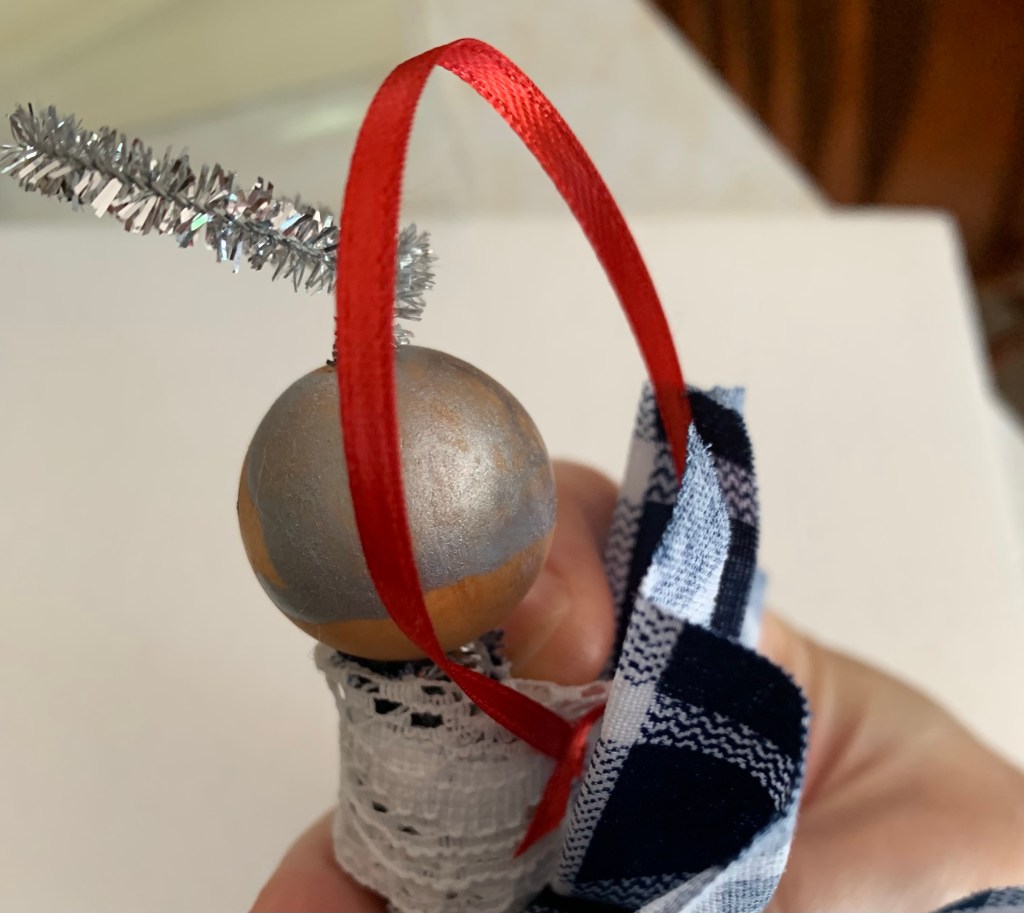
Since painting a round bead can be tricky, I stuck a spare piece of pipe cleaner through the hole of the bead. This made it much easier to turn the bead and paint. I hung the pipe cleaners and beads over the edge of the cup to allow the beads to dry.
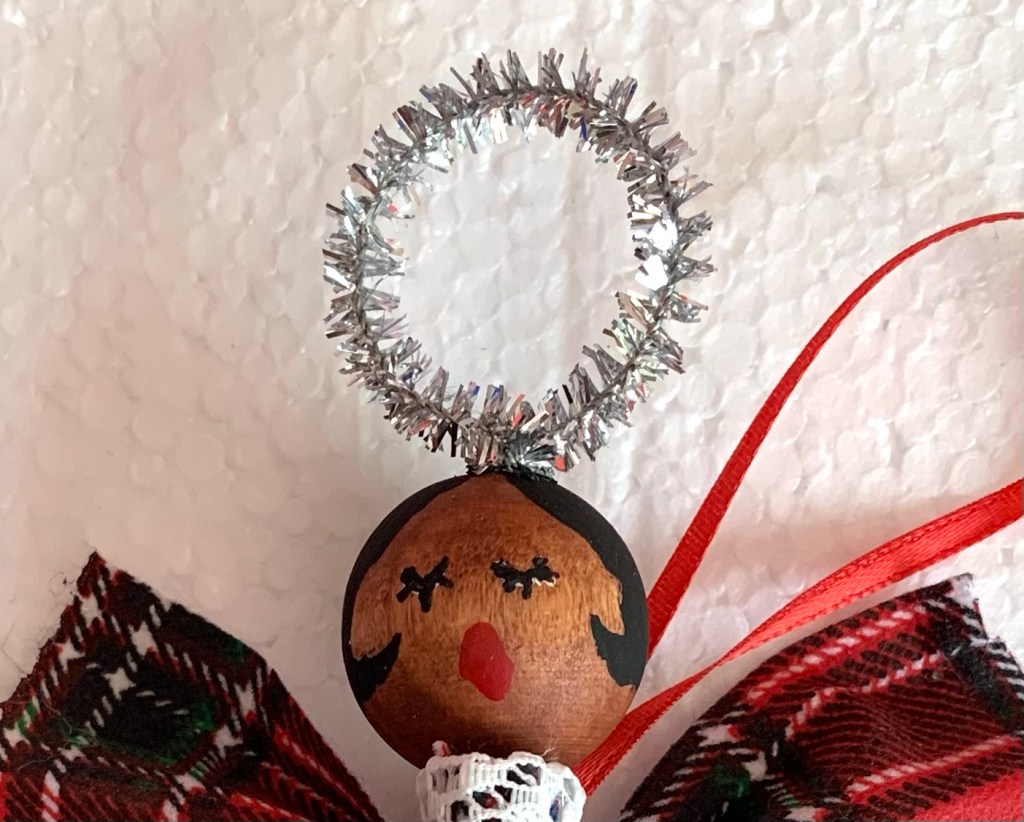
To make a perfect halo, I used a spare wooden bead and wrapped the pipe cleaner around it to form a neat circle. Then, to attach the halo, I inserted the end of the pipe cleaner into the center hole of the bead I painted. I added a small amount of hot glue inside of the bead-hole to keep the halo in place.
Use hot glue inside the bead to keep halo sturdy.
Now back to the body of the angel. Once the fabric is dry and stiff, I added a small bit of lace trim to the gathered end of the skirt with some hot glue. The lace I used was thick, so I folded it in half before glueing.
Lace for angel neck.If your lace is thick, fold it in half before attaching.Twist the bread tie to help secure the wings to the angel’s body.
Once that is dried, I used the bread tie and some more hot glue to attach the wings to the back of the angel. I hid the ends of the bread tie under the lace.
Fit the end of the pipe cleaner carefully into the folds of the dress.Secure the head to the body with some hot glue.
Now it’s time to attach the halo and angel head to the body. To do this, I simply inserted the end of the pipe cleaner halo into the folds of the angel’s dress. Add some hot glue to keep it secure.
Ribbon for hanging your angel.
To hang on a tree, I cut a small length of 1/8″ red ribbon and then hot glued the ends to the back of the angel.
A memorial angel is a perfect way to hold a special place on your holiday tree for your loved one. You can use a shirt, dress or even a tablecloth. The possibilities are endless. Happy crafting!
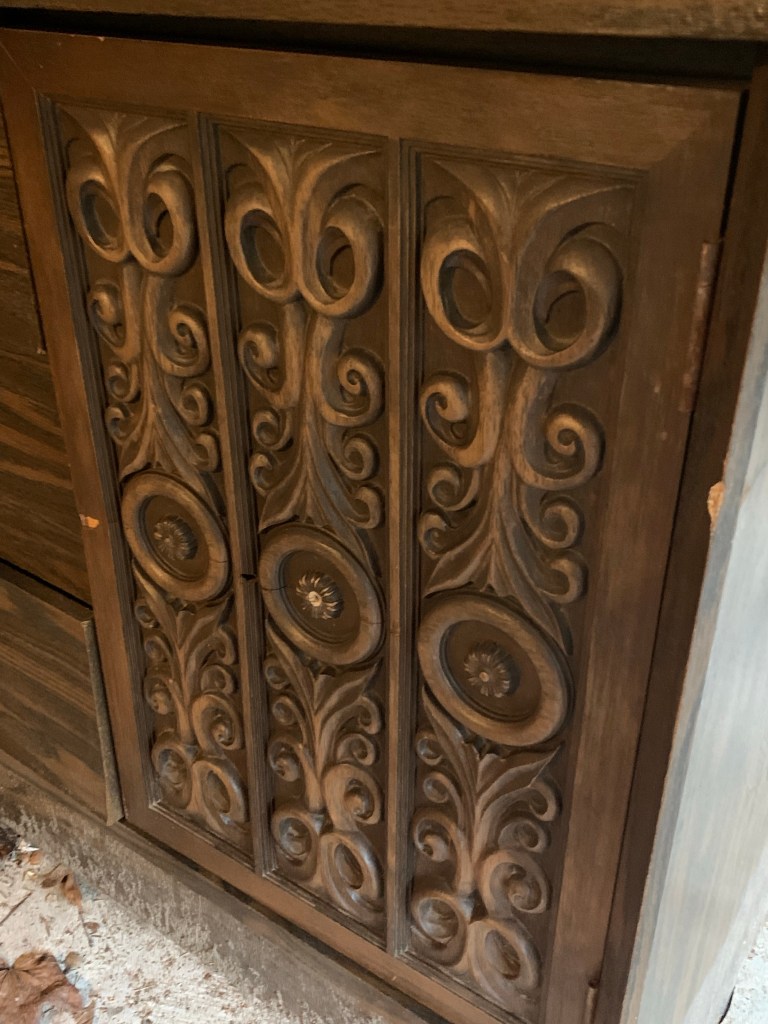
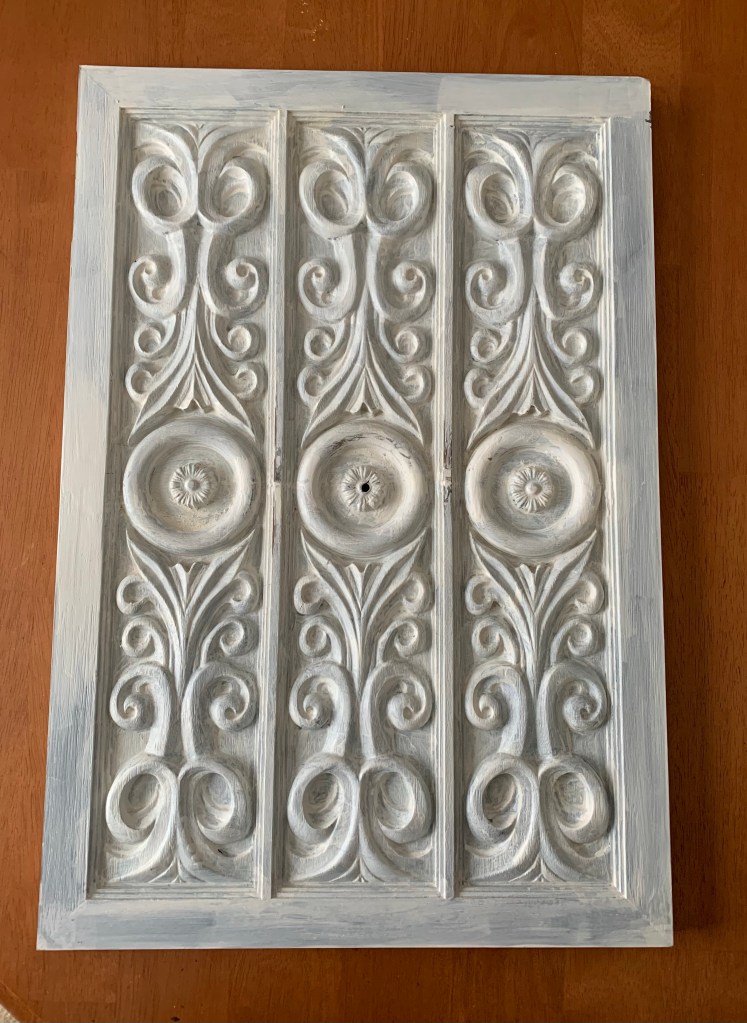
I love watching videos and reading up about furniture renovations, but I’ve always been too chicken to try to do it myself. Then one day on my way to work, I saw it. It looked like a large, ornate buffet on the side of the road. I was drawn in by the unusual decorative cabinet doors on either side of the piece. I started imagining how great it could look with some paint and new hardware. It just so happens I was looking for a table long enough to fit my TV plus provide storage.
My sad TV stand.
We bought a new TV about two years ago. Our old TV stand was not wide enough to hold it, so the legs of the TV hung over the edge. To solve the problem, I simply placed a piece of leftover plywood shelving over the top of the TV stand. But it was not an ideal or attractive solution. A new TV stand could cost over $500, but if I could fix up this buffet, I knew it could be the perfect TV stand to replace the ramshackle one I was using.
After convincing my husband to take a drive with me to look at the piece, he immediately nixed the idea. I went home emptyhanded that night, but I couldn’t stop thinking about it. I knew I could do something with it. Finally, after much nagging, I convinced him to return the next night and after much struggle (it weighs a ton) we stuffed it into the back of our hatchback and took it home. It deposited quite a bit of pulverized particle board all over the car, but it was now mine.
Upon its arrival in my garage, I poured over blogs and videos to learn all I could about rehabbing old particle board furniture. Through my research of 1970s Mediterranean furniture, I also discovered that the piece was actually most likely a dresser, not a buffet.
Yuck!
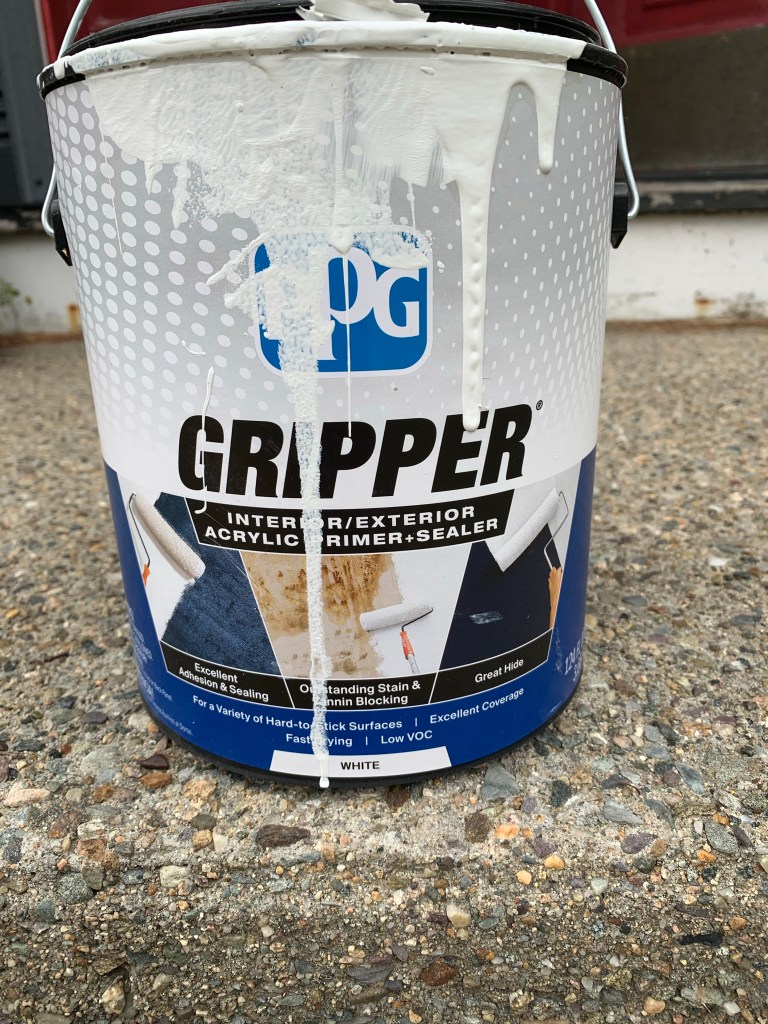
I was relieved to find out that laminate particle board could be painted and repaired. But the first order of business was cleaning. The piece was filthy, and I soon discovered it smelled very strongly of cigarette smoke. The smell was so bad, I dubbed it The Cigar Box. Even the fact that it had been sitting outside for a week did little to get rid of the stench. Immediately, I opened all the drawers to help air them out. But even after several cleanings, I could still smell smoke, so I went to the grocery store and bought baking soda. Pouring it over every crevice, I waited, hoping it would take away most of the lingering smell. After vacuuming up the baking soda, I could still smell smoke, so I decided to paint every inch of the pieces with primer. After a couple coats, the smell thankfully started to disappear.
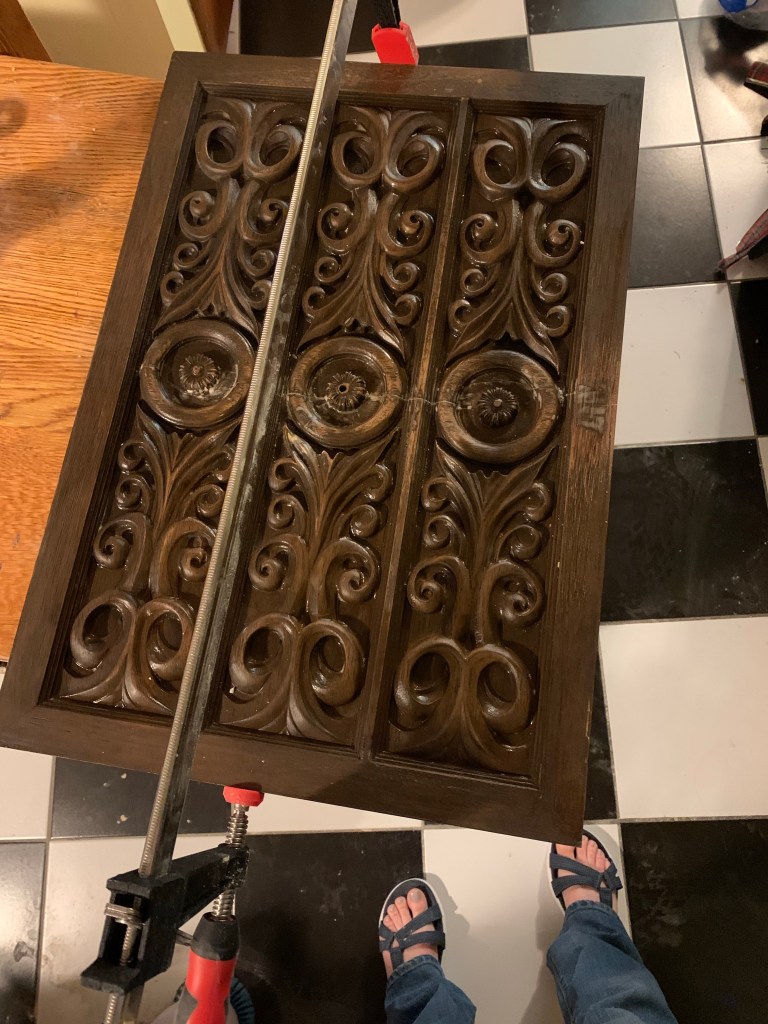
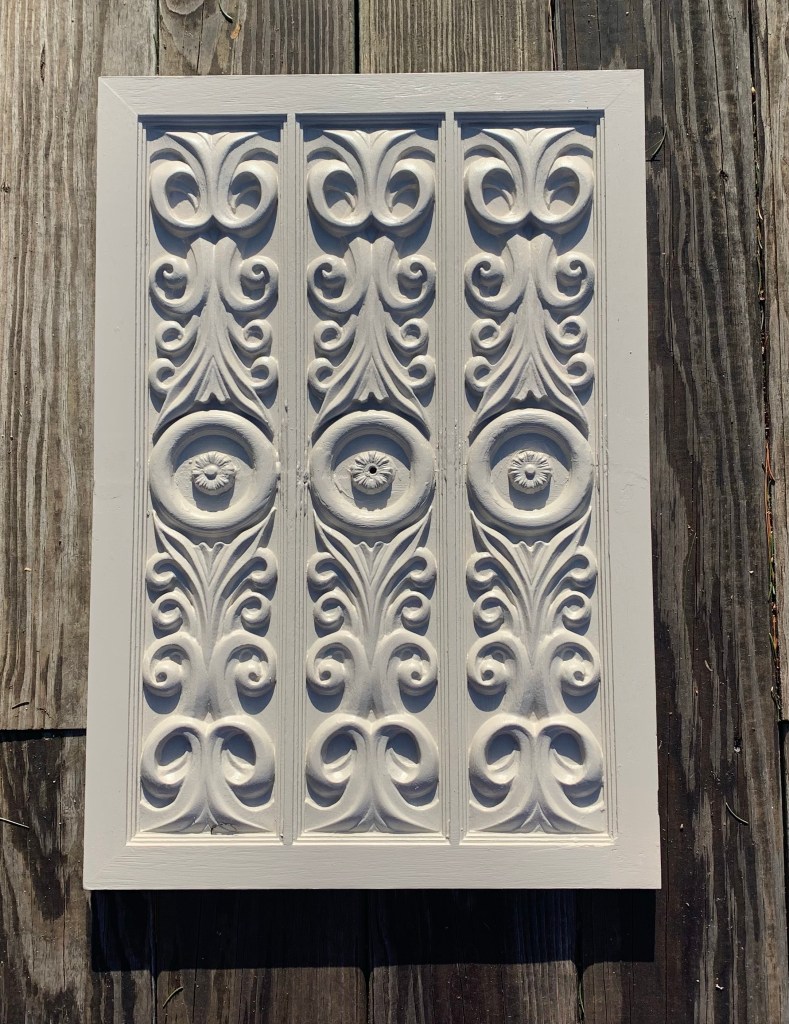
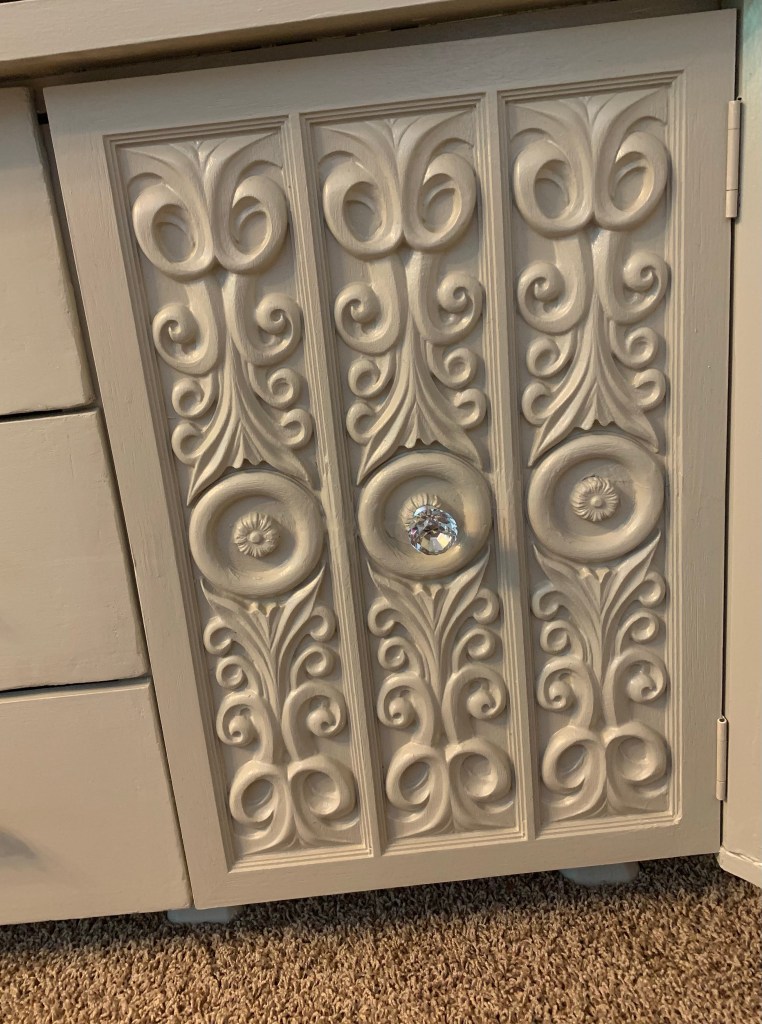
A close up of a cabinet door.
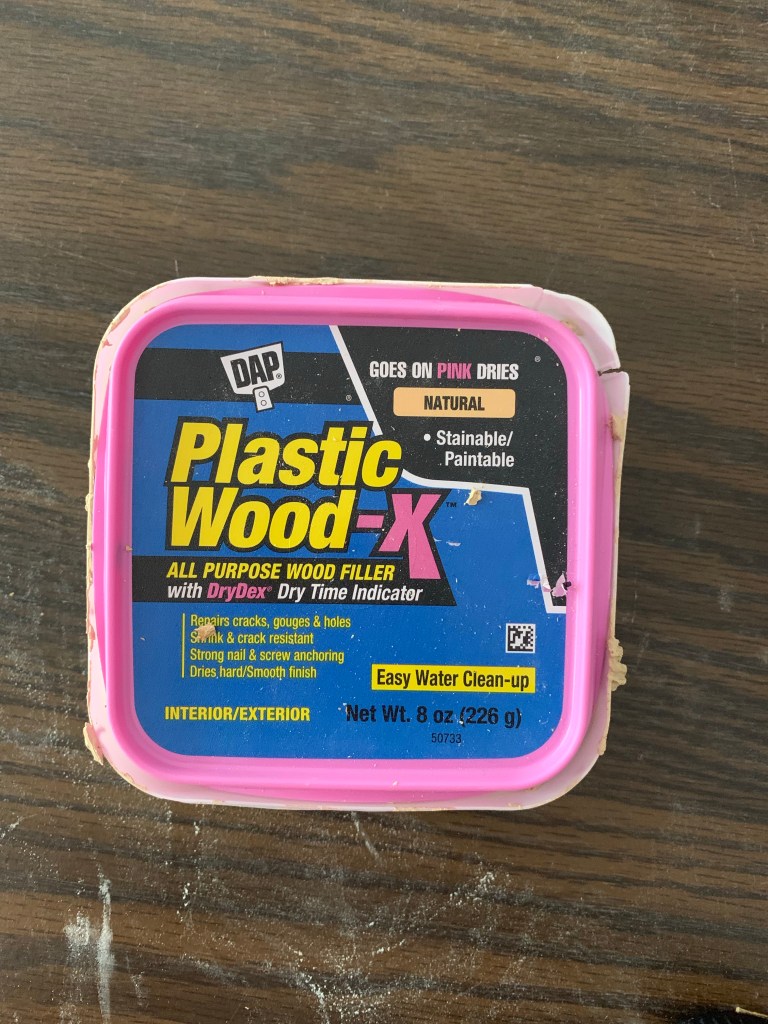
I was surprised the funky cabinet doors on either side were not made out of wood but resin. After decades of use, the resin was cracked and damaged in some spots. Using clamps, I gently applied pressure to the doors to close in the cracks. Then I used Gorilla Glue to seal them shut. The glue held the resin together and made it stronger, preventing any more damage. Once the glue dried, I sanded it smooth then applied plastic wood to repair the rest of the damage. After everything was dry, I sanded again and covered the doors with two coats of gripper primer.
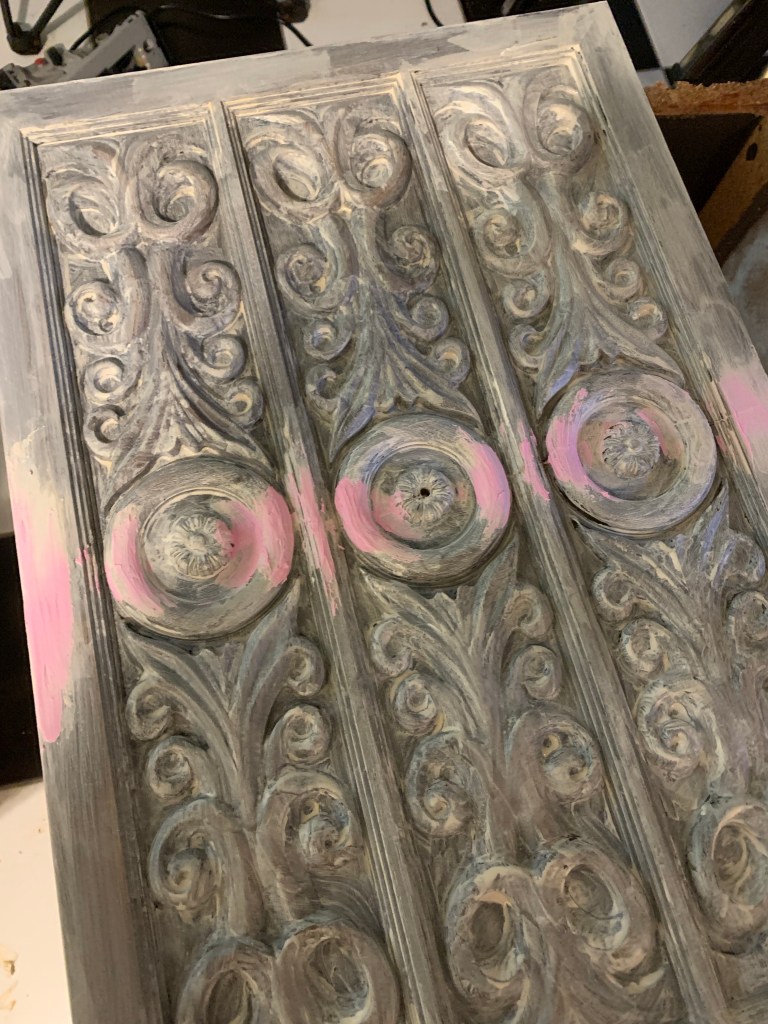
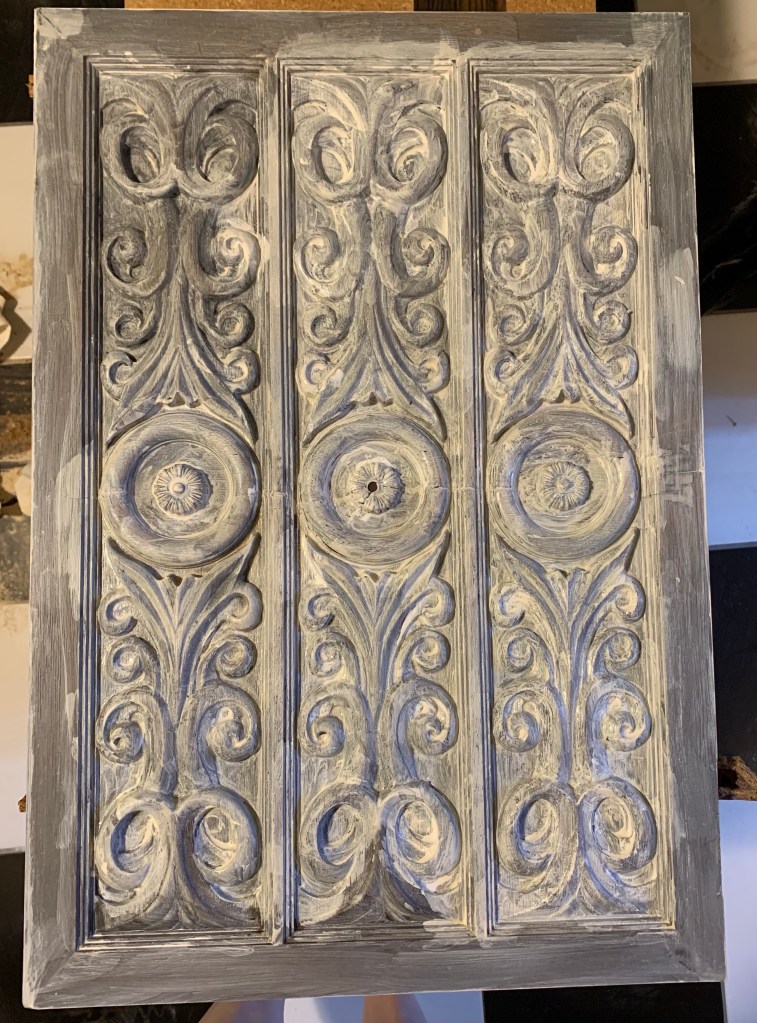
1 coat of primer.The cabinet door after two coats of primer.
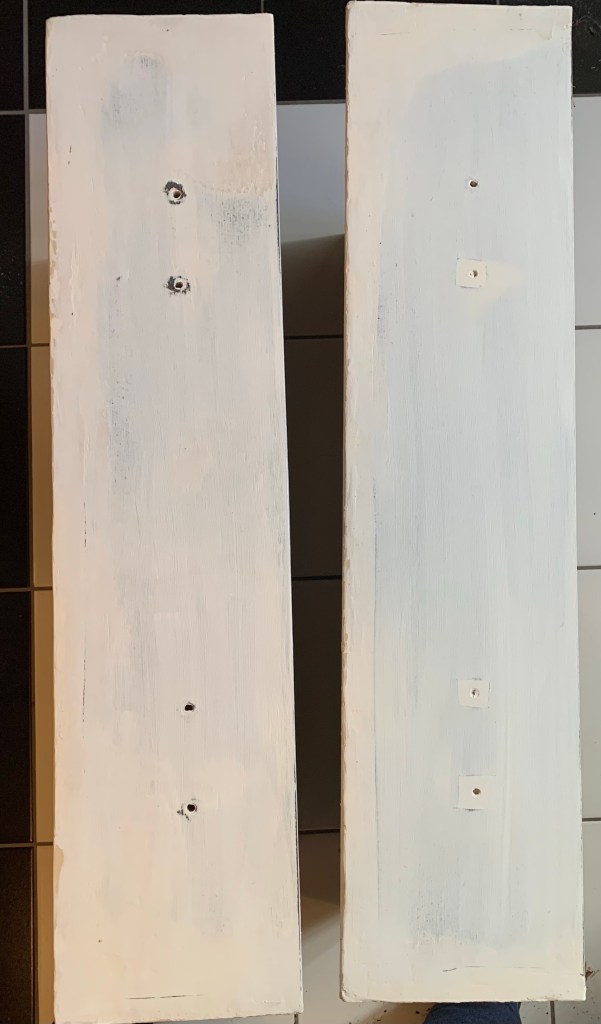
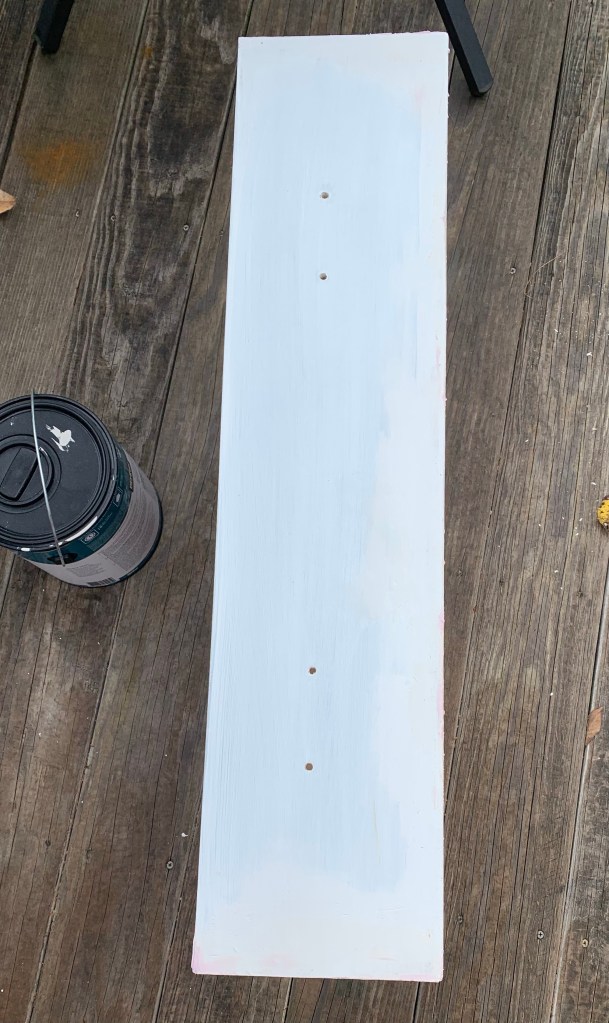
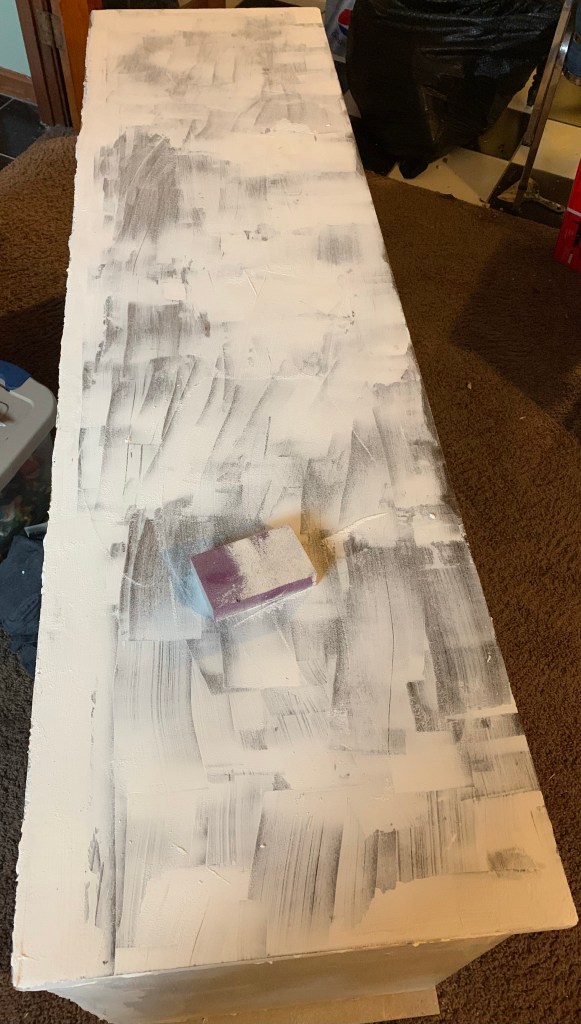
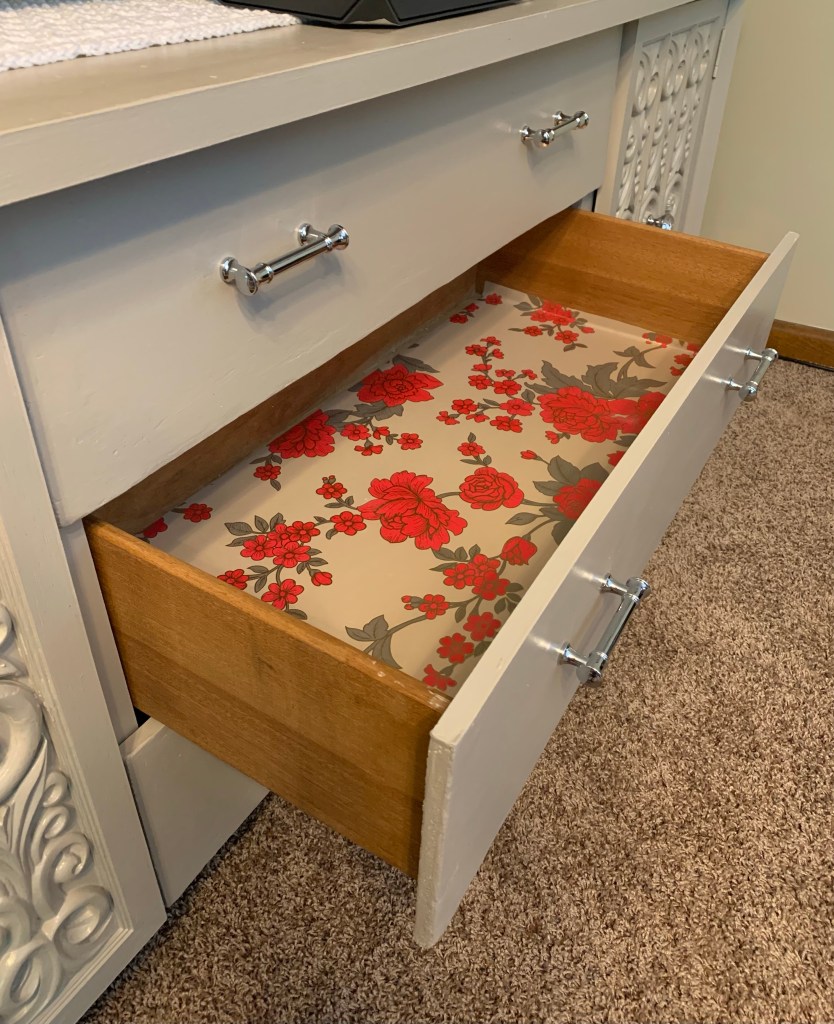
The drawers were my next obstacle. There was quite a bit of damaged laminate. Using a razor blade, I scored, then cut off all the curling laminate around the edges. Next I removed any bulging, water-damaged particle board. Then I painted a few thin layers of Gripper primer, sanding between coats.
Two coats of primer.
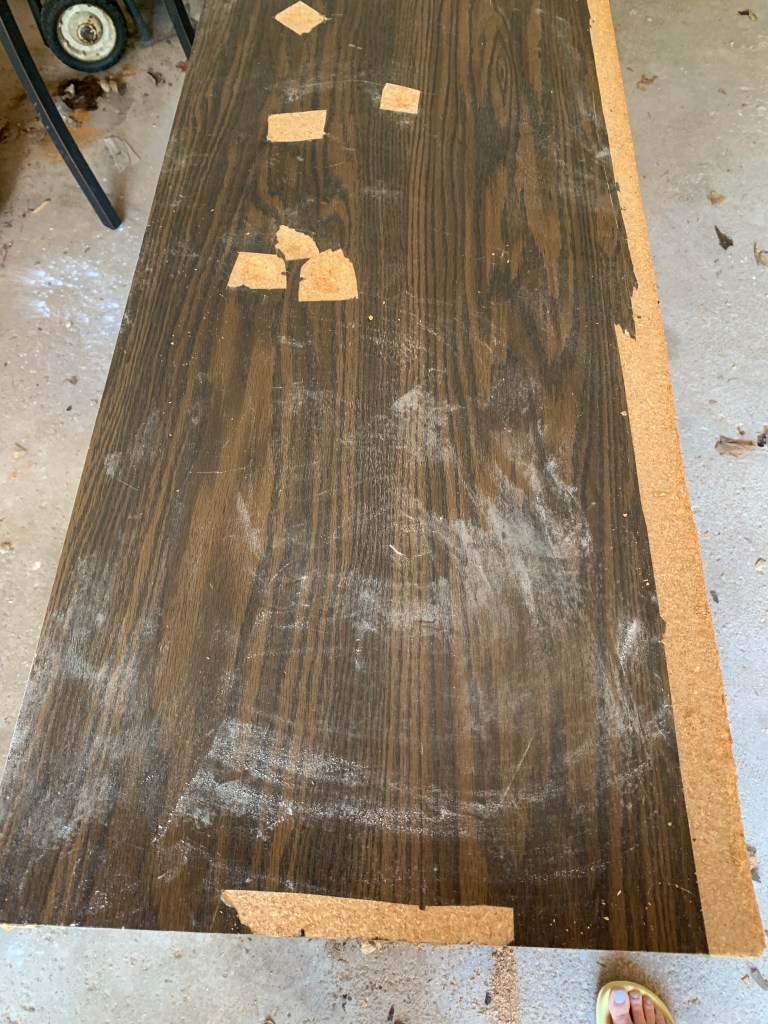
The top of the piece also had a lot of water damage and bubbling laminate. Using the razor, I scored around each bubble and then dug out the swelled particle board. After that I covered the divots with Plastic Wood.
I used several buckets of Plastic Wood to fill in the dips and smooth out the top.
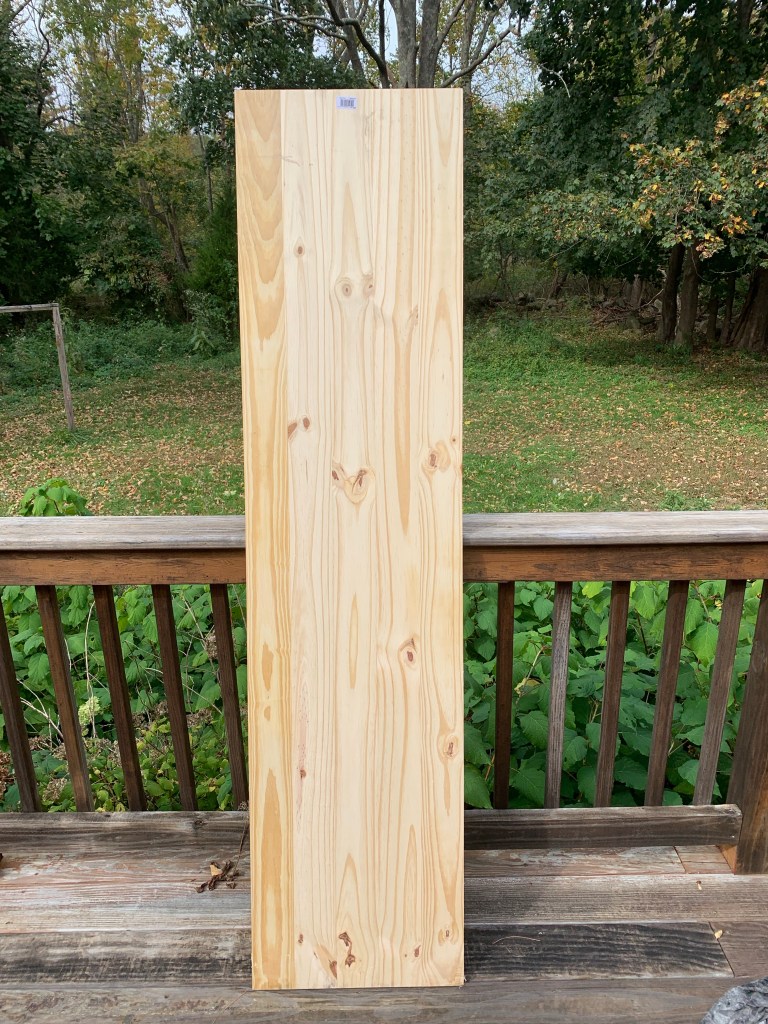
The bottom of the dresser was rotted from sitting out in the elements for so long, so I had to take it off. It was much easier than I was anticipating. It literally fell off and crumbled in my hands with just the slightest bit of help. But this left me with another problem: what to use in its place. Luckily, a trip to the home improvement store’s lumber area solved this problem. To my surprise, the store actually had a piece of wood that fit the bottom quite nicely. I also picked up some small table legs while I was there.
Tip: Check the home improvement store’s website before making the drive. Most stores keep an inventory list online along with the aisle and bin where the item is located. This saves a ton of time in searching the aisles for what you’re looking for. It will also tell you if an item is in stock.
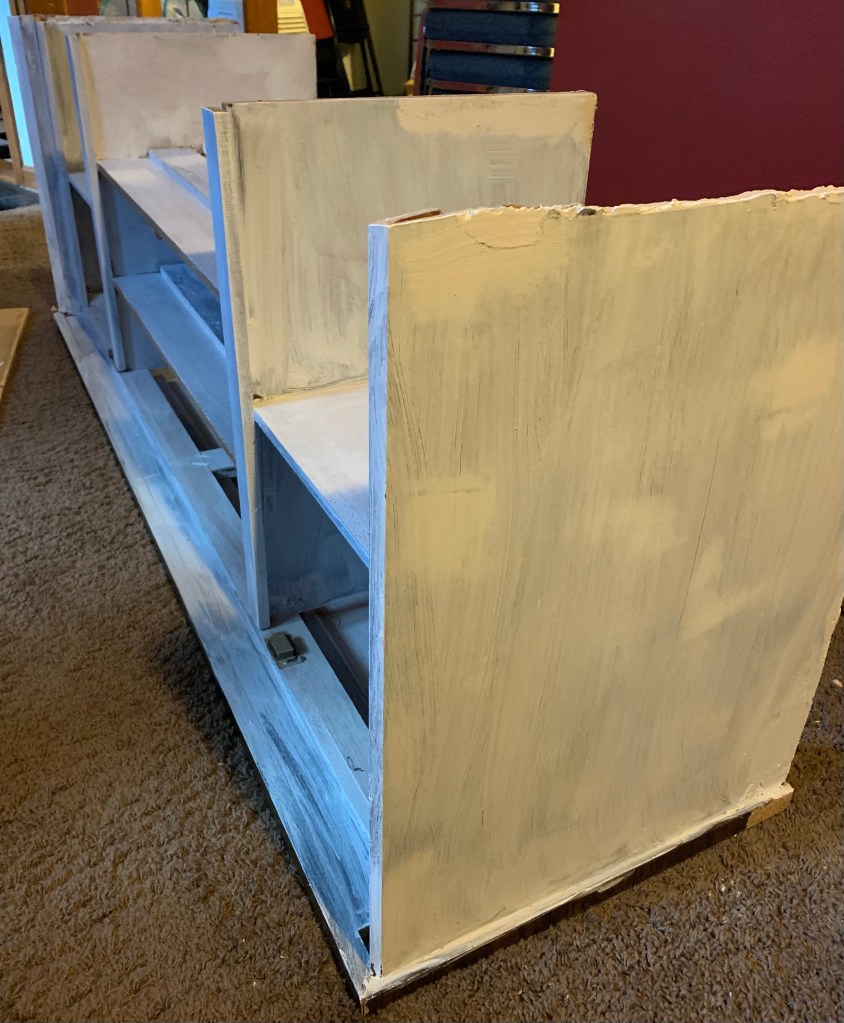
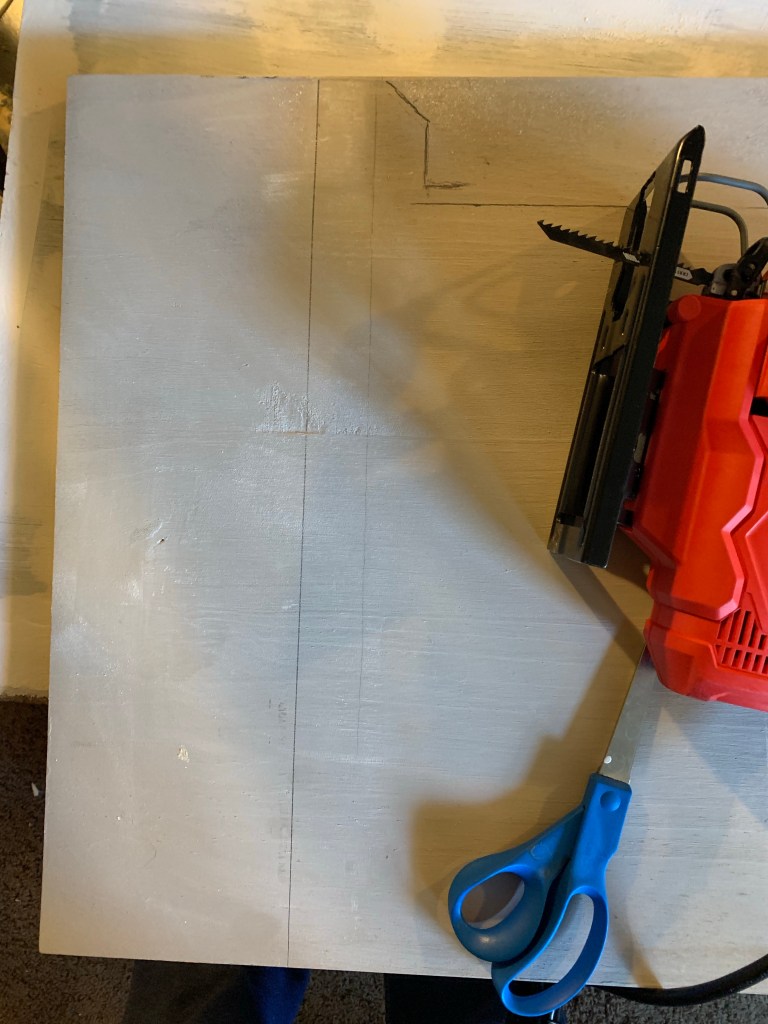
With a level and a small saw, I sawed the bottom as evenly as I could.
I sawed about seven inches off the bottom and painted the entire piece with primer to rid it of the smoke smell.
Next, I placed the dresser on top of the wood I bought and traced around the piece. I had to cut the excess from the front and sides to allow the cabinet doors and the bottom drawer to close. The jigsaw made quick work of the cuts.
Using a pencil, I traced the indents of the piece then cut it with a jigsaw.This is what it looked like after I cut and painted the wood.
Placing the piece upside down, I glued the plywood to the bottom using wood glue. Then I found several heavy boxes in my garage and sat them on top of the wood until it was dry.
A view from the side and the 1/4 inch round trim.
Despite my best efforts, the bottom looked a little ragged in spots. To fix this, I cut some 1/4 inch round trim to hide the jagged edges of my cuts. Then I glued the pieces in place. To make it look more polished, I sealed the edges of the trim with paintable caulk and nailed the trim into place with some finishing nails.
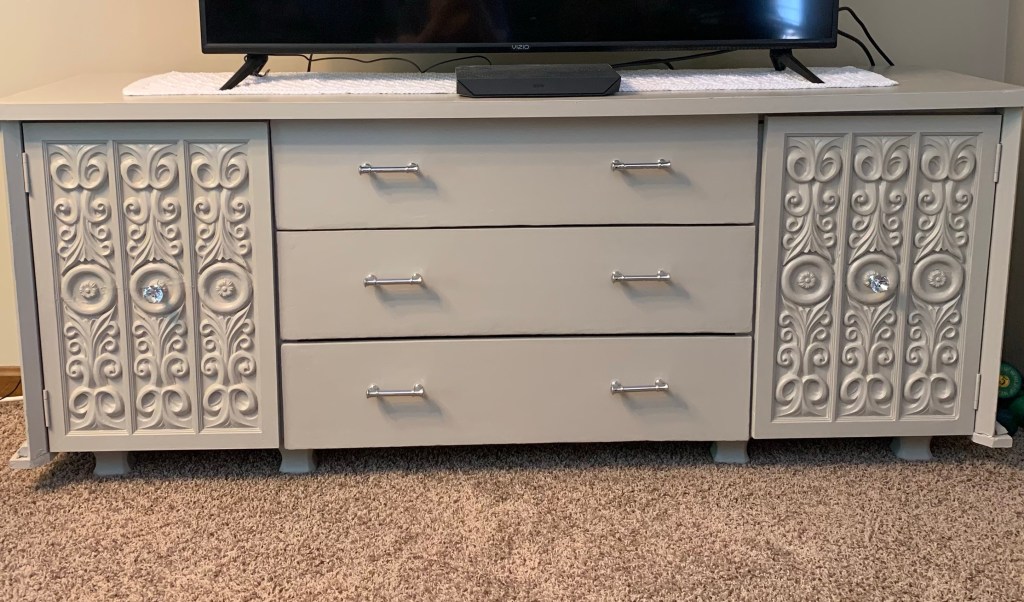
For the paint, I wanted to go with a greige color. I found the perfect color with Behr Perfectly Taupe in a satin finish. At times the paint looks gray, and others it takes on a more beige tone.
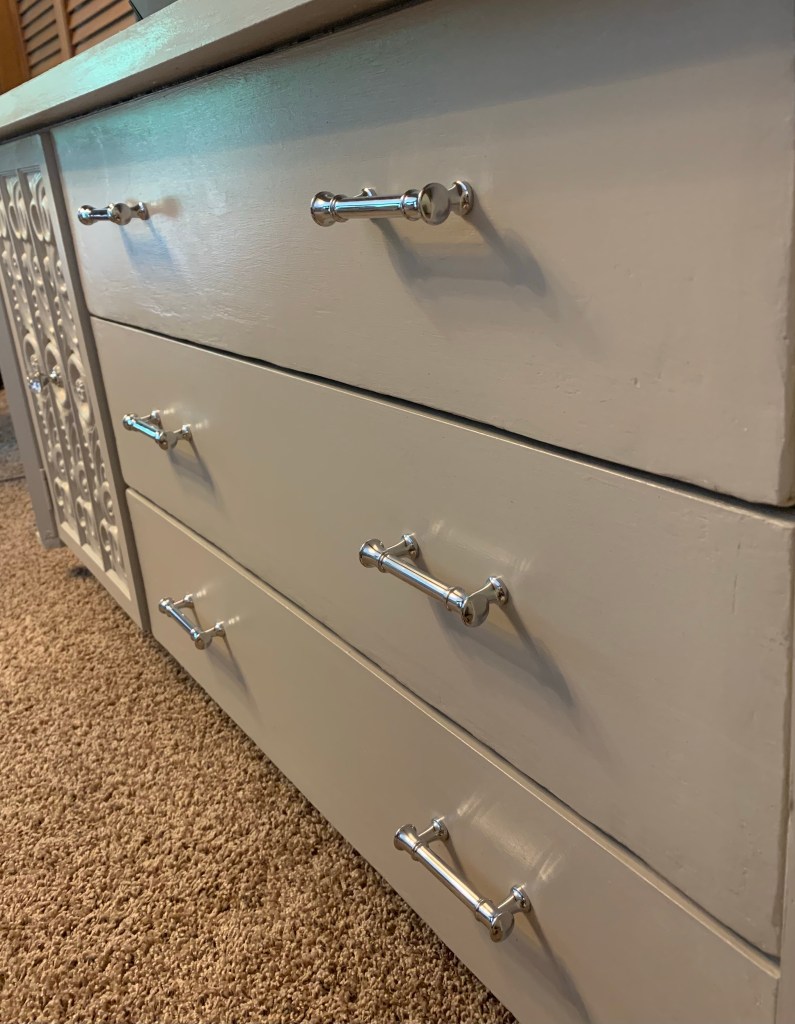
After two coats of paint.
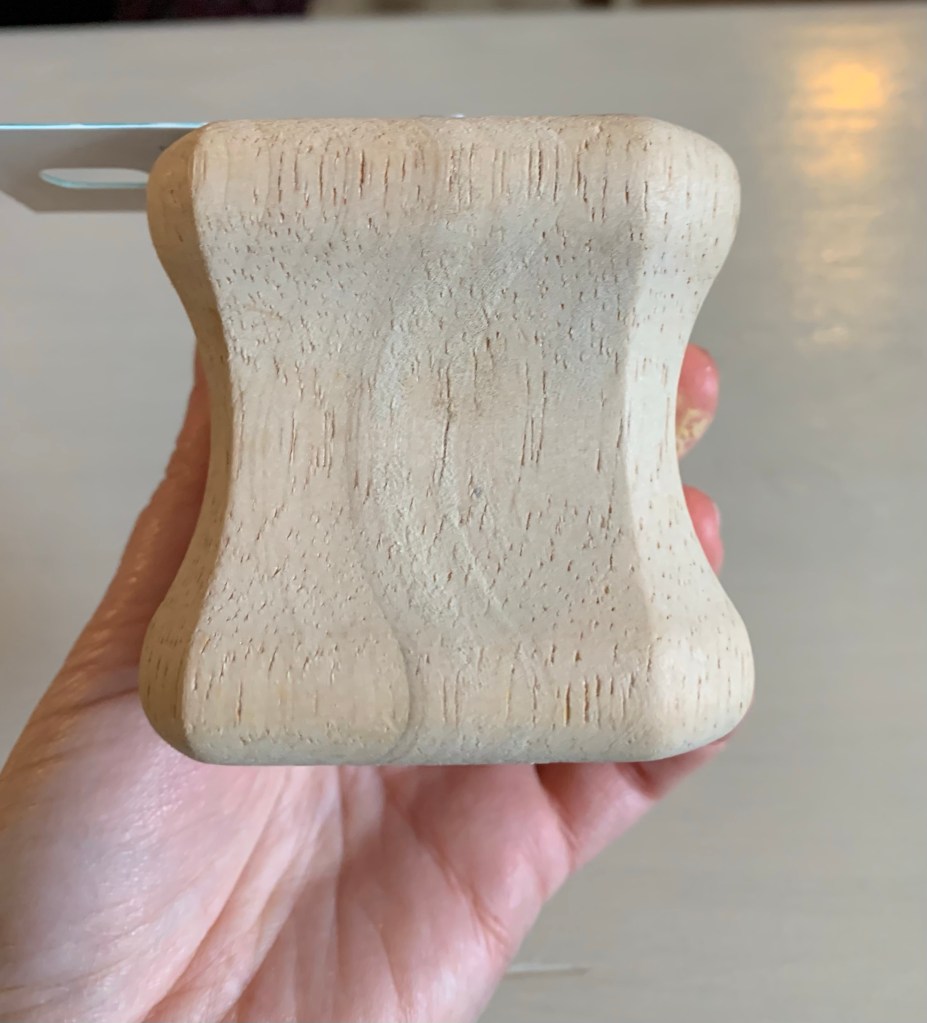
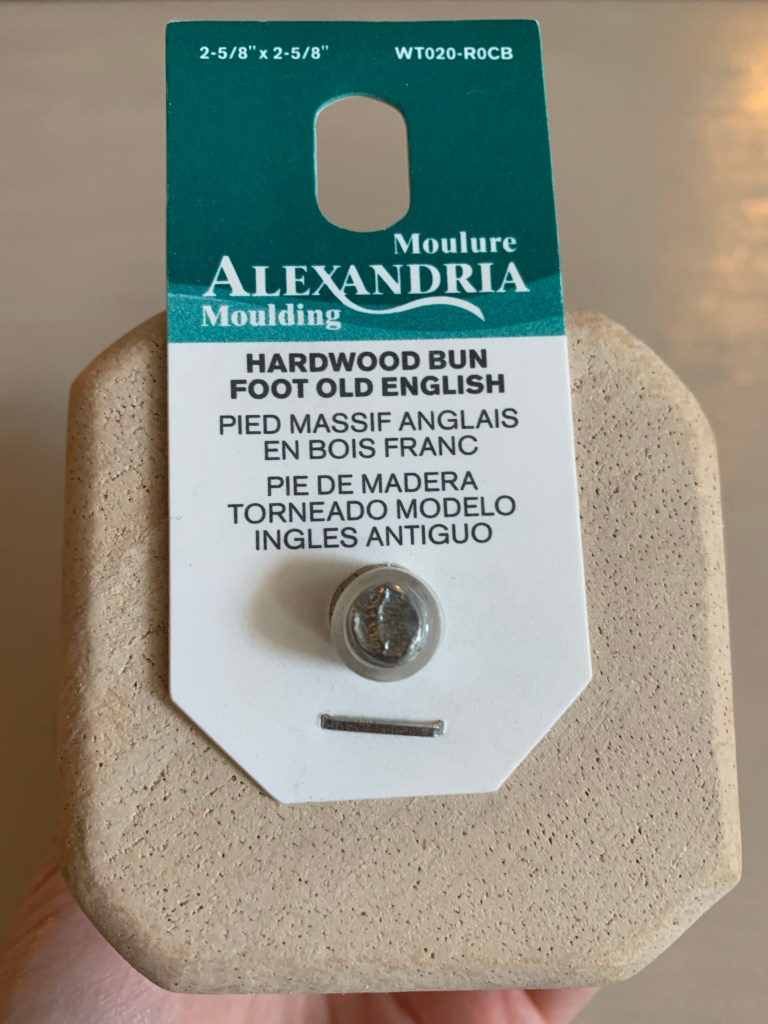
To lift up the piece I found some cute bun table legs. Since the piece is very heavy, I went with eight legs to help distribute the weight.
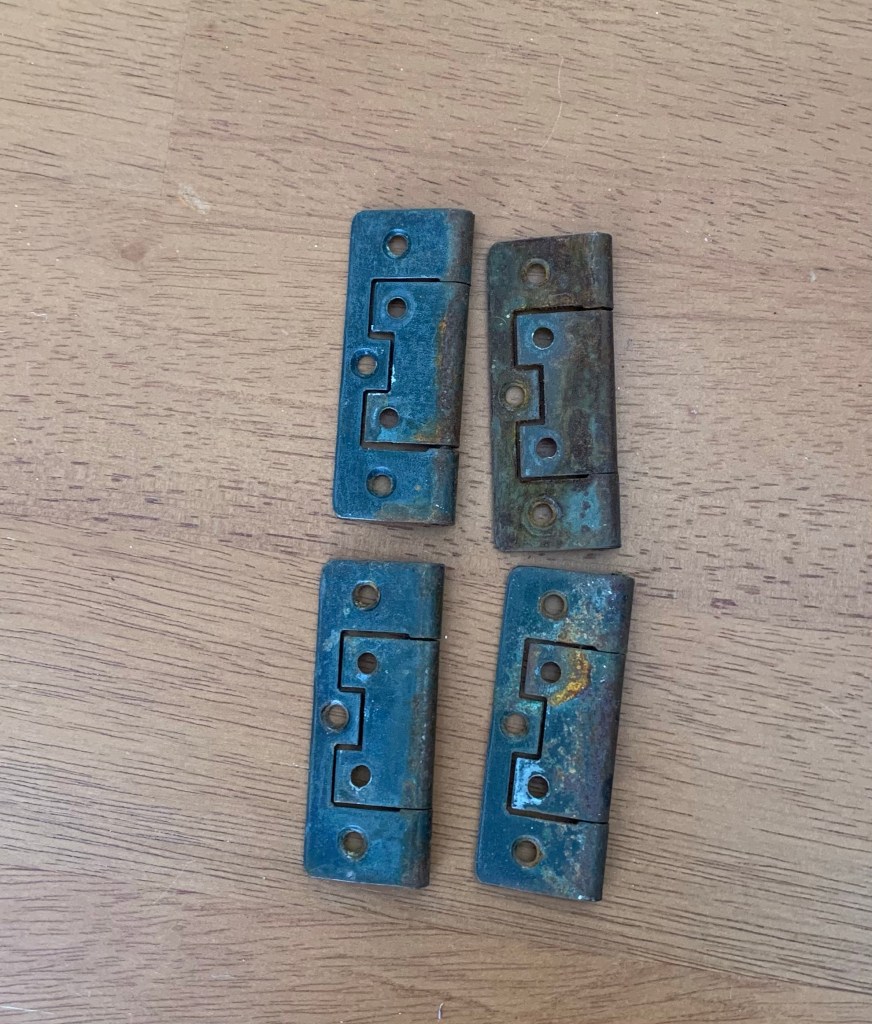
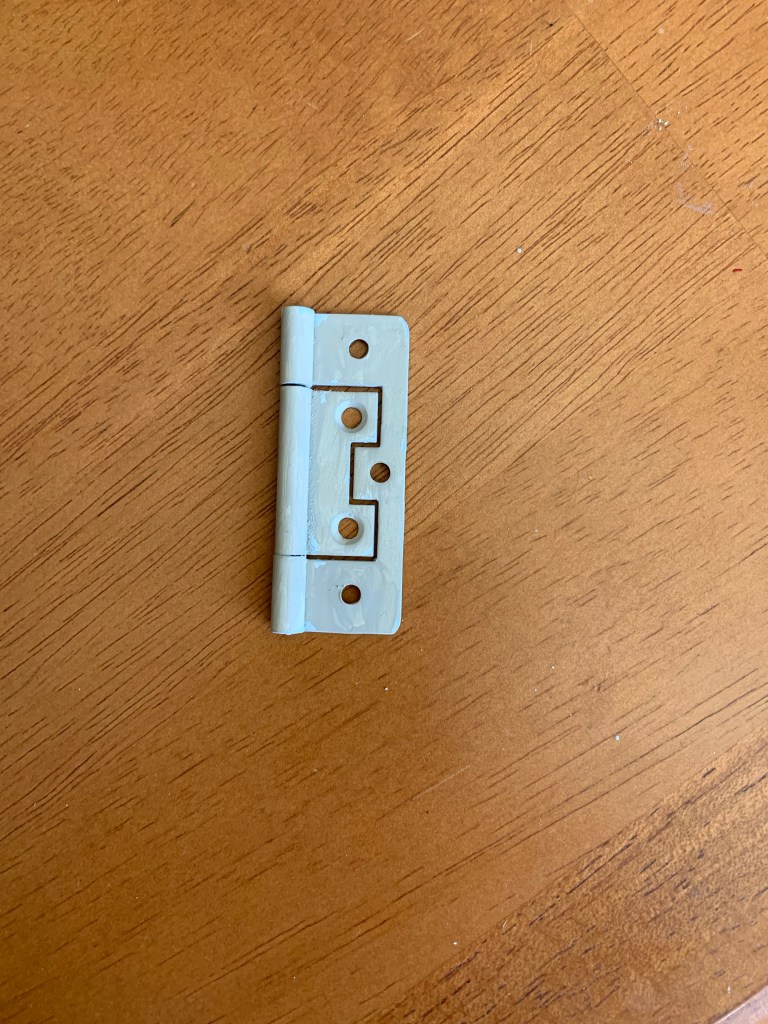
The cabinet door hinges needed a quick cleaning with a wire brush and a mixture of warm water, vinegar and dish soap. Once they were dry, I sprayed them with a metal primer, then painted them with the same taupe paint to blend in with the rest of piece.
After cleaning with wire brush.Metal primer applied.
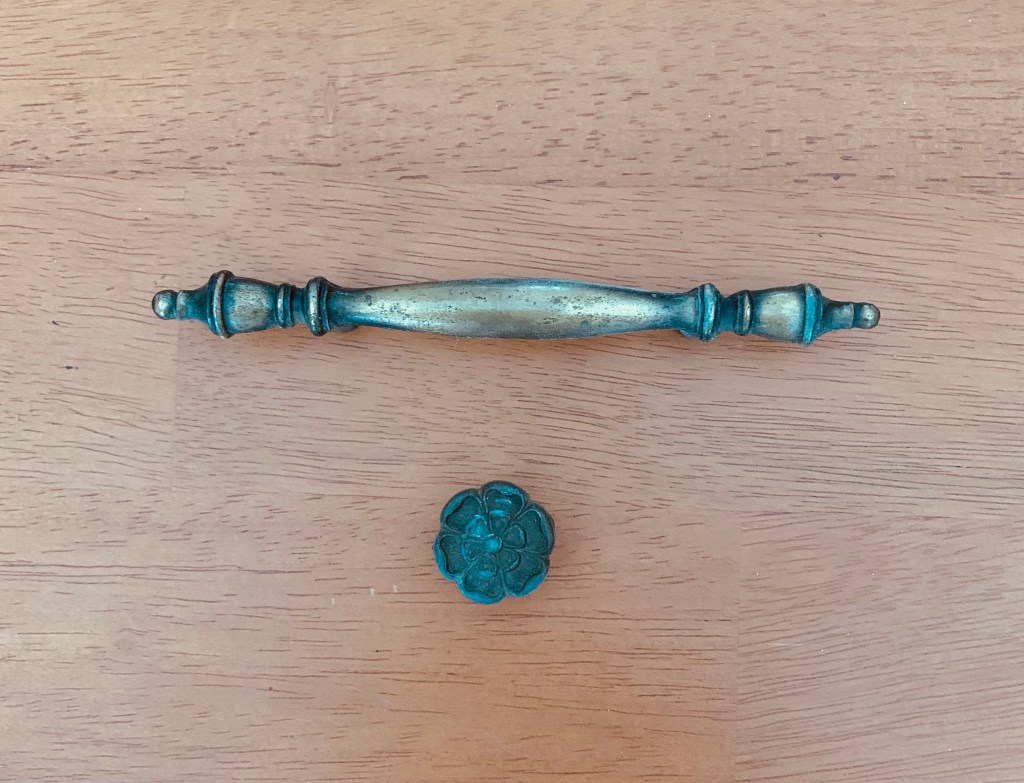
For the fixtures, I wanted to add some sparkle to the funky doors. The existing pulls were not going to cut it. Instead, I used a sparkly solitaire knob for each cabinet door and chrome handles for the drawers. I also found pretty shelf paper online to line the inside of the drawers.
Original hardware.
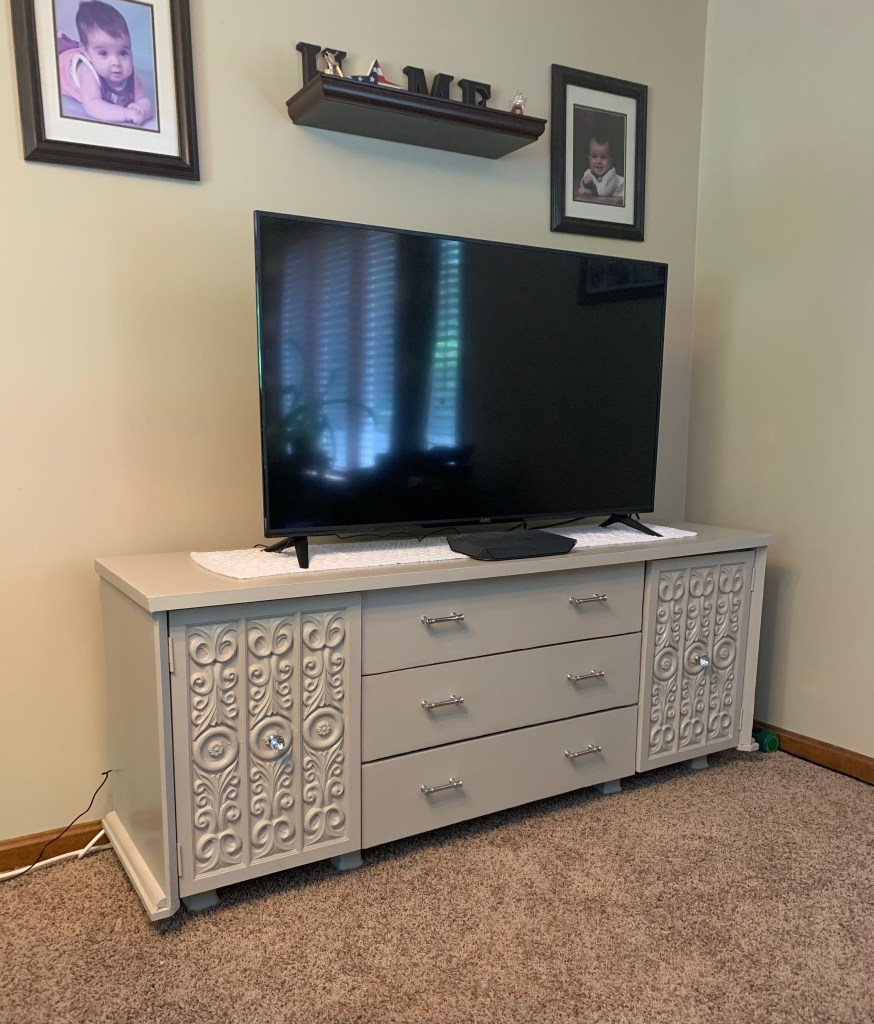
This piece was definitely a ton of work, but I really love how it turned out. The piece fits perfectly against my wall, and holds not only my TV, but has so much storage potential. I’m glad I was able to save this dresser from the garbage. It’s not only a unique piece of furniture, but an elegant addition to my family room. Who knew such an ugly, smelly old piece could find new life in my family room? I hope this inspires you to look differently at the old furniture on the side of the road. It could become a treasured piece of furniture in your home.
This looks so much better than before!New shelf paper.The cabinet doors are even fancier now with a Diamond touch.
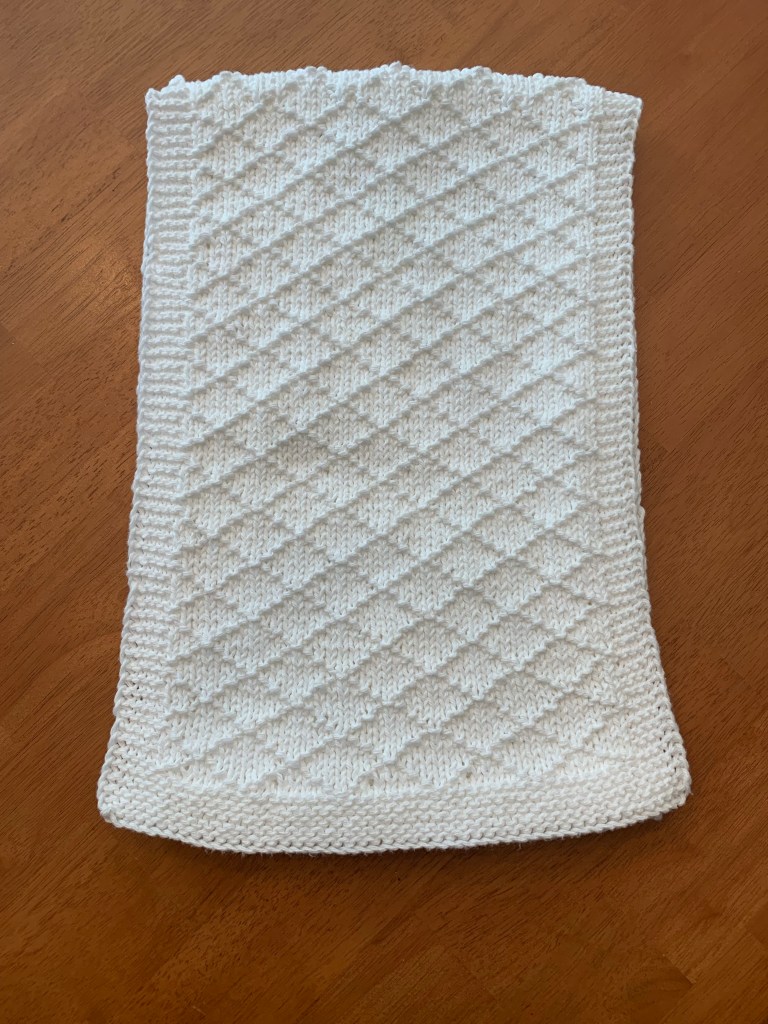
For the past year I’ve been working on an upcycled TV stand that I hope to show off next month. Now that I’m nearly finished, I wanted to buy a table runner to go underneath the TV to help protect the top finish of the piece. After searching online, I found a beautiful diamond macrame table runner. But, at over $150, it was definitely out of my budget. So, I decided to get out my knitting needles and come up with something far less expensive.
After perusing a knitting book, I decided on the Diamond Seed pattern for my runner. The Diamond Seed creates a simple diamond pattern with just knit and purl stitches. To ensure the piece stayed flat, I added a band of garter stitches on the ends and sides of the runner.
Next, I headed to the craft store to find yarn. Using the inspiration of the macrame table runner I found online, I wanted to use cotton yarn. I not only wanted the texture, but I wanted something that could be easily cleaned.
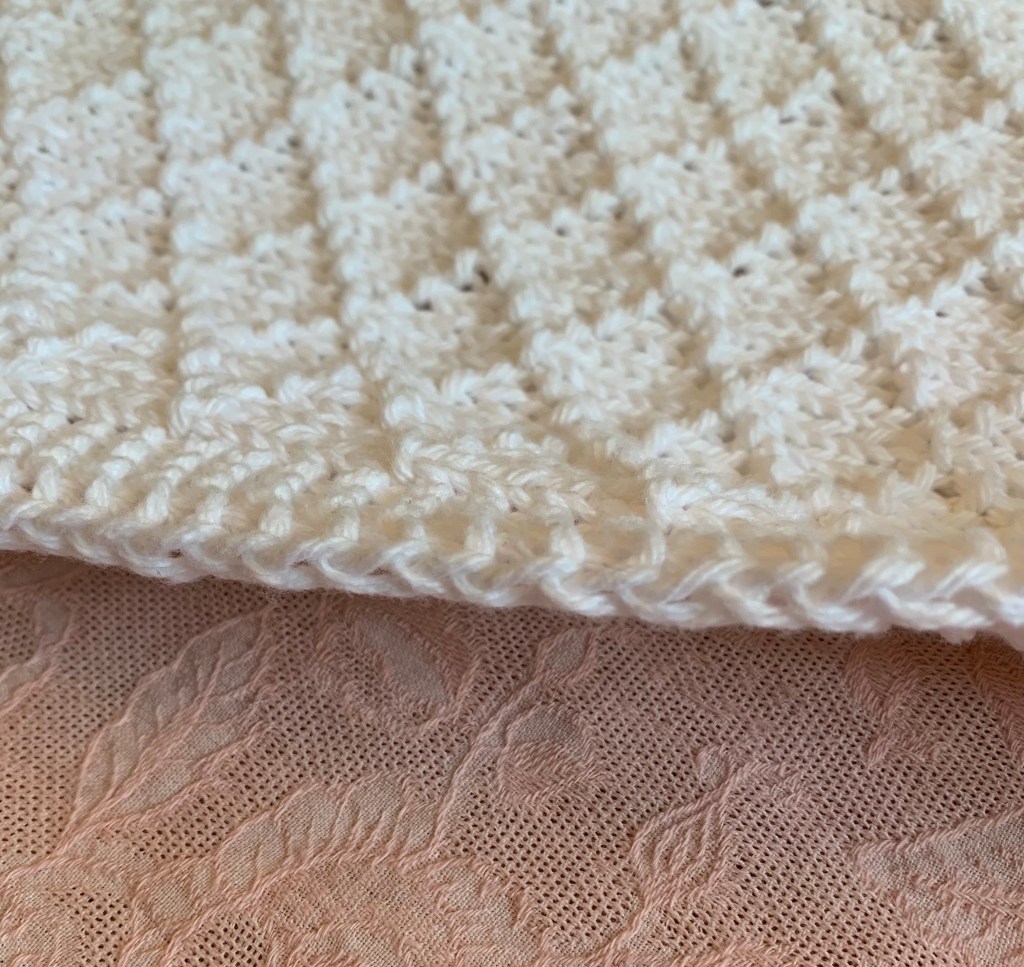
To make the runner look more polished, I added a selvedge edge. A selvedge edge gives the ends of a knitted piece a braided look. Although it may sound complicated, it’s actually quite simple to do. A typical garter stitch border can look kind of bumpy, and by adding a selvedge edge, it gives knitted pieces a more elegant look. To create a selvedge edge, all you have to do is slip the first stitch purl-wise from your needle with the yarn in the front. Then move the yarn to the back and knit as usual. Here’s a video to illustrate:
Selvedge edge
Knitted Diamond Table Runner Pattern:
Supplies: pair of size 8 knitting needles and one cone of Sugar’n Cream cotton yarn in white.
Cast on 50 stitches. Then work in garter stitch (knit every stitch) for the first 10 rows. Then begin pattern as follows:
Row 1: Knit five stitches to create border, then place stitch marker to mark place. Then P1, k7*. Repeat from * across row until the last five stitches. Place a stitch holder and knit last five stitches.
Row 2: k5 for border. Then k1, p5, k1, p1*. Repeat from * across row until you reach stitch holder, then knit last 5 stitches for border.
Row 3: k5 for border. Then k2, p1, k3, p1, k1*. Repeat from * across row until you reach stitch holder, then knit last 5 stitches for border.
Row 4: k5 for border. Then p2, k1, p1, k1, p3*. Repeat from * across row until you reach stitch holder, then knit last 5 stitches for border.
Row 5: k5 for border. Then k4, p1, k3*. Repeat from * across row until you reach stitch holder, then knit last 5 stitches for border.
Row 6: k5 for border: Then p2, k1, p1, k1, p3*. Repeat from * across row until you reach stitch holder, then knit last 5 stitches for border.
Row 7: k5 for border: Then k2, p1, k3, p1, k1*. Repeat from * across row until you reach stitch holder, then knit last 5 stitches for border.
Row 8: k5 for border. Then k1, p5, k1, p1*. Repeat from * across row until you reach stitch holder, then knit last 5 stitches for border.
Repeat these 8 rows until table runner reaches desired length. To complete runner, knit 10 more rows of garter stitch to create border. Bind off and use a tapestry needle to hide yarn tails.
I made my runner 50 inches to fit under my TV. The diamond seed pattern is such a simple pattern, but I think it looks very elegant. It really makes my TV stand look even better. Since it was so easy, I’m already thinking up new ideas to create table runners for other areas of my home.