For the past year I’ve been working on an upcycled TV stand that I hope to show off next month. Now that I’m nearly finished, I wanted to buy a table runner to go underneath the TV to help protect the top finish of the piece. After searching online, I found a beautiful diamond macrame table runner. But, at over $150, it was definitely out of my budget. So, I decided to get out my knitting needles and come up with something far less expensive.

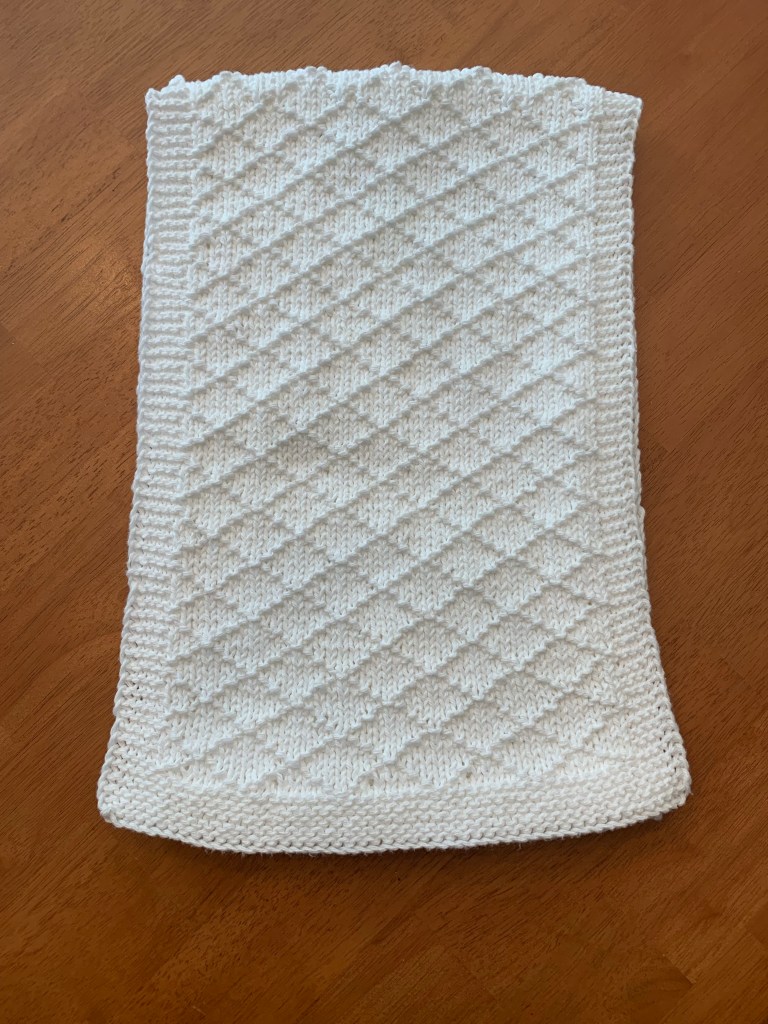
After perusing a knitting book, I decided on the Diamond Seed pattern for my runner. The Diamond Seed creates a simple diamond pattern with just knit and purl stitches. To ensure the piece stayed flat, I added a band of garter stitches on the ends and sides of the runner.
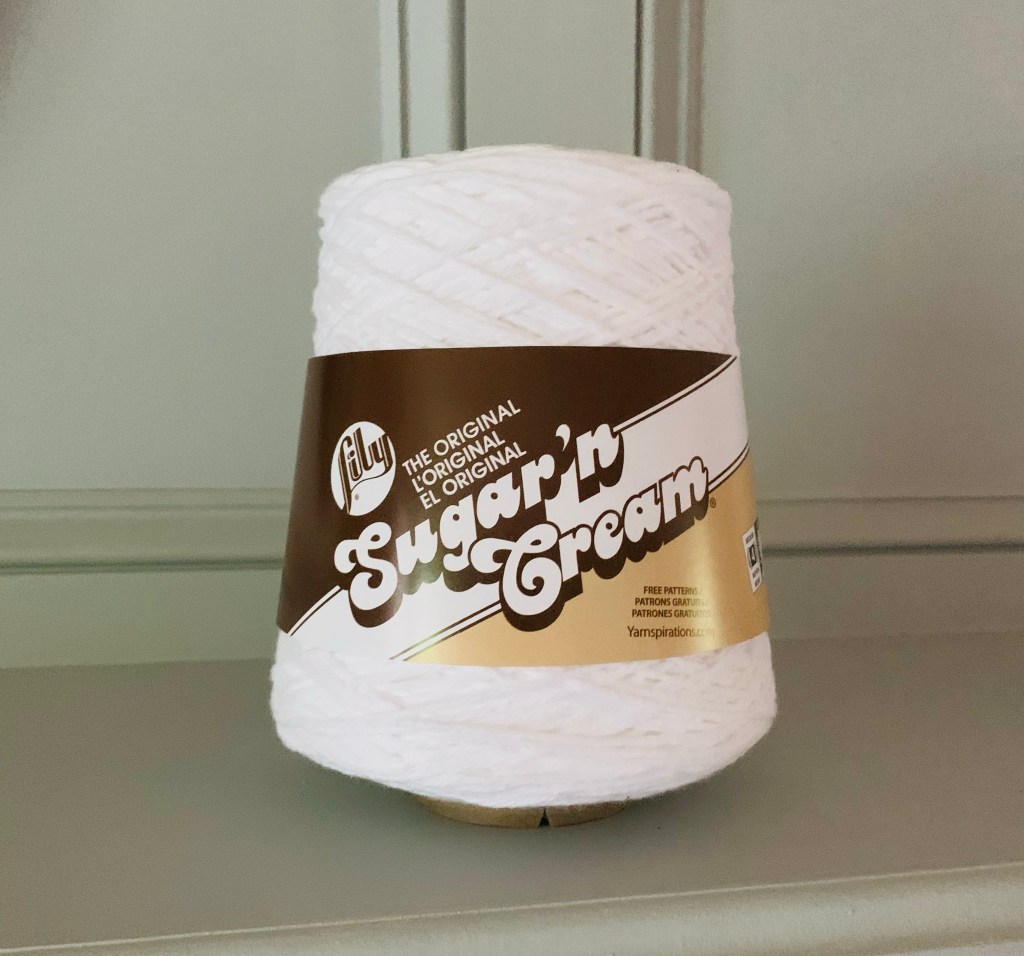

Next, I headed to the craft store to find yarn. Using the inspiration of the macrame table runner I found online, I wanted to use cotton yarn. I not only wanted the texture, but I wanted something that could be easily cleaned.
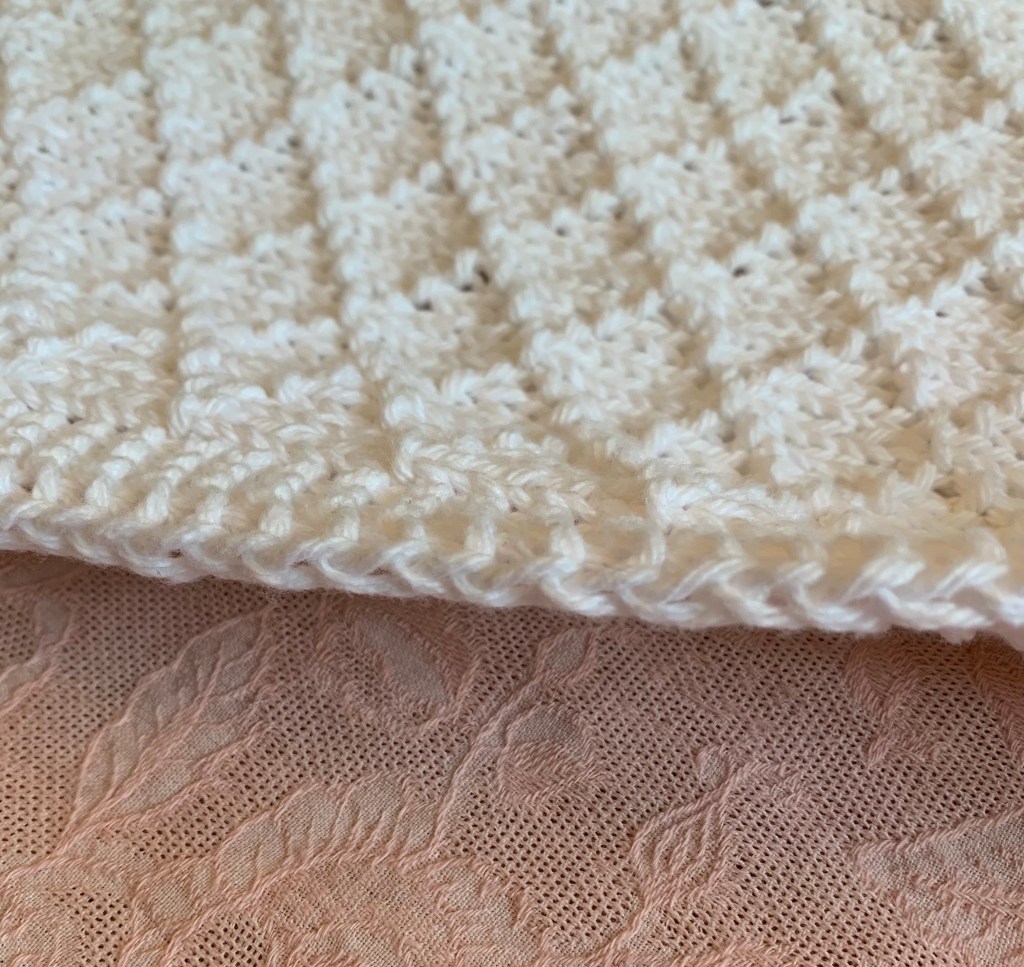
To make the runner look more polished, I added a selvedge edge. A selvedge edge gives the ends of a knitted piece a braided look. Although it may sound complicated, it’s actually quite simple to do. A typical garter stitch border can look kind of bumpy, and by adding a selvedge edge, it gives knitted pieces a more elegant look. To create a selvedge edge, all you have to do is slip the first stitch purl-wise from your needle with the yarn in the front. Then move the yarn to the back and knit as usual. Here’s a video to illustrate:
Knitted Diamond Table Runner Pattern:
Supplies: pair of size 8 knitting needles and one cone of Sugar’n Cream cotton yarn in white.
- Cast on 50 stitches. Then work in garter stitch (knit every stitch) for the first 10 rows. Then begin pattern as follows:
- Row 1: Knit five stitches to create border, then place stitch marker to mark place. Then P1, k7*. Repeat from * across row until the last five stitches. Place a stitch holder and knit last five stitches.
- Row 2: k5 for border. Then k1, p5, k1, p1*. Repeat from * across row until you reach stitch holder, then knit last 5 stitches for border.
- Row 3: k5 for border. Then k2, p1, k3, p1, k1*. Repeat from * across row until you reach stitch holder, then knit last 5 stitches for border.
- Row 4: k5 for border. Then p2, k1, p1, k1, p3*. Repeat from * across row until you reach stitch holder, then knit last 5 stitches for border.
- Row 5: k5 for border. Then k4, p1, k3*. Repeat from * across row until you reach stitch holder, then knit last 5 stitches for border.
- Row 6: k5 for border: Then p2, k1, p1, k1, p3*. Repeat from * across row until you reach stitch holder, then knit last 5 stitches for border.
- Row 7: k5 for border: Then k2, p1, k3, p1, k1*. Repeat from * across row until you reach stitch holder, then knit last 5 stitches for border.
- Row 8: k5 for border. Then k1, p5, k1, p1*. Repeat from * across row until you reach stitch holder, then knit last 5 stitches for border.
- Repeat these 8 rows until table runner reaches desired length. To complete runner, knit 10 more rows of garter stitch to create border. Bind off and use a tapestry needle to hide yarn tails.

I made my runner 50 inches to fit under my TV. The diamond seed pattern is such a simple pattern, but I think it looks very elegant. It really makes my TV stand look even better. Since it was so easy, I’m already thinking up new ideas to create table runners for other areas of my home.
