
A few posts ago I mentioned a macrame angel that used to hang on my mother’s tree. I stole her often off of the tree to play with in my room with my other toys during the Christmas season. To me, she was the most elegant of our Christmas ornaments. I considered her an honored guest for my other toys. I even staged an elaborate wedding in my bedroom for her when she wed another treasured Christmas ornament, The Christmas Yarn Clown. My grandmother even had a similar angel on her tree. Unfortunately, some Christmas boxes in my mother’s basement got damaged a few years back and the macrame angel is no more. All I had of her were memories. Thankfully, I still remember vividly what she looked like. I have wanted to recreate her for a long time, but I wasn’t sure my limited macrame skills were up to the challenge.
Finally, last month I started searching for the perfect materials. I had to at least try to recreate this beautiful ornament. From my memories, the angel was made from thick, white yarn or rope with a wooden bead for her head. A simple silver pipe cleaner served as her halo. To practice, I bought some standard macrame cord. Though it was helpful to practice with, I quickly realized it was far too thin to work for this project. Back to the internet, I found some thick, white clothesline rope that looked the closest to my memories. I also picked some wooden beads and silver pipe cleaners. After a bit of practice I realized with just a few inexpensive materials I could recreate the caroling macrame angel.


Materials:
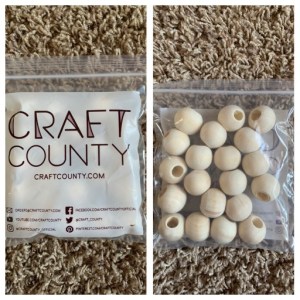
1 1 inch wooden bead with a 3/8 inch opening
1 4” piece of silver or gold pipe cleaner
2 20” pieces of white clothesline rope
Black and red Sharpie markers
Optional items: wood stain and gold paint or marker for hair. I also used a large tapestry needle to thread the rope through the opening of the bead.

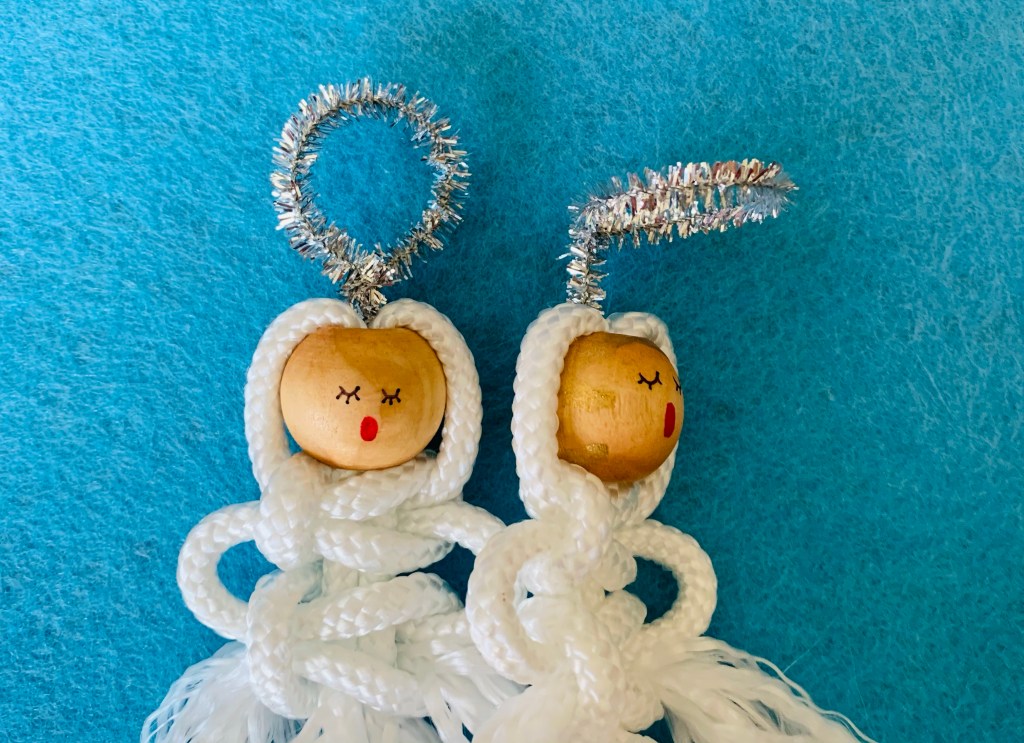
First, stain and draw the face onto your wooden bead. My old macrame angel was a simple stained bead with a drawn-on face and no hair, but you can also get creative and paint hair for your angel. The stain I used was a light golden pecan. You can also leave the bead its natural color if you like, though I recommend staining the bead since I found that the sharpie markers bled on an unstained bead. To draw the face on, I used an ultra-fine tipped sharpie in black and red. The eyes are simply two semi-circles with small lines indicating her eyelashes and her mouth is a red oval. Let the wood stain dry before you draw on the face. Allow the bead to dry completely before moving on.


To start the angel’s body, pull the two pieces of white rope through the top of the angel’s head so that there are 4 pieces hanging down to knot. I used a large tapestry needle to help get the rope through the small opening of the bead. I pulled the rope so that the outside pieces hung about 4 inches longer than the two inner pieces of rope like the picture above. The clothesline rope is much thicker than standard macrame cord and I found that when I started to tie the knots that the outside pieces ended up much shorter than the inner two pieces unless I gave them so more length.
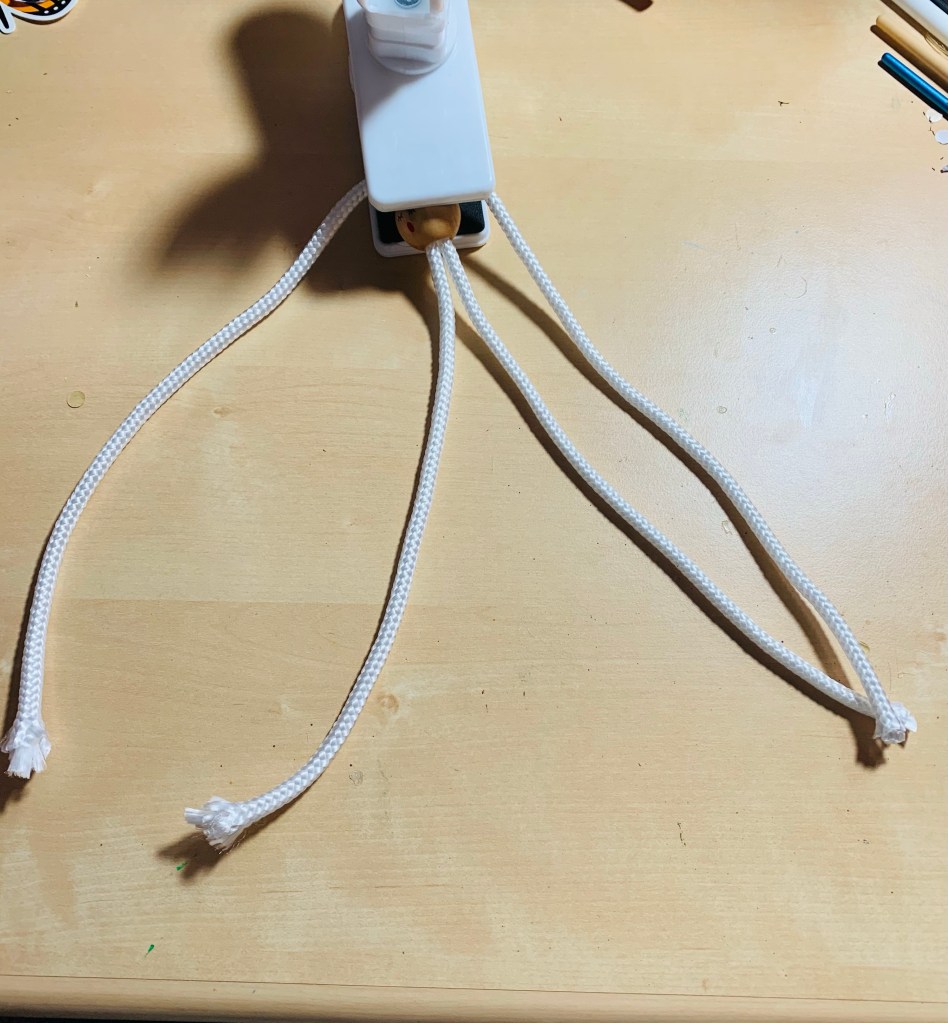

Start by tying a basic square knot. To stabilize the bead, I used an old desk fan clip, but you could also use a clipboard to keep it steady. Again, the thicker rope makes tight knot making difficult, so do your best to get it as tight as possible. After I completed the first square knot, I made a square knot with a loop to create the angel’s arms. It took me a bit of practice and youtube watching to get the loops even on both sides, so it may take a couple tries. The good news is that if you screw up, you can simply untie the knot and try again.
Once you’ve done the two square knots, the upper body of the angel was done! On to her flowing dress. To achieve this, all you need is a fork and some time. Some pent-up aggression helps too. Using the fork’s tongs, I ripped it down the frayed ends of the rope, slowly traveling up to the end of the knots. Of the entire project, this took the most time, but the fork certainly helps things move along more quickly.

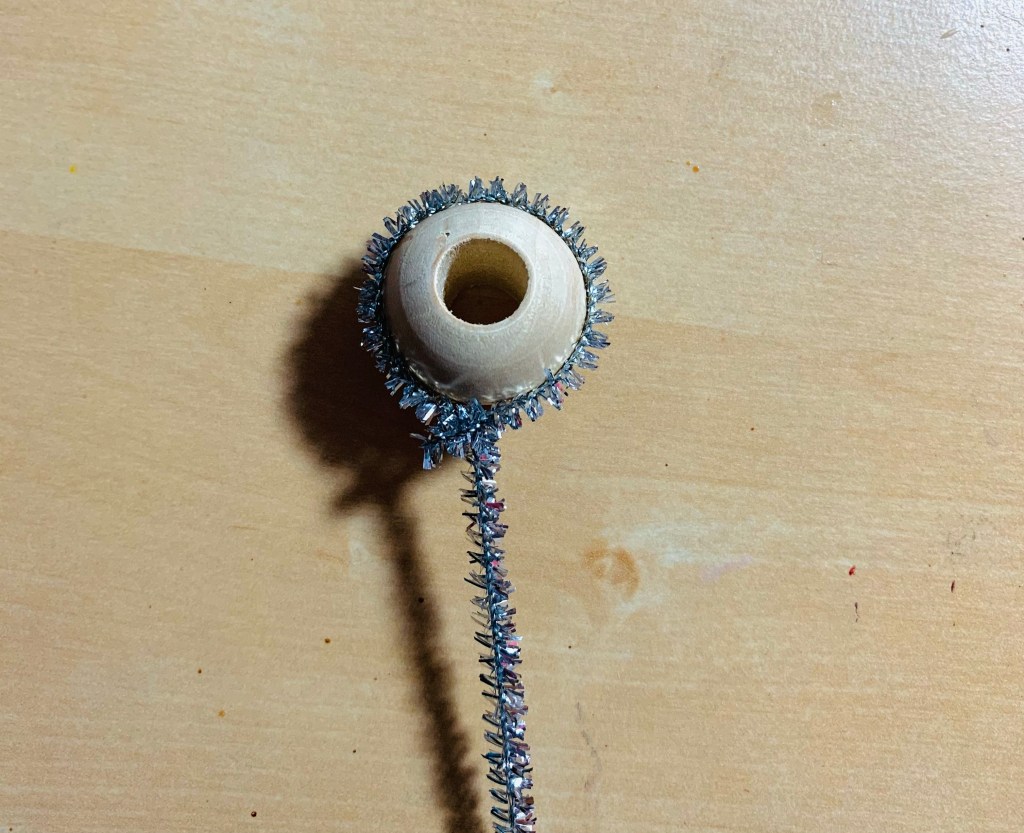
Lastly, I cut a piece of 4” silver pipe cleaner for her halo. The halo can also be used to hang her on the tree. My angel’s halo stuck straight over her head, so that’s how I made my recreation, but you can bend the halo so that it hovers over her head if you want. I used a spare wooden bead as a guide to make my halo a perfect circle. Dab the end in a little bit of glue then insert into the opening of the bead.

When I finished, I brought out my old Christmas Yarn Clown and sat him next to my new macrame angel. Along with a few other tattered ornaments, he is the oldest ornament on my tree and always gets a place of honor. It was a reunion nearly 40 years in the making. I can’t wait to hang them both on my tree next holiday season.


This sounds like such an inspiring and heartwarming project.
LikeLiked by 1 person
Thank you!
LikeLike