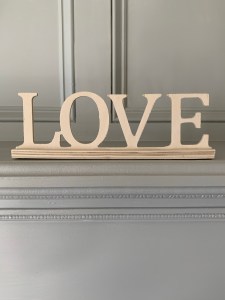
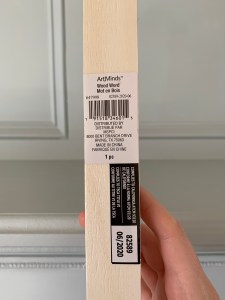
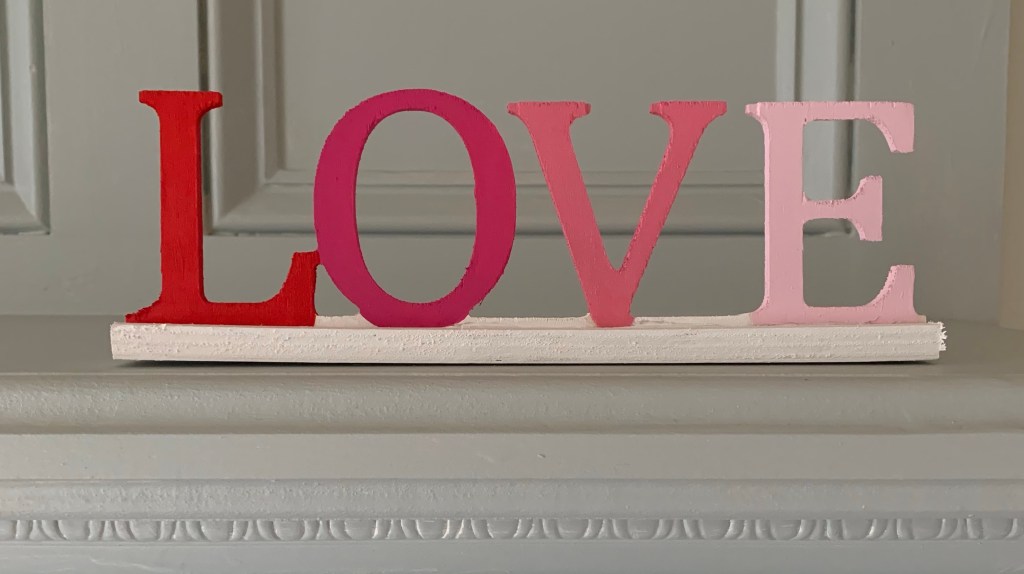
On a recent trip to Michael’s Craft Store to gather supplies for another project I came across a bin by the register filled with simple wooden signs made by Artminds. The wooden letters spelled out either Love or Blessed. Instantly I knew I had to have one of the Love signs. My mind filled with ideas for painting and decorating. At the register I was even happier when the little sign rang up on sale. At only 79 cents, I had unexpectedly found my next craft project.

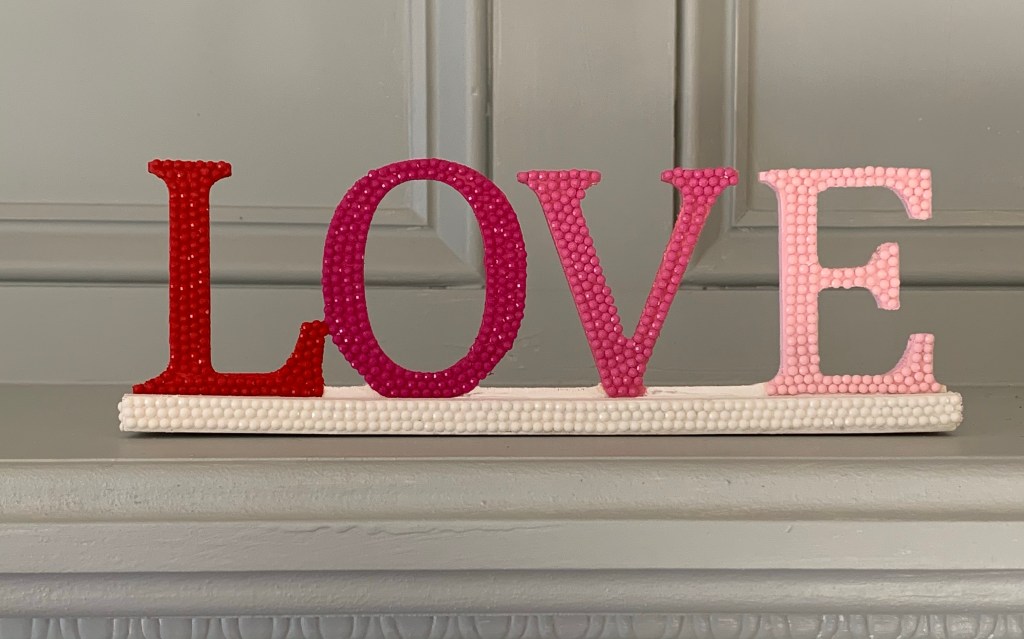
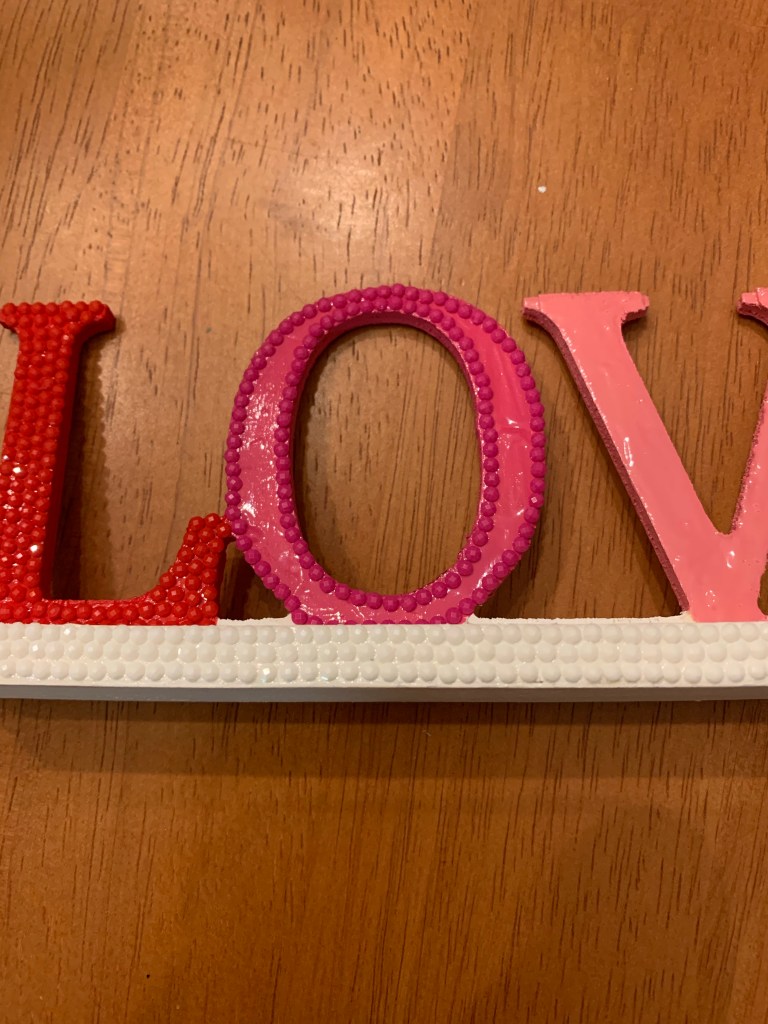
If you’re like me, your house looks a little empty once the Christmas tree gets put away and the long month of January commences. I have a few snowflakes and a few pine cones I picked from my backyard. But other than a few hearts, I don’t have many Valentine’s Day decorations. So to make this sign pop on my mantle, I decided to paint each letter of the word love a different hue of red. I was hoping to give it an ombre look. To give the sign some sparkle, I decided to add Diamond Dotz to both the front of the letters and the edge of the base. To find coordinating paint and Diamond Dotz, I prefer Joann Fabrics to Michael’s. I was able to find good matches and then set to work creating my new project.
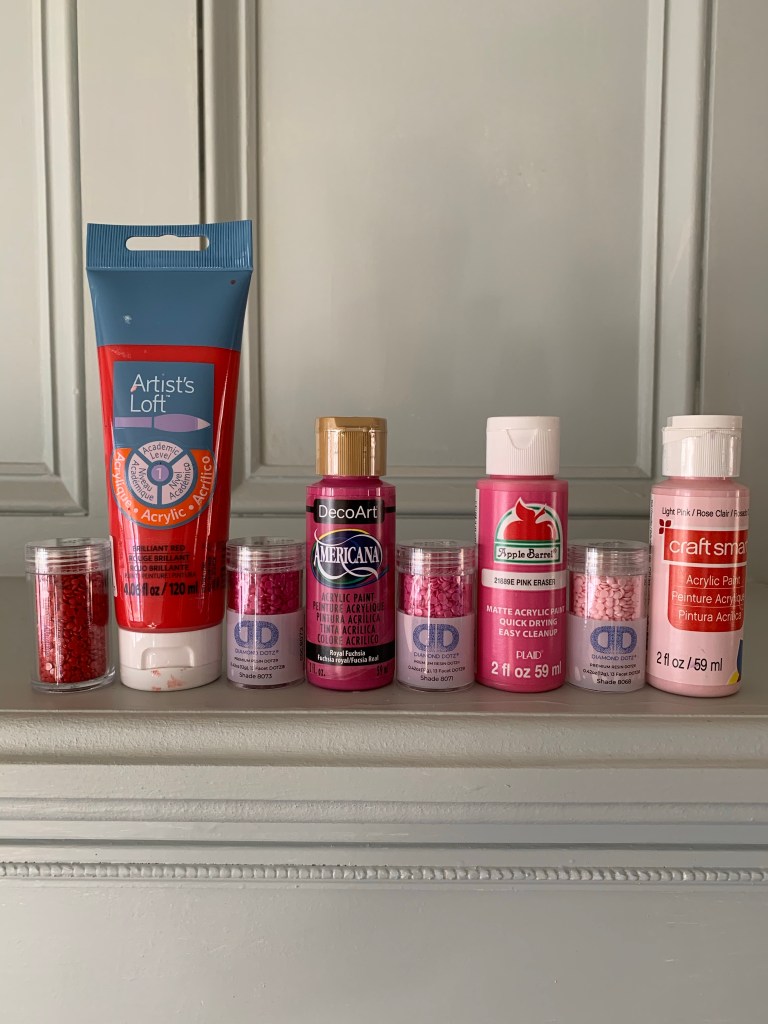
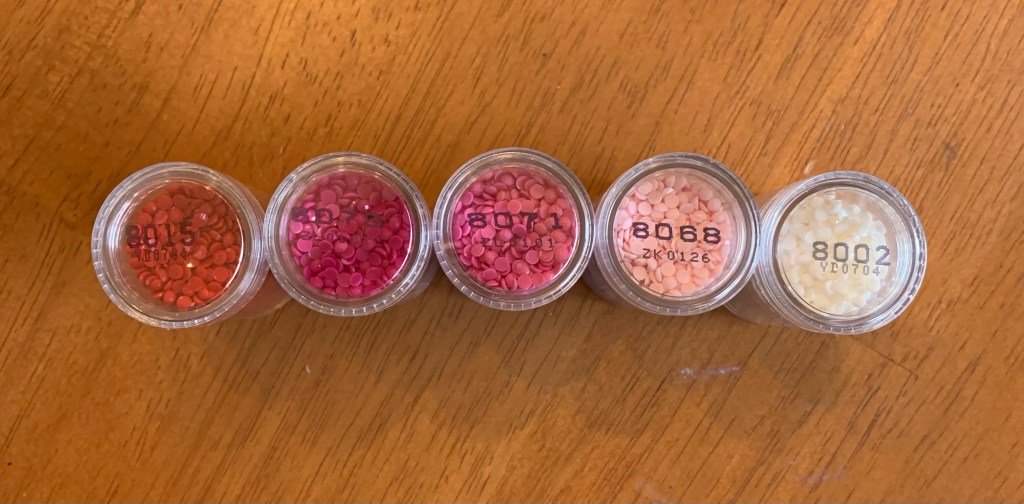
Here is a list of the paint and coordinating Diamond Dotz (DD) color I used for this project:
For the “L” I used Artist’s Loft paint in bright red and DD in color 8015 Red.
For the “O” I used DecoArt Americana paint in Royal Fuschia with DD in color 8073 Bright Cerise.
For the “V” I used Craft Smart paint in pink and DD in color 8071 Puce.
For the “E” I used Craft Smart paint in light pink and DD in color 8068 Pink Mist.
I painted the base with Craft Smart paint in White and DD in color 8002 White.
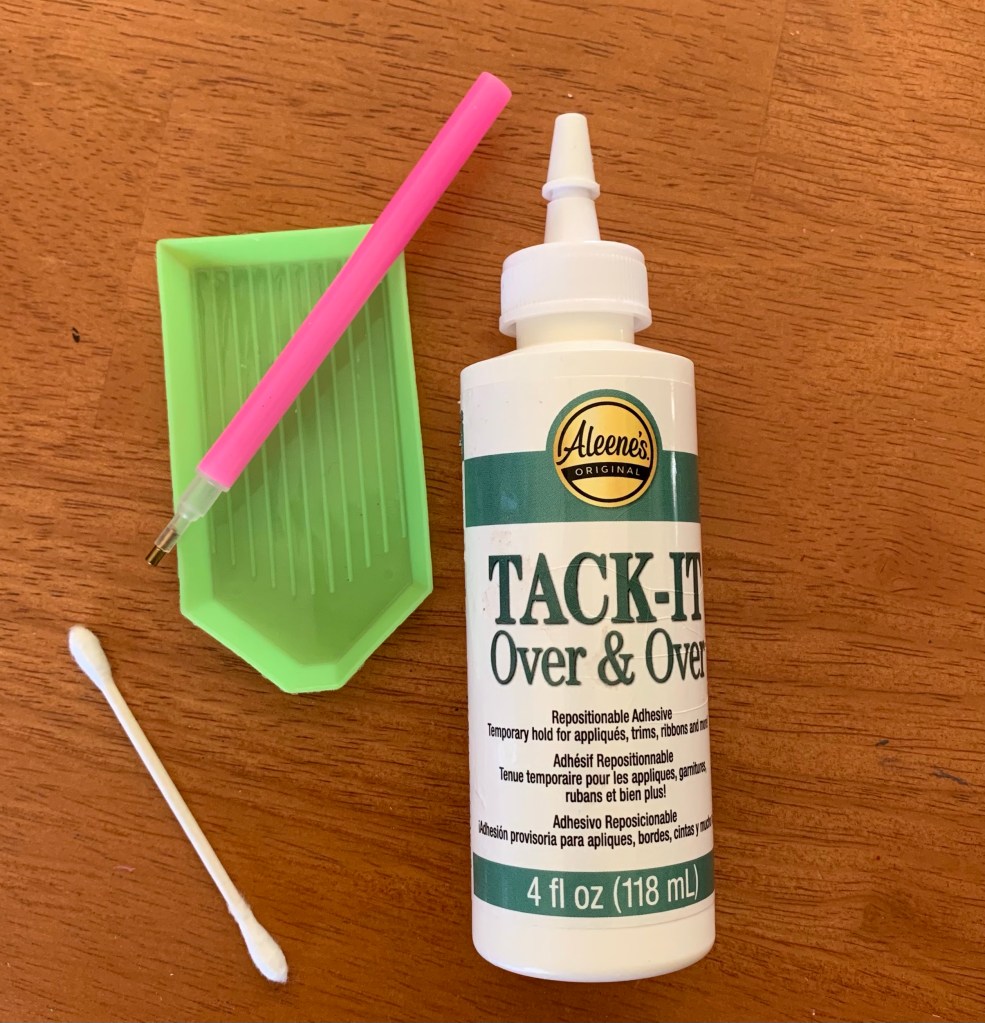
Additional Supplies: To attach the Diamond Dotz I used Aleene’s Tack-It glue, a q-tip and a drill pen to apply the Diamond Dotz.
First, you may have to lightly sand the piece with a fine piece of sand paper to smooth out the edges of the wood. Then you can paint the sign with two to three coats of paint. The wood absorbs a lot of the paint and it’s important to paint the piece well before adding the Diamond Dotz.
Once the piece is painted, apply a thick coat of the Aleene’s Tack-It glue to the areas where you want to apply the Diamond Dotz. For this project, I only wanted to make the front of the letters and the edge of the base sparkly. But you can cover the whole piece of you wish. I used a Q-Tip to spread the glue easily without getting it all over my hands or ruining a paint brush. The glue should be thick enough that it appears white. This will ensure that the Diamond Dotz stay put and don’t fall off. Don’t worry, once it is set it will turn translucent.

Allow the glue to set for at least an hour, or until the glue appears translucent. Then you’re ready to apply your Diamond Dotz.
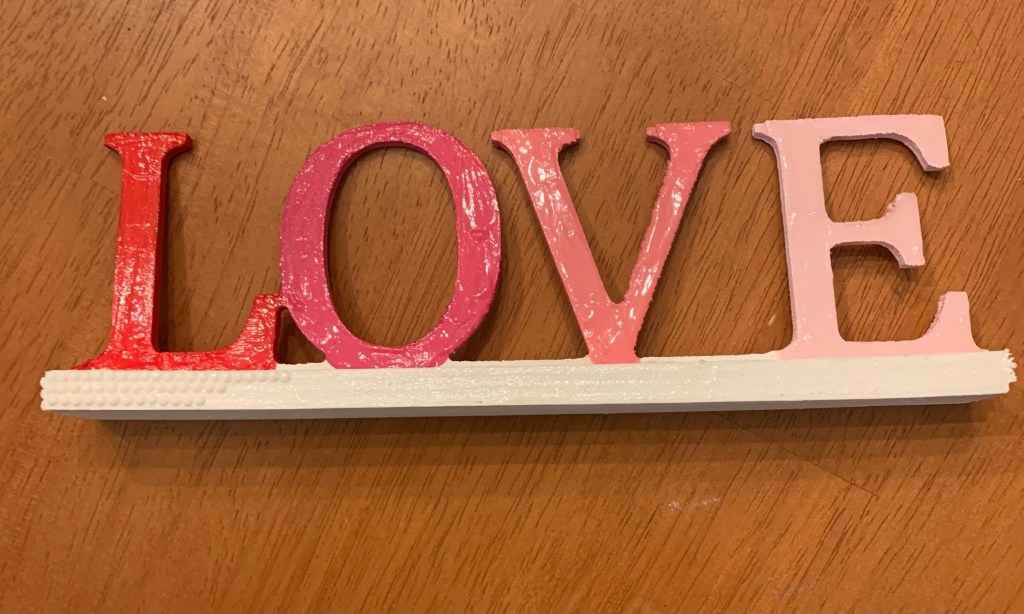
Since the letters were so thin, it was a challenge to apply the Diamond Dotz. Though it was hard to stick to the edges, I do think applying the Diamond Dotz as neatly as possible makes the finished product look the best. When you are finished, you can use a roller to press the Diamond Dotz firmly into place. If you don’t have a roller, simply press down gently on the gems with your fingers.
I decided to place this piece on my mantle since it desperately needed a pop of color. I love the way the morning sun makes the small gems sparkle. If you get a chance to grab one of these signs, it’s the perfect weekend project that will be a wonderful addition to your winter decor.

