2020 so far isn’t going great. Between the pandemic, politics and social injustice, I’ve been burying myself in crafting to avoid social media and ease my anxiety. Since fall is nearly upon us, I’m starting to think about the holidays. I like to make at least one thing for my family at Christmas, but I was stumped this year. Yes, I could craft a simple mask and embroider the year on it and dangle it on the tree, or I could delve into my older crafts and find something that better represents this scary year. The answer was sitting in my hutch: a yarn clown.
The origin of the yarn clown comes from my family’s Christmas tree. I don’t know where he came from, or who made him, but I’m pretty sure it was the 1970’s. He was pink, and his long yarn legs would rest on the pipe cleaner tree branches or our tree. Every Christmas I could not wait to decorate the tree to free the ornaments from their boxed prisons. There were so many fun ornaments to play with and the yarn clown was one of my favorites. At night I would wait until everyone was distracted, then I would sneak my favorite ornaments off the tree to play with them in my room. The yarn clown took center stage in many of the Christmas-themed dramas I created. I imagined he was an ex-circus clown who finds love and happiness as a Christmas ornament. Engaged to a macrame angel ornament, they married in my room surrounded by my She-Ra dolls, Monchichis and Barbies.
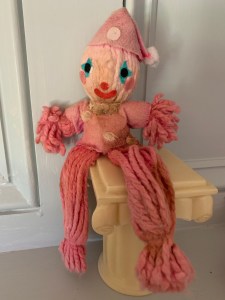
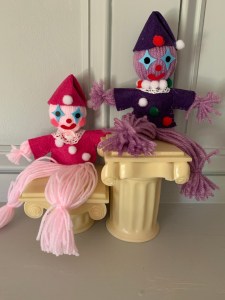
Years later, when my mother was cleaning out her basement, I was reunited with the yarn clown. The years had not been kind to him, but my memories of him and the stories I created stayed with me all these years later. He was damaged and stained with age, but thankfully I was able to save him before he was thrown away (sadly, his wife the macrame angel was not so lucky). I took him to my house, where he lives in my hutch wedged between my china. That is where I keep all my precious items. He comes out every Christmas to sit on my Christmas tree. I place him near the top in a place of honor.
It does not seem fair to me that I am the only one with a yarn clown for my tree. So, for this month, I have instructions for you to make your own. I hope your yarn clown represents for you all the fears you overcame this year. Whenever the world throws another punch (and it will), look at your clown and remember how strong you are. Perhaps you have a friend or a relative who could use a yarn clown to cheer them up. This was a scary year, so what better way to beat our fears than putting a clown on your tree?
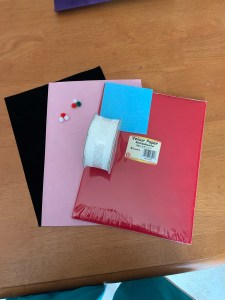
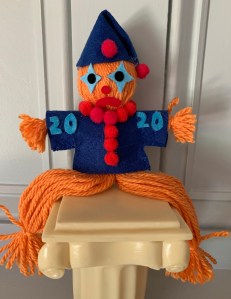
I found the clown was sturdier when I used worsted weight yarn. Baby yarn made the clown flimsier, but if it’s all you have, use it. You can use any color as this project is perfect for that ball of leftover yarn sitting in the bottom of your yarn pile. Your clown can be green or red to make it more holiday, or your favorite color. I used Red Heart yarn in lavender and white and baby yarn was used for the orange and pink clown. For his shirt and hat, a simple piece of felt works, or if you can sew, you can get fancier and use a piece of fabric. Red velour contact paper was used to make the mouth and nose of the clowns, but red felt would work fine, too. For this project, a glue gun is your friend and makes attaching the pom poms and felt easy. Use pom poms, sequins, button, beads, or simply cut more felt to decorate your clown.

Supplies
32 pieces of yarn cut 18”
26 pieces of yarn cut 6”
1 ½” styrofoam ball
Fabric glue and a glue gun
Sharp pair of scissors and a hole punch
1 tack, optional
felt in various colors
decorations like pom poms, sequins, buttons, beads, lace trim, felt, etc.
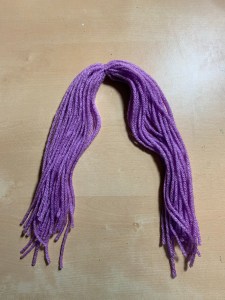
Once you have the yarn pieces cut, take the 18” pieces of yarn and take two pieces away, so you have a bundle of thirty. Use one of the two pieces and tie the bundle of yarn pieces together in the center like in the picture above. Then, spread a good amount of fabric glue on the styrofoam ball. This will help keep the yarn in place. Place the center of the yarn bundle where it is tied on top of the styrofoam and then spread out the yarn so that it covers the ball completely, gathering the yarn at the bottom. I stuck a tack on the top of the clown’s head through to keep the bundle of yarn secure. Using the other 18″ piece, tie the yarn at the base of the clown’s head (see below). You may want to cut an extra piece to tie the base twice or use an elastic to make the yarn covering the ball as tight as possible. This will make decorating the clown’s face easier. Let the tied ends fall to join the other pieces of yarn. Allow to dry for about 1 hour. Once it is dry, you can remove the tack if you want, but the hat will be covering the top of his head, so it is not necessary.


Next take the pile of 6″ yarn pieces and take 6 pieces away from the pile, leaving twenty. Then divide the remaining twenty pieces of 6” yarn into two piles of ten. Place ten pieces behind the clown and ten pieces over his chest.


Use two of the six pieces you removed from the pile to tie the clown’s arms at the shoulders to secure it to the body (see below). Instead of cutting the ends of the tied pieces, let the ends become part of his arms.
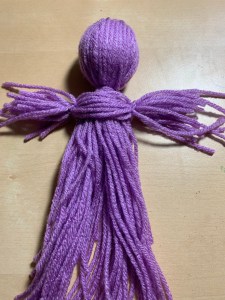
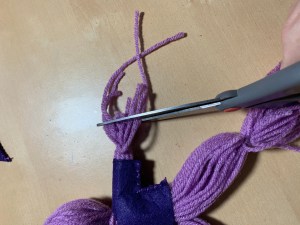
Then, take the last two pieces of 18” yarn and use them to separate the legs. You can count the yarn or just eyeball it. Tie just underneath the chest. Take the last four pieces of 6″ yarn to tie the wrists and ankles. Using a sharp pair of scissors, cut the arms and legs evenly.

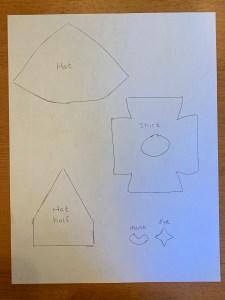
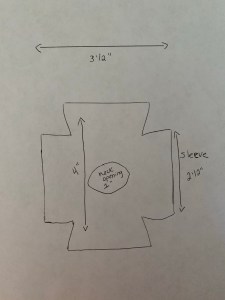
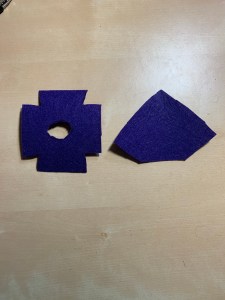
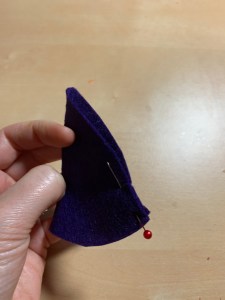
Now you can cut out the felt shirt and hat. Starting at the legs, wiggle the yarn through the neck hole until it reaches the clown’s neck. Then pin the felt together at his arms and side. I used a blanket stitch (in my case, a very messy blanket stitch). For the hat, fold the felt in half and sew seam with an applique stitch.


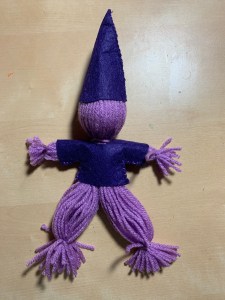
If you should pause your project at this point, I suggest hiding your yarn clown under a blanket as it could pass as a crude voodoo doll. Don’t worry, with some embellishments, it will soon look like a cheery clown!
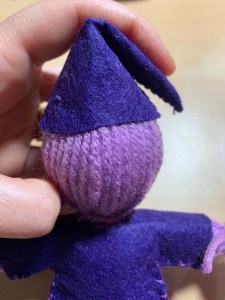
To attach the hat, I used glue gun and put a few dots on the inside of the hat to secure. Keep the seam of the hat to the side of the clown’s head. Then fold the hat down over the seam and put more hot glue on the tip to secure it to the base of the hat. Don’t worry if it looks messy, you’re going to hide the tip with a pom pom.
Now to decorate! I used leftover pom poms and hot glue, but if you want to put your clown on the tree, sequins would add some sparkle. To give the neck a nice trim, I used some lace, but you could also use more pom poms.
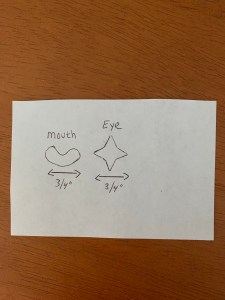
The lace I bought was too thick, so I cut it in half and tried to pleat it neatly under the clown’s head with hot glue. A hole punch makes the perfect size for the nose and eyes, and I cut a pom pom in half to glue as cheeks. You can even hot glue the year onto the clown’s shirt so you never forget why you made him in the first place.


If you have a cricut, there is a shapes button that includes both a circle and a diamond, which you could use instead of my template for the eyes. Using a glue gun, I glued the diamond shape for the eyes on first. Then I used a hole punch to punch out the nose and eyes. I cut a 1 cm pom pom in half and glued it on either side of his mouth for this cheeks. The mouth I drew free-hand on a piece of tissue paper, then traced on the back of a piece of red velour contact paper.

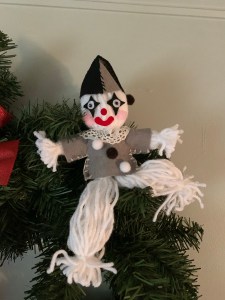
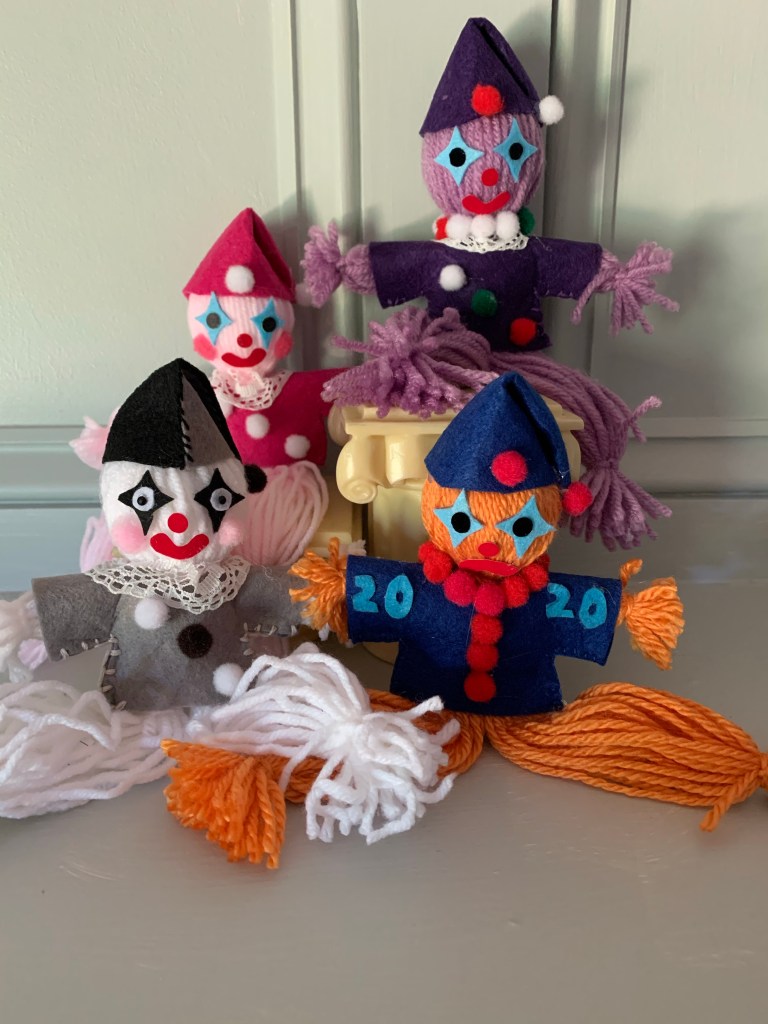
There are many different ways to dress your clown up. For the black and white clown, I made half the clown’s hat black and half gray (template is above). Then end result was a motley crew of yarn clowns that honestly look a little terrifying. But it was the perfect craft to keep me occupied and away from bad news. To me, the yarn clown perfectly sums up my feelings on this year. Hope you enjoy creating your own!

One thought on “The Yarn Clown”